Hyundai Palisade: Wipers and washers / Front Windshield Wipers
Operates as follows when the ignition switch is in the ON position.
MIST : For a single wiping cycle, push the lever upward and release. The wipers will operate continuously if the lever is held in this position.
OFF : Wiper is not in operation.
INT : Wiper operates intermittently at the same wiping intervals. To vary the speed setting, move the speed control lever. The top most setting will run the wipers most frequently (for more rain). The bottom setting will run the wipers the least frequently (for less rain).
AUTO : The rain sensor located on the upper end of the windshield glass senses the amount of rainfall and controls the wiping cycle for the proper interval. The more it rains, the faster the wiper operates. When the rain stops, the wiper stops.To vary the speed setting, turn the speed control knob (B).
LO : The wiper runs at a lower speed.
HI : The wiper runs at a higher speed.
Information
If there is heavy accumulation of snow or ice on the windshield, defrost the windshield for about 10 minutes, or until the snow and/or ice is removed before using the windshield wipers to ensure proper operation.
If you do not remove the snow and/or ice before using the wiper and washer, it may damage the wiper and washer system.
AUTO (Automatic) control
The rain sensor located on the upper end of the windshield glass senses the amount of rainfall and controls the wiping cycle for the proper interval.
The wiper operation time will be automatically controlled depends on rainfall.
When the rain stops, the wiper stops.
To vary the sensitivity setting, turn the sensitivity control knob (1).
If the wiper switch is set in AUTO mode when the ignition switch is in the ON position, the wiper will operate once to perform a self-check of the system. Set the wiper to OFF position when the wiper is not in use.
WARNING
To avoid personal injury from the windshield wipers, when the engine is running and the windshield wiper switch is placed in the AUTO mode:
- Do not touch the upper end of the windshield glass facing the rain sensor.
- Do not wipe the upper end of the windshield glass with a damp or wet cloth.
- Do not put pressure on the windshield glass.
NOTICE
- When washing the vehicle, set the wiper switch in the OFF position to stop the auto wiper operation. The wiper may operate and be damaged if the switch is set in the AUTO mode while washing the vehicle.
- Do not remove the sensor cover located on the upper end of the passenger side windshield glass. Damage to system parts could occur and may not be covered by your vehicle warranty.
- Because of using a photo sensor, temporary malfunction could occur according to sudden ambient light change made by stone and dust while driving.

 Front Windshield Washers
In the OFF position, pull the lever
gently toward you to spray washer
fluid on the windshield and to run the
wipers 1-3 cycles. The spray and
wiper operation will continue until
you release the lever...
Other information:
Hyundai Palisade (LX2) 2020-2025 Service Manual: Heater & A/C Control Unit (DATC)
Components and components location Component Connector Pin Function Connector PIN No Pin Function Connector PIN No Pin Function A 1 Battery A 21 IGN2 2 ISG B+ 22 IGN1 3 ILL+ (TAIL) 23 Blower Motor (+) 4 Sensor Ground REF (+5V) 24 Photo Sensor (-)_LEFT 5 Mode Control Actuator Feedback 25 Photo Sensor (-)_RIGHT 6 Temperature Actuator Feedback - Driver 26 Incar Sensor (+) 7 Intake Actuator Feedback 27 Incar Motor (-) 8 Evaporator Temperature Sensor (+) 28 PTC Relay 3 9 Ambient Temperature Sensor (+) 29 PTC Relay 3 10 Mode Control Actuator (Vent) 30 PTC On Signal 11 Mode Control Actuator (Defrost) 31 Detent out (-) 12 Temperature Control Actuator (Cool) - Driver 32 K - Line 13 Temperature Control Actuator (Warm) - Driver 33 P_CAN High 14 Intake Actuator (Fresh Air) 34 P_CAN Low 15 Intake Actuator (Recirculated Air) 35 Mosfet (DRAIN F/B) 16 HTD (Rear Defrost) 36 Mosfet (GATE) 17 Rear Defogging Swich 37 ECV + 18 Clean Signal 38 ECV - 19 Ionizer Diagnosis 39 Sensor Ground 20 ILL - (RHEO) 40 Ground Connector PIN No Pin Function Connector PIN No Pin Function B 1 Temperature Control Actuator Feedback - Passenger B 9 - 2 Temperature Control Actuator (Cool) - Passenger 10 - 3 Temperature Control Actuator (Warm) - Passenger 11 - 4 Defogging Actuator Feedback 12 Defogging Sensor TEMP 5 Defogging Actuator (Open) 13 Defogging Sensor SCK 6 Defogging Actuator (Close) 14 Defogging Sensor Data 7 - 15 - 8 Seat Signal PWM - Driver 16 Ground Repair procedures Self Diagnosis 1...
Hyundai Palisade (LX2) 2020-2025 Service Manual: Rear Stabilizer Bar
Repair procedures Removal 1. Raise the vehicle, and make sure it is securely supported. 2. In the case of 4WD vehicle, remove the rear differential assembly. (Refer to Driveshaft and axle - "Rear Differential Carrier") 3...
Categories
- Manuals Home
- 1st Generation Palisade Owners Manual
- 1st Generation Palisade Service Manual
- Theft-alarm system
- Reverse Parking Aid Function
- How to reset the power liftgate
- New on site
- Most important about car
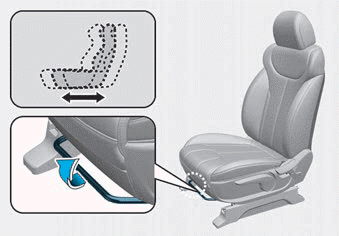
Manual adjustment
The front seat can be adjusted by using the levers located on the outside of the seat cushion. Before driving, adjust the seat to the proper position so that you can easily control the steering wheel, foot pedals and controls on the instrument panel.