
Hyundai Palisade (LX2): Windshield Wiper/Washer / Front Washer Motor
Repair procedures
| Inspection |
| 1. |
With the washer motor connected to the reservoir tank, fill the reservoir
tank with water.
|

| 2. |
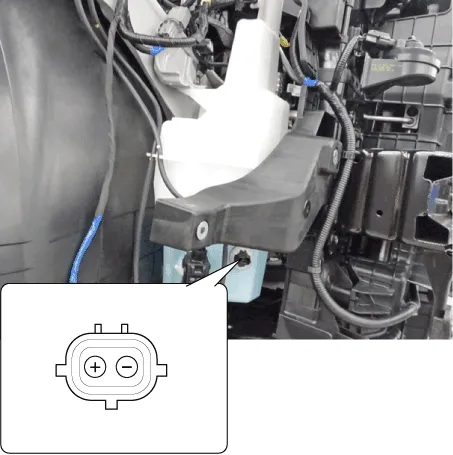
Connect positive (-) battery cables to terminal 1 and negative (+) battery
cables to terminal 2 respectively.
|
| 3. |
Check that the motor operates normally and the washer motor runs and
water sprays from the front nozzles.
|
| 4. |
If they are abnormal, replace the washer motor.
[Standard Type]
|
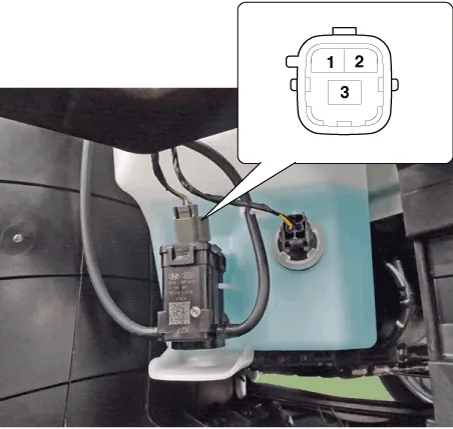
| 1. |
Disconnect the negative(-) battery terminal.
|
| 2. |
Drain the washer fluid less than 650 cc.
|
| 3. |
Check for continuity between the No. 1 and No.2 terminal in each float
position.
There should be continuity when the float is down.
There should be no continuity when the float is up.
|
| 4. |
If the continuity is not as specified, replace the washer fluid level
switch
|

| Removal |
|

| 1. |
Disconnect the negative (-) battery terminal.
|
| 2. |
Remove the front bumper cover.
(Refer to Body - "Front Bumper Cover")
|
| 3. |
Separate the washer hose and then disconnect the motor and level sensor
connector.
|
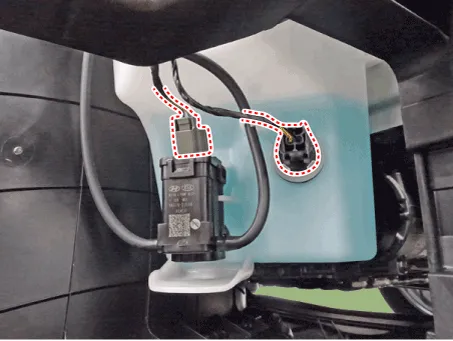
| 4. |
Remove the washer motor and level sensor.
|
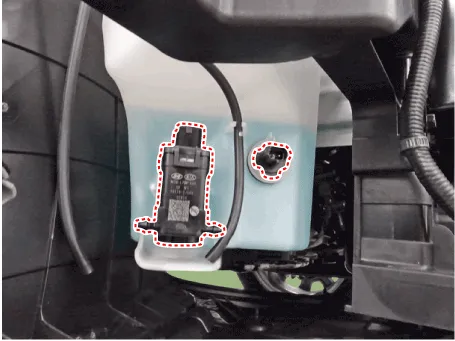
| 5. |
Remove the washer reservoir (A) after loosening bolts .
|
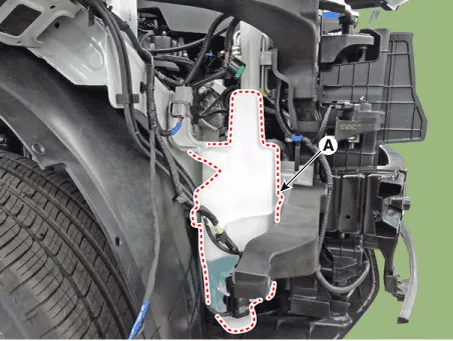
| Installation |
| 1. |
Reassemble the washer reservoir.
|

| 2. |
Install the washerlever sensor and washer motor.
|
| 3. |
Connect the washer motor connector and washer hose.
|
| 4. |
Install front bumper cover.
|
Components and components location Component Location 1. Cap 2. Nut 3. Wiper arm & blade 4. Cowl top cover 5.
Components and components location Components Description and operation Description Integrated Rain Sensor Integrated rain sensor (A) controls three systems: front wiper, auto-light, and central air conditioner.
Other information:
Hyundai Palisade (LX2) 2020-2026 Service Manual: Mode Control Actuator
Description and operation Description The mode control actuator is located at the heater unit. It adjusts the position of the mode door by operating the mode control actuator based on the signal of the A/C control unit. Pressing the mode select switch makes the mode control actuator shift in order of Vent → Bi-Level →
Hyundai Palisade (LX2) 2020-2026 Service Manual: Rear Corner Safety ON/OFF Switch
Components and components location Circuit Diagram Repair procedures Inspection 1. Disconnect the negative (-) battery terminal. 2. Remove the crash pad lower panel. (Refer to Body - "Crashpad Lower Panel") 3.
Categories
- Manuals Home
- Hyundai Palisade Owners Manual
- Hyundai Palisade Service Manual
- Automatic Transaxle System (A8LF1)
- How to reset the power liftgate
- Resetting the Driver's Seat Memory System
- New on site
- Most important about car
