Hyundai Palisade (LX2): Seat Electrical / Power Seat Motor
Repair procedures
| Inspection |
| 1. |
Disconnect the connectors for each motor.
(Refer to Body - "Front Seat Assembly")
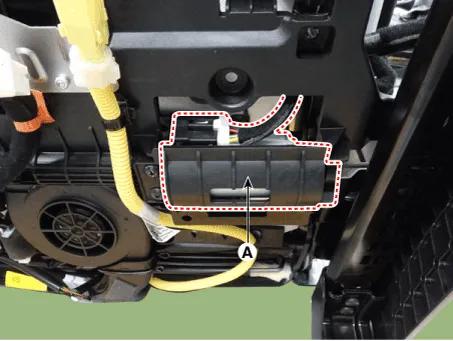
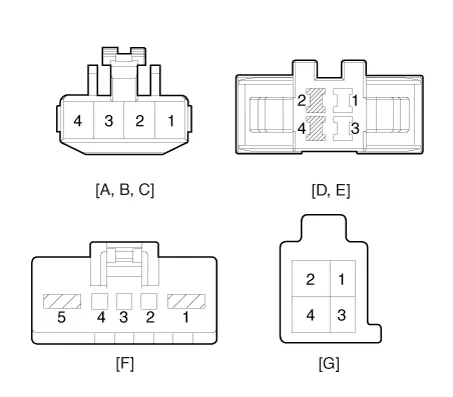
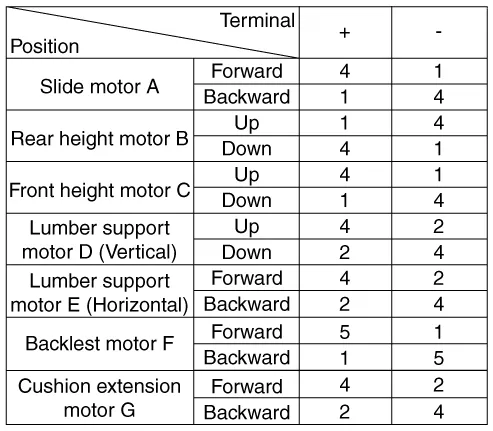
A : Slide motor
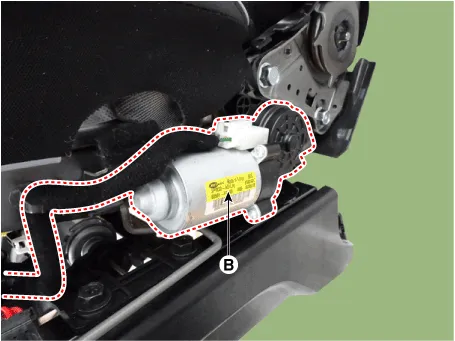
B : Rear height motor
C : Front height motor
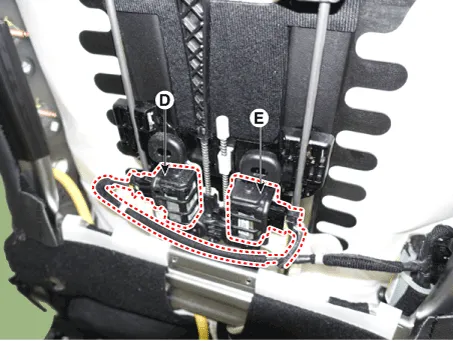
D : Lumber support motor (Vertical)
E : Lumber support motor (Horizontal)
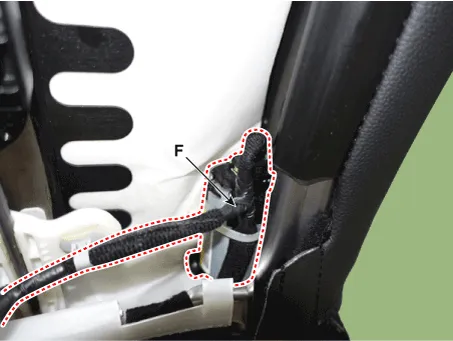
F : Backlest motor
G : Cushion extension motor
|

| 2. |
With the battery connected directly to the motor terminals, check if
the motors run smoothly.
|
| 3. |
Reverse the connections and check that the motor turns in reverse.
|
| 4. |
If there is an abnormality, replace the motors.
|
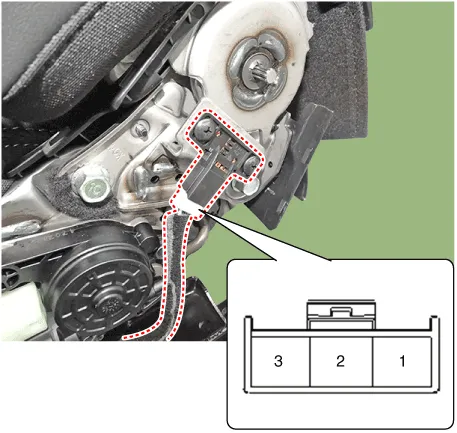
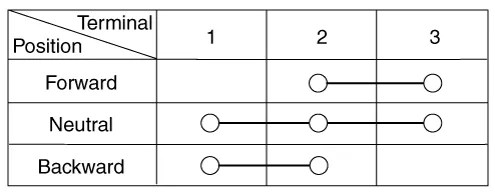
| 1. |
Disconnect the limit switch and operate the limit switch.
|
| 2. |
Check for continuity between the terminals.
|
| 3. |
Make sure that the seat operation is normal in the reverse after the
maximum operation.
|
| 4. |
If there is an abnormality, replace the limit switch.
|
Component Location 1. Backlest motor 2. Front height motor 3. Cushion extension motor 4. Lumber support motor 5.
Repair procedures Removal 1. Disconnect the negative (-) battery terminal. 2. Remove the front seat shield outer cover.
Other information:
Hyundai Palisade (LX2) 2020-2026 Service Manual: Rear Blower Motor
Repair procedures Replacement 1. Disconnect the negative (-) battery terminal. 2. Remove the luggage side trim (Refer to Body - "Luggage Side Trim ") 3. Separate the rear blower motor connector (A), loosen the mounting screws and remov
Hyundai Palisade (LX2) 2020-2026 Service Manual: Description and operation
Description and Operation Blcok Diagram • This system monitors the driving situations through the radar and the camera. Thus, for a situation out of the sensing range, the system may not normally operate.
Categories
- Manuals Home
- Hyundai Palisade Owners Manual
- Hyundai Palisade Service Manual
- Convenient Features of Your Vehicle
- Electrochromatic Mirror (ECM) with homelink system
- Body (Interior and Exterior)
- New on site
- Most important about car
