
Hyundai Palisade (LX2): AVN System / USB jack
Schematic diagrams
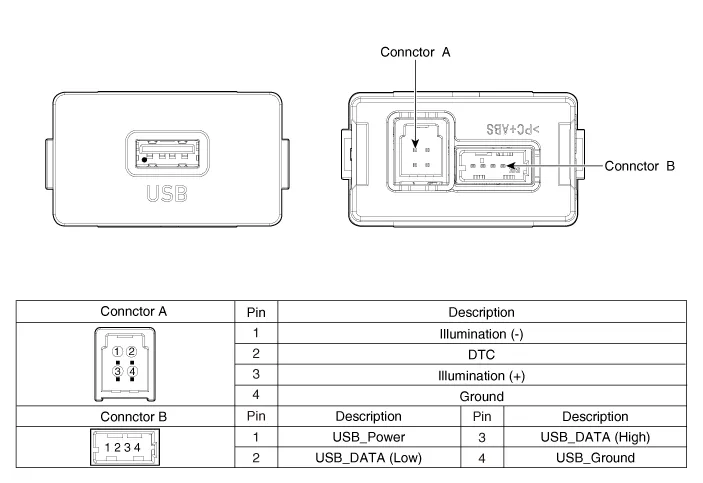
| Circuit Diagram |
Description and operation
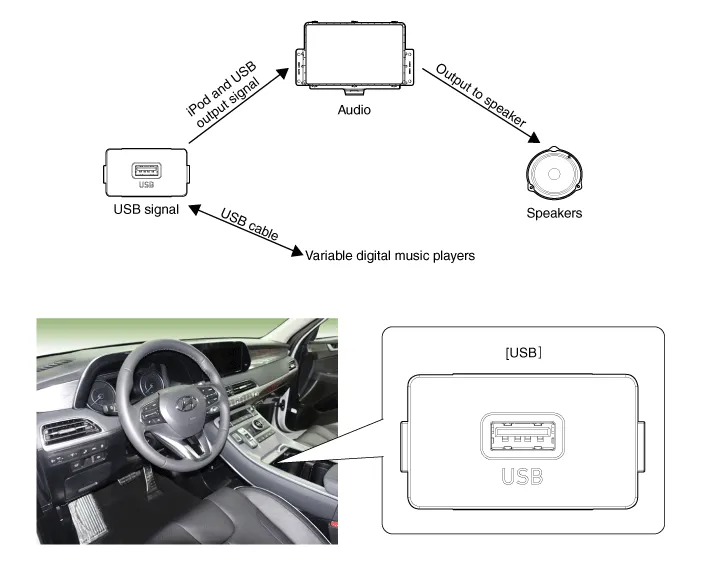
| Description |
Repair procedures
| Removal |
| 1. |
Disconnect the negative (-) battery terminal.
|
| 2. |
Remove the front console assembly.
(Refer to Body - Floor Console Assembly")
|
| 3. |
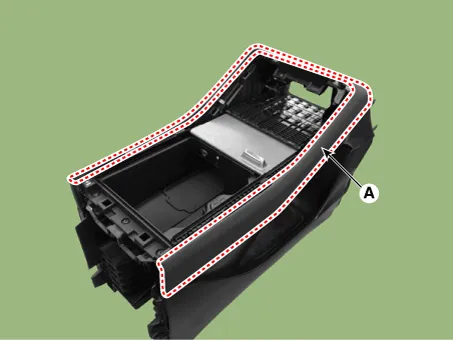
Remove the front console garnish (A).
|

| 4. |
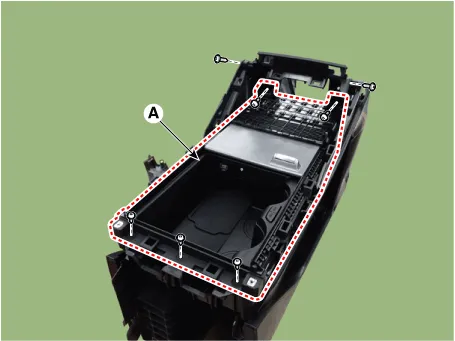
Remove the front console tray assembly (A).
|
| 5. |
Disconnect the connector (A).
|
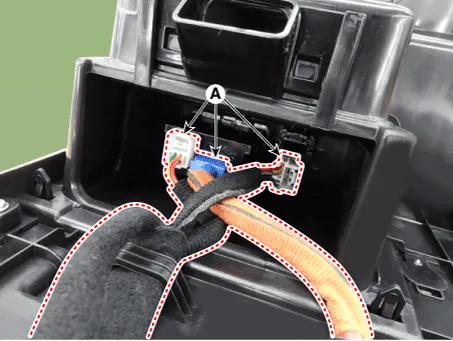
| 6. |
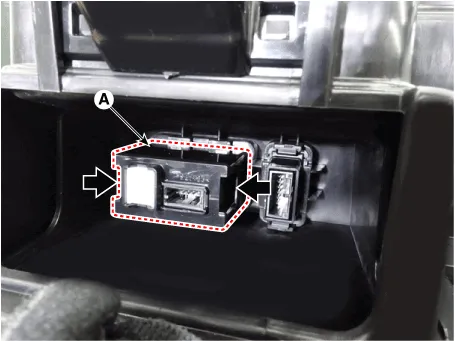
Remove the USB (A) by pushing the fixed clip in the direction of the
arrow as lillustration below.
|
| Installation |
| 1. |
Install the USB.
|
| 2. |
Install the front console assembly.
|
| 3. |
Connect the negative (-) battery connector.
|
Components and components location Components Repair procedures Removal 1. Disconnct the negative (-) battery terminal.
Components and components location Components 1. Remote control switch (LH : Audio + Voice) 2. Remote control switch (RH : Trip + Cruise) Schematic diagrams Circuit Diagram [Audio / Bluetooth / Voice] [Trip + Cruise] [Trip + Cruise + Smart cruise] Repair procedures Inspection 1.
Other information:
Hyundai Palisade (LX2) 2020-2026 Service Manual: Intake Actuator
Description and operation Description The intake actuator is located at the blower unit. It regulates the intake door by a signal from the control unit. Pressing the intake selection switch will shift between recirculation and fresh air modes.
Hyundai Palisade (LX2) 2020-2026 Service Manual: Rear Corner Radar Unit
Specifications Specifications [BCW, BCA] Items Blind-Spot Collision Warning (BCW) Blind-Spot Collision- Avoidance Assist (BCA) Rated voltage DC 12V Operating voltage 9V - 16V Operating speed 30 km/h
Categories
- Manuals Home
- Hyundai Palisade Owners Manual
- Hyundai Palisade Service Manual
- Automatic Transaxle System (A8LF1)
- How to reset the power liftgate
- Rain Sensor
- New on site
- Most important about car
