Hyundai Palisade (LX2): AVN System / Steering Wheel Remote Controller (SWRC)
Components and components location
| Components |

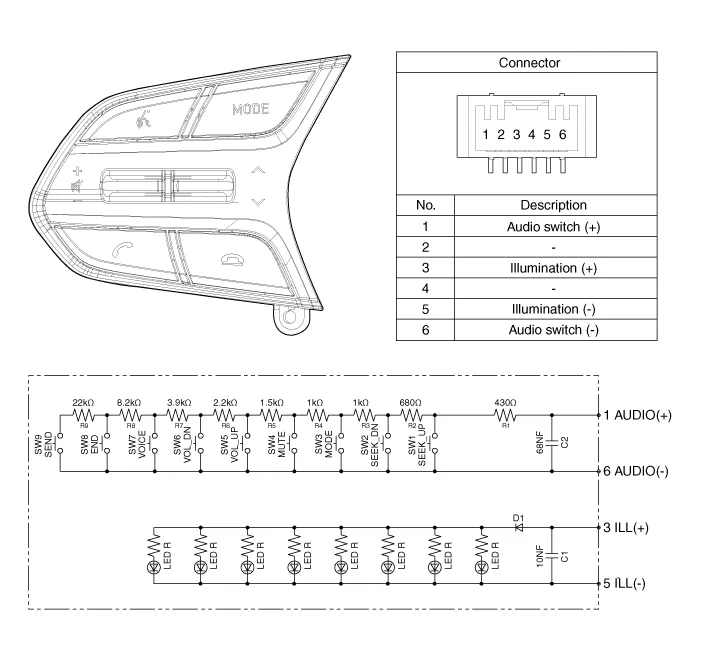
| 1. Remote control switch (LH
: Audio + Voice) |
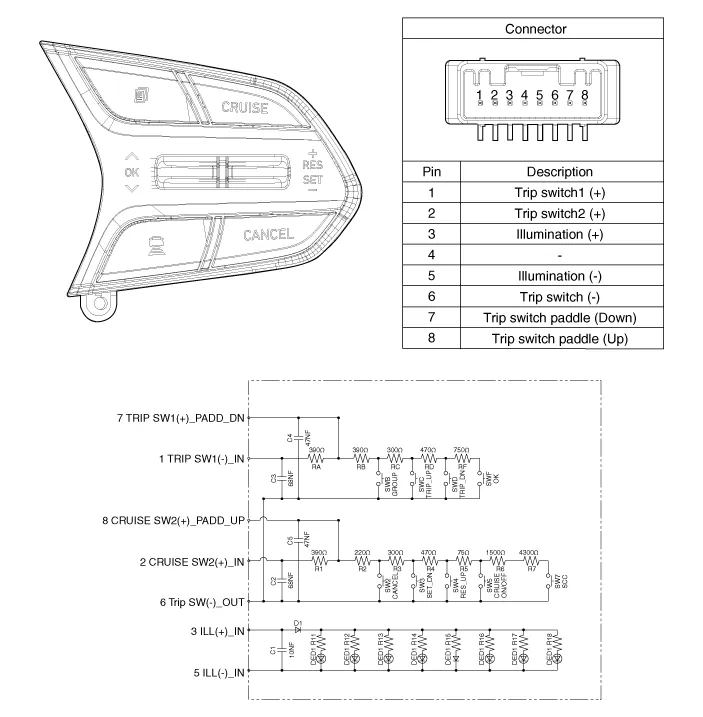
2. Remote control switch (RH
: Trip + Cruise) |
Schematic diagrams
| Circuit Diagram |

Repair procedures
| Inspection |
| 1. |
Check for resistance between terminals in left switch position.
[Audio / Bluetooth]
|

| 2. |
Check for resistance between terminals in right switch position.
[Trip / Cruise]
|
| Removal |
| 1. |
Disconnect the negative (-) battery terminal.
|
| 2. |
Remove the driver airbag module.
(Refer to Restraint - "Driver Airbag (DAB) Module and Clock Spring")
|
| 3. |
Remove the steering wheel.
(Refer to Steering System - "Steering Column and Shaft")
|
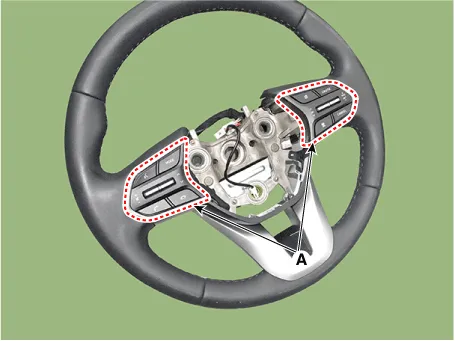
| 4. |
Remove the steering wheel cover (A) after loosening the screws.
|

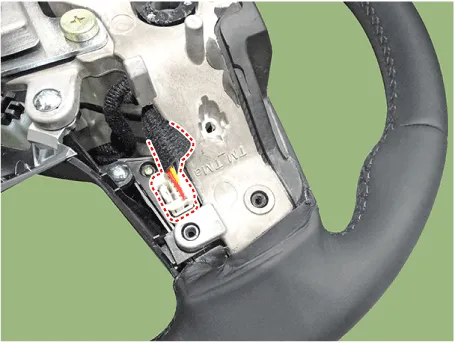
| 5. |
Loosen the screws and then disconnect the steering wheel remote control
switch connector.
|
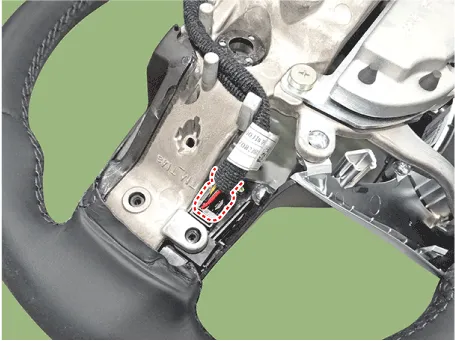
| 6. |
Remove the remote control switchs (A).
|
| Installation |
| 1. |
Install the remote control switch on the steering wheel.
|
| 2. |
Install the steering wheel.
|
| 3. |
Reconnect the remote control switch connector and airbag connectors.
|

| 4. |
Install the driver airbag module.
|
| 5. |
Connect the negative (-) battery terminal.
|
Schematic diagrams Circuit Diagram Description and operation Description The AUX, iPod and USB JACK on the center console is for customers who like to listen to external portable music players like the MP3, iPod, earphone, USB memory stick, CD player and etc.
Other information:
Hyundai Palisade (LX2) 2020-2026 Service Manual: Antenna Coil
Repair procedures Removal 1. Disconnect the negative (-) battery terminal. 2. Remove the crash pad lower panel. (Refer to Body - "Crash Pad Lower Panel") 3.
Hyundai Palisade (LX2) 2020-2026 Service Manual: Description and operation
Description The smart cruise control system allows a driver to program the vehicle to control the speed and following distance by detecting the vehicle ahead without depressing the brake pedal or the accelerator pedal. 1.
Categories
- Manuals Home
- Hyundai Palisade Owners Manual
- Hyundai Palisade Service Manual
- Scheduled maintenance services
- Automatic Transaxle Fluid (ATF)
- Lift and Support Points
- New on site
- Most important about car
