Hyundai Palisade (LX2): Floor Console / Rear Console Cover
Components and components location
| Component Location |
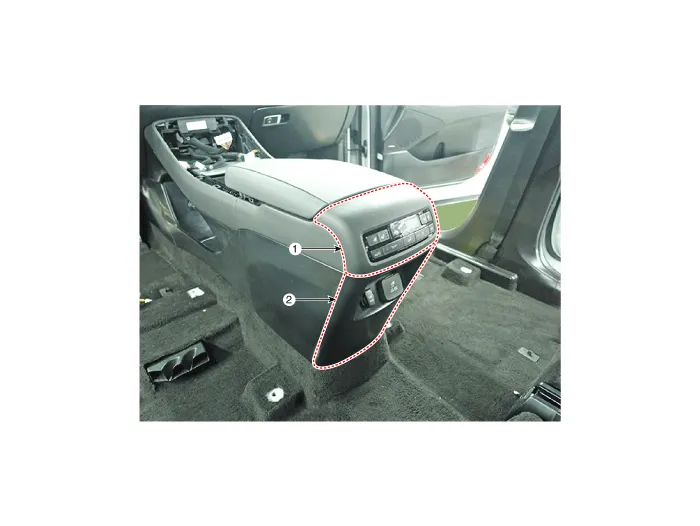
| 1. Rear console upper cover |
2. Rear console under cover |
Repair procedures
| Replacement |
|

|

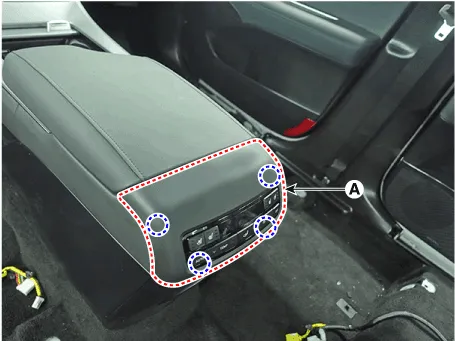
| 1. |
Using a flat-tip screwdriver or remover and remove the rear console
upper cover (A).
|
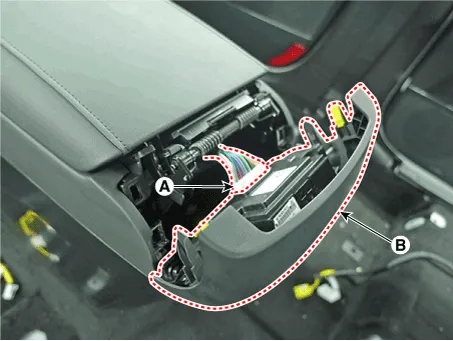
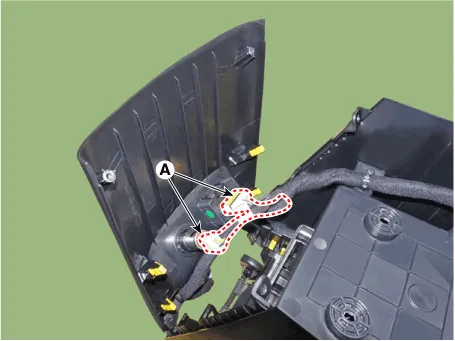
| 2. |
Separate the rear console upper cover connector (A) and remove the rear
console upper cover (B).
|
| 3. |
To install, reverse removal procedure.
|

|

|

| 1. |
Remove the rear console assembly.
(Refer to Floor console - "Floor console assembly")
|
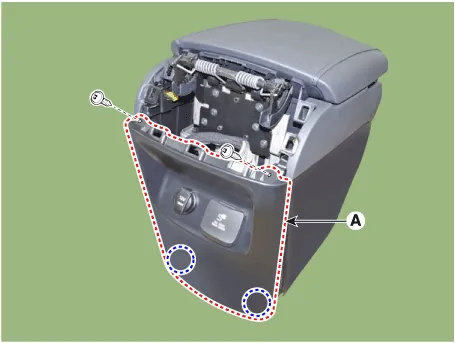
| 2. |
Loosen the mounting screws and remove the rear console under cover (A).
|
| 3. |
Press the lock pin and separate the connector (A).
|
| 4. |
To install, reverse removal procedure.
|

Components and components location Component Location 1. Front console assembly 2. Rear console assembly Repair procedures Replacement ŌĆó When removing with a flat-tip screwdriver or remover, wrap protective tape around the tools to prevent damage to components.
Components and components location Component Location 1. Console armrest Repair procedures Replacement ŌĆó When removing with a flat-tip screwdriver or remover, wrap protective tape around the tools to prevent damage to components.
Other information:
Hyundai Palisade (LX2) 2020-2026 Service Manual: Blower Motor
Repair procedures Inspection 1. Connect the battery voltage and check the blower motor rotation. 2. If the blower motor does not operate well, substitute with a known-good blower motor and check for proper operation.
Hyundai Palisade (LX2) 2020-2026 Service Manual: Front View Camera Unit
Schematic diagrams Circuit Diagram Repair procedures Removal 1. Disconnect the negative (-) battery terminal. 2. Remove the inside rear view mirror cover (A) and rain sensor cover (B).
Categories
- Manuals Home
- Hyundai Palisade Owners Manual
- Hyundai Palisade Service Manual
- Body (Interior and Exterior)
- Electrochromatic Mirror (ECM) with homelink system
- Scheduled maintenance services
- New on site
- Most important about car
