Hyundai Palisade (LX2): Hood / Hood Assembly
Components and components location
| Component Location |
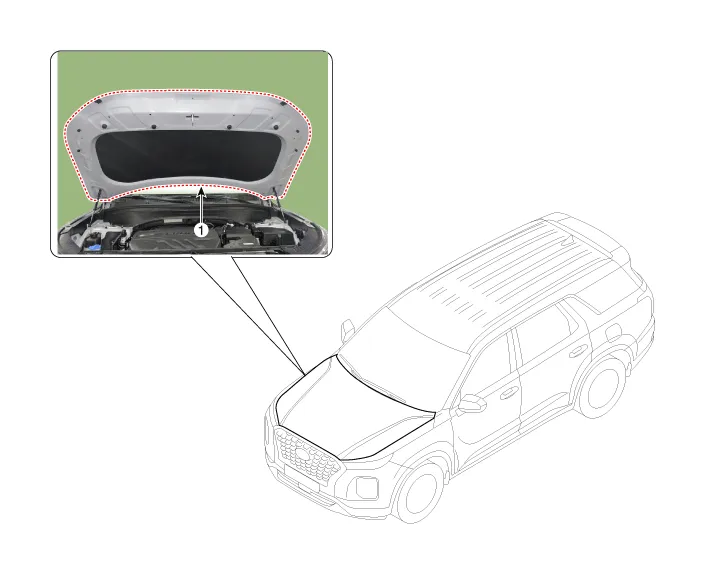
| 1. Hood assembly |
Repair procedures
| Replacement |
|

| 1. |
After loosening the hood hinge (A) mounting bolts, remove the hood assembly
(B).
|
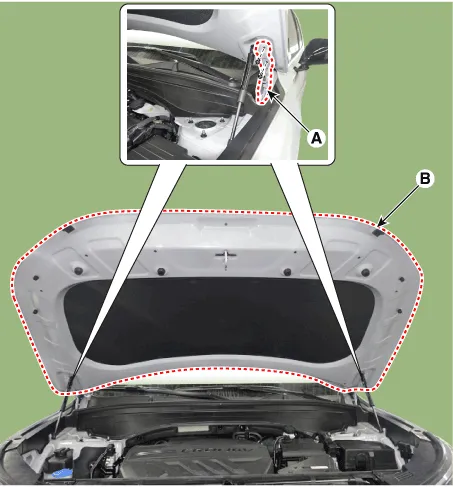
| 2. |
To install, reverse removal procedure.
|

Adjustment 1. After loosening the hinge (A) mounting bolt, adjust the hood (B) by moving it up and down or from side to side and tighten the bolt.
Repair procedures Replacement 1. Using a clip remover, remove the clips and then the hood insulator pad (A). • Be careful not to scratch the hood panel.
Other information:
Hyundai Palisade (LX2) 2020-2026 Service Manual: Troubleshooting
Trouble Symptom Charts Trouble Symptom 1 Trouble Symptom 2 Trouble symptom Probable cause Remedy The set vehicle speed varies greatly upward or downward "Surging" (repeated alternating acceleration and deceleration) occurs after set
Hyundai Palisade (LX2) 2020-2026 Service Manual: Cruise Control (CC) Switch
Components and components location Components 1. Remote control switch (Audio swtich) 2. Remote control switch (Cruise control switch) Schematic diagrams Circuit Diagram Repair procedures Removal 1.
Categories
- Manuals Home
- Hyundai Palisade Owners Manual
- Hyundai Palisade Service Manual
- Engine Mechanical System
- Rear Heater Unit
- Automatic Transaxle Fluid (ATF)
- New on site
- Most important about car
