Hyundai Palisade (LX2): Rear Heater / Rear Heater Unit
Hyundai Palisade (LX2) 2020-2026 Service Manual / Heating,Ventilation And Air Conditioning / Rear Heater / Rear Heater Unit
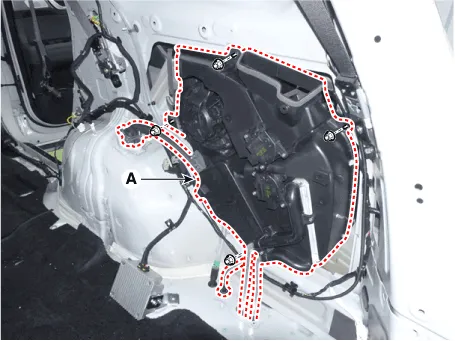
Components and components location
| Component Location |
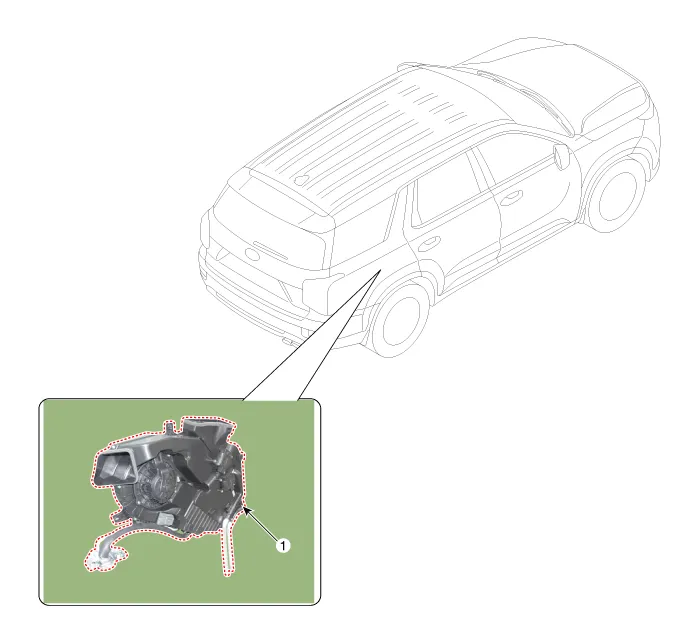
| 1. Rear Heater & A/C Unit |
Repair procedures
| Replacement |
|

| 1. |
Disconnect the negative (-) battery terminal.
|
| 2. |
Recover the refrigerant with a recovery/charging station.
|
| 3. |
Remove the luggage side trim [RH]
(Refer to Body - "Luggage Side Trim")
|
| 4. |
Remove the rear wheel guard [RH].
(Refer to Body - "Rear Wheel Guard")
|
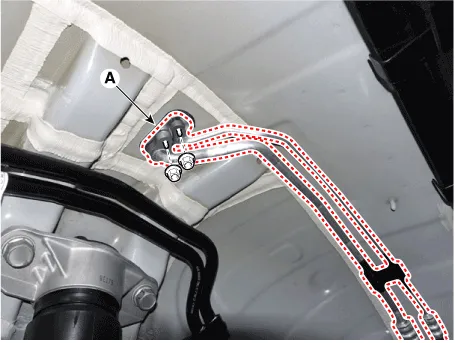
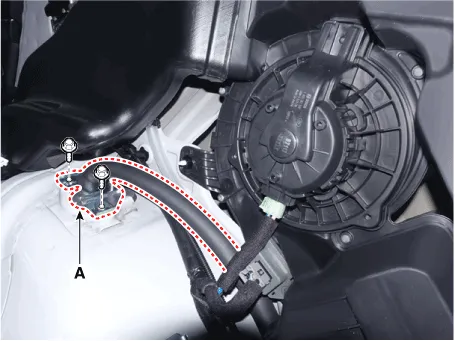
| 5. |
Loosen the mounting nuts and remove the refrigeration line (A).
|

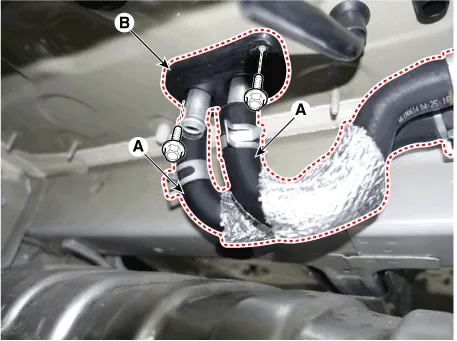
| 6. |
Press the lock pin and separate the rear heater hose (A), loosen the
mounting bolts and remove the braket (B).
|

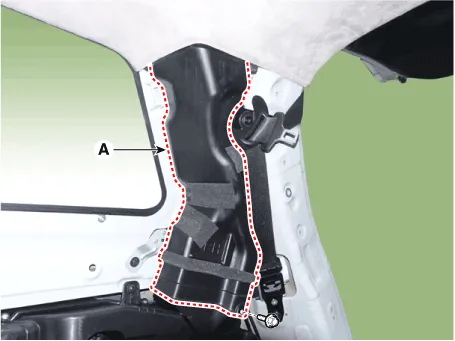
| 7. |
Loosen the mounting nuts, clips and remove the rear air duct (A).
[Upper]
[Lower]
|

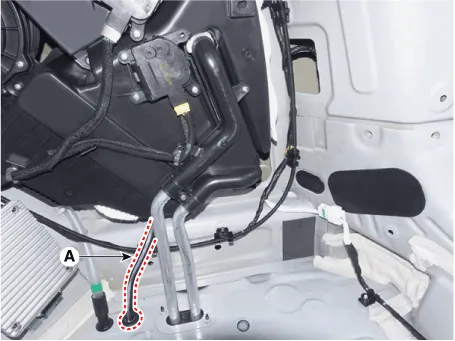
| 8. |
Loosen the rear evaporator pipe (A) mounting bolts.
|
| 9. |
Remove the drain hose (A) from rear heater & A/C unit.
|
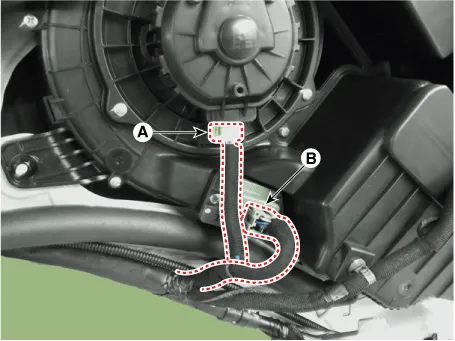
| 10. |
Press the lock pin and separate the blower motor connector (A) and rear
power mosfet connector (B).
|
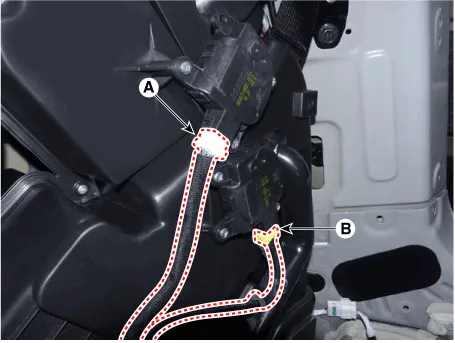
| 11. |
Press the lock pin and separate the rear mode control actuator connector
(A) and rear temperature control actuator connector (B).
|
| 12. |
Loosen the mounting nuts, bolts and remove the rear heater & A/C unit
(A).
|
| 13. |
Install in the reverse order of removal.
|

Repair procedures Replacement 1. Remove the rear heater & A/C unit. (Refer to Rear Heater - "Rear Heater Unit") 2.
Other information:
Hyundai Palisade (LX2) 2020-2026 Service Manual: Smart Cruise Control (SCC) Switch
Components and components location Components 1. Remote control switch (Audio swtich) 2. Remote control switch (Cruise control switch) Schematic diagrams Circuit Diagram Trip + SCC Repair procedures Removal 1.
Hyundai Palisade (LX2) 2020-2026 Service Manual: Troubleshooting
Diagnosis with Diagnostic tool 1. In the body electrical system, failure can be quickly diagnosed by using the vehicle diagnostic system (Diagnostic tool). The diagnostic system (Diagnostic tool) provides the following information.
Categories
- Manuals Home
- Hyundai Palisade Owners Manual
- Hyundai Palisade Service Manual
- Electronic Child Safety Lock System
- Repair procedures
- Automatic Transaxle System (A8LF1)
- New on site
- Most important about car

Copyright © 2026 www.hpalisadelx.com - 0.0144