Hyundai Palisade (LX2): Hydraulic System / Electronic Oil Pump (EOP)
Repair procedures
| Removal |
| 1. |
Turn ignition switch OFF and disconnect the negative (-) battery cable.
|
| 2. |
Remove the under cover.
(Refer to Engine Mechanical System - "Engine Room Under Cover")
|
| 3. |
Disconnect the EOP connector (A).
|
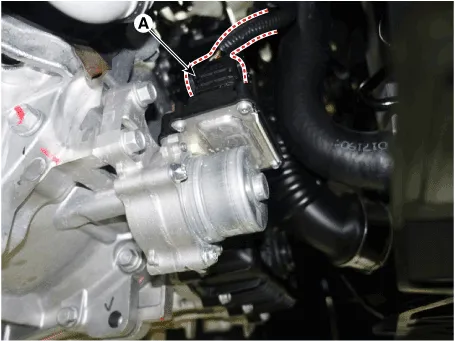
| 4. |
Remove the EOP (B) after removing the bolts (A).
|

| Installation |
| 1. |
To install, reverse the removal procedure.
|

| 2. |
Check the ATF level after refilling the automatic transaxle with fluid.
(Refer to Automatic Transaxle System - "Automatic Transaxle Fluid(ATF)")
|

Components Location 1. Valve body assembly 2. Solenoid valve
Description and operation Description • The valve body mounted is inside the transaxle. • The valve body is essential to automatic transaxle control and consists of various valves used to control the oil feed from the oil pump.
Other information:
Hyundai Palisade (LX2) 2020-2026 Service Manual: Heater Unit
Components and components location Component Location 1. Heater unit assembly Components 1. Heater core assembly 2. Heater unit pad 3. Heater lower cover 4. Drain hose 5.
Hyundai Palisade (LX2) 2020-2026 Service Manual: Troubleshooting
Trouble Symptom Charts Trouble Symptom 1 Trouble Symptom 2 Trouble symptom Probable cause Remedy The set vehicle speed varies greatly upward or downward "Surging" (repeated alternating acceleration and deceleration) occurs after set
Categories
- Manuals Home
- Hyundai Palisade Owners Manual
- Hyundai Palisade Service Manual
- Engine Mechanical System
- Body (Interior and Exterior)
- Repair procedures
- New on site
- Most important about car
