
Hyundai Palisade (LX2): Crash Pad / Crash Pad Center Panel
Components and components location
| Component Location |
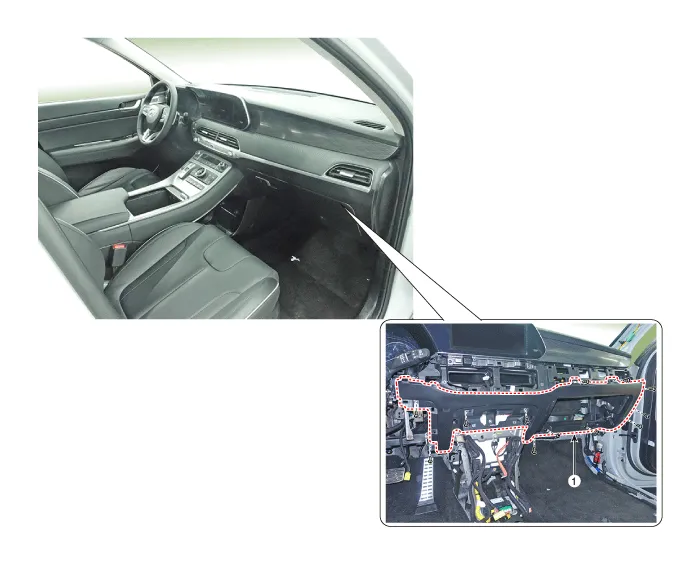
| 1. Crash pad center panel |
Repair procedures
| Replacement |
|

|

| 1. |
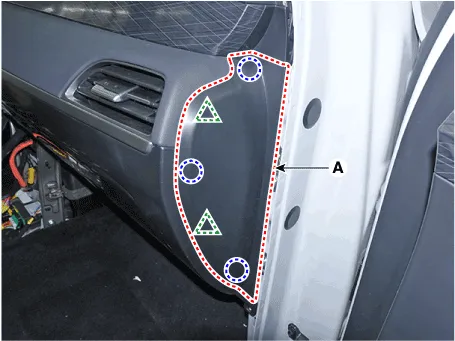
Using a flat-tip screwdriver or remover and remove the crash pad side
cover [RH] (A).
|
| 2. |
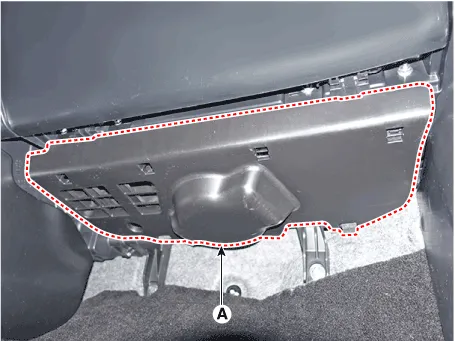
Remove the crash pad under cover (A).
|
| 3. |
Remove the floor console.
(Refer to Floor Console - "Floor Console Assembly")
|
| 4. |
Remove the cowl side trim.
(Refer to Interior Trim - "Cowl Side Trim")
|
| 5. |
Remove the glove box.
(Refer to Crash Pad - "Glove Box")
|
| 6. |
Remove the Crash Pad lower panel.
(Refer to Crash Pad - "Crash Pad Lower Panel")
|
| 7. |
Remove the crash pad center garnish.
(Refer to Crash pad - "Crash pad garnish")
|
| 8. |
Remove the AVN keyboard assembly
(Refer to Body Electrical System - "AVN keyboard unit")
|
| 9. |
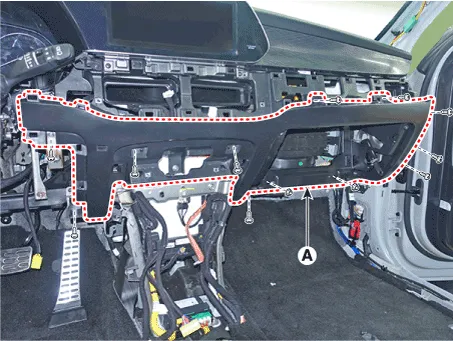
Loosen the mounting screws, nuts, bolt and remove the crash pad center
panel (A).
|
| 10. |
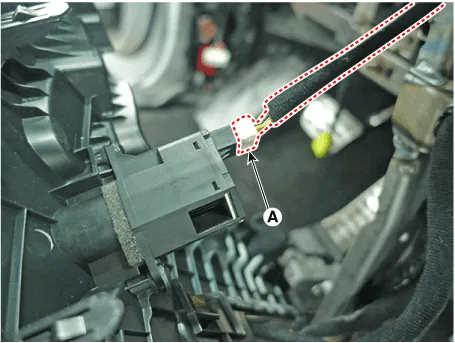
Press the lock pin and separate the incar sensor connector (A).
|
| 11. |
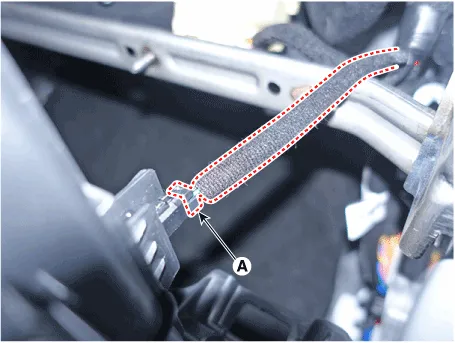
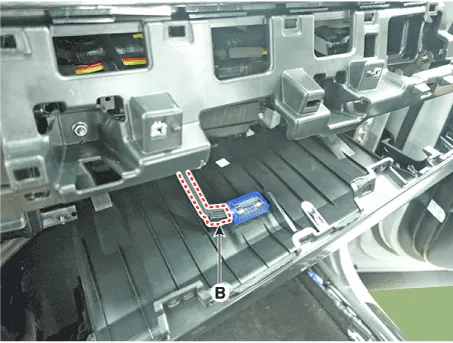
Separate the glove box lamp switch connector (A) and glove box lamp
connector (B).
|
| 12. |
To install, reverse removal procedure.
|

Components and components location Component Location 1. Glove box
Components and components location Component Location 1. Main crash pad assembly
Other information:
Hyundai Palisade (LX2) 2020-2026 Service Manual: Smart Cruise Control (SCC) Switch
Components and components location Components 1. Remote control switch (Audio swtich) 2. Remote control switch (Cruise control switch) Schematic diagrams Circuit Diagram Trip + SCC Repair procedures Removal 1.
Hyundai Palisade (LX2) 2020-2026 Service Manual: Description and operation
Description Blind-Spot Radar is a system that measures the relative speed and distance from the following vehicles by using two electromagnetic wave radar sensors attached to the rear bumper, and detects any vehicle within the blind spot zone and gives off alarm (visual and auditory).
Categories
- Manuals Home
- Hyundai Palisade Owners Manual
- Hyundai Palisade Service Manual
- How to reset the power liftgate
- Engine Electrical System
- Automatic Transaxle System (A8LF1)
- New on site
- Most important about car
