
Hyundai Palisade (LX2): Brake System / Brake oil
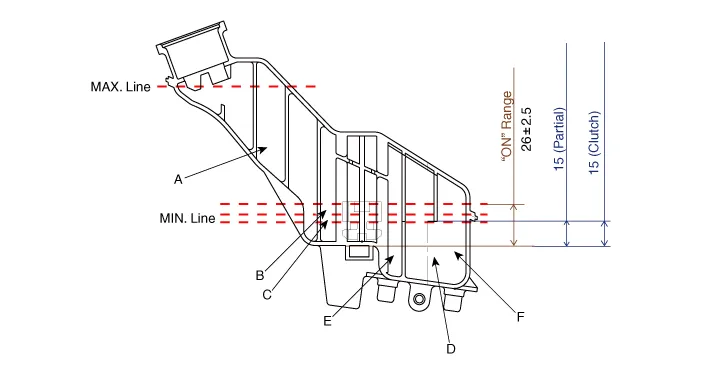
Specifications
| Specification |
|
Fluid Type |
|
DOT 3 or DOT 4 |
|
Reservoir Quantity (cc) |
||
|
Total |
A + B + C + D + E + F |
460 ± 20 |
|
MAX LEVEL |
A + B + C + D + E |
440 ± 20 |
|
MIN LEVEL |
B + C + D + E |
165 ± 20 |
|
ON LEVEL |
C + D + E |
135 ± 10 |
|
PARTIAL LEVEL |
D |
Pri : 60 ± 5 |
|
D |
Sec : 50 ± 5 |
|
|
CLUTCH LEVEL |
F |
15 ± 5 |
Repair procedures
| Replacement |
|

| 1. |
Turn ignition switch OFF and disconnect the negative (-) battery cable.
|
| 2. |
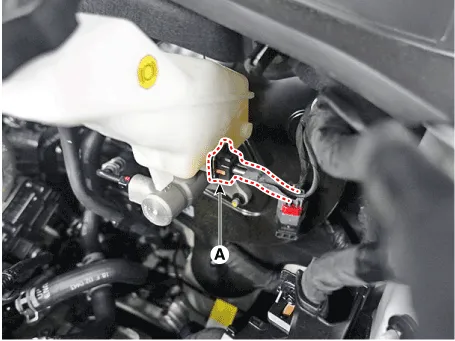
Disconnect the brake fluid level sensor connector (A).
|
| 3. |
Remove the brake fluid from the master cylinder reservoir with a syringe.
|

| 4. |
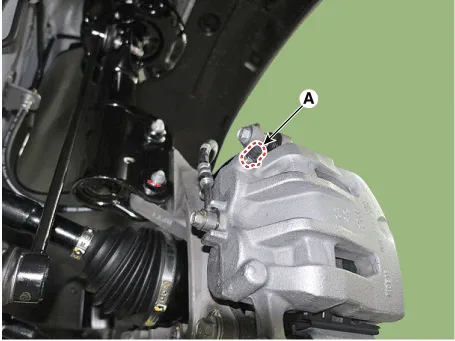
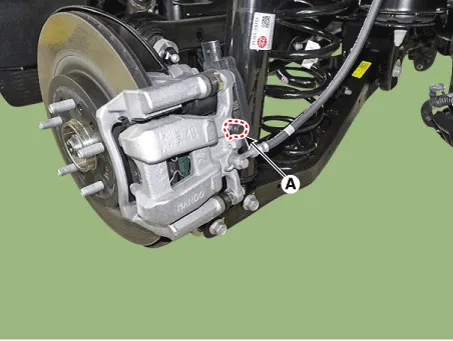
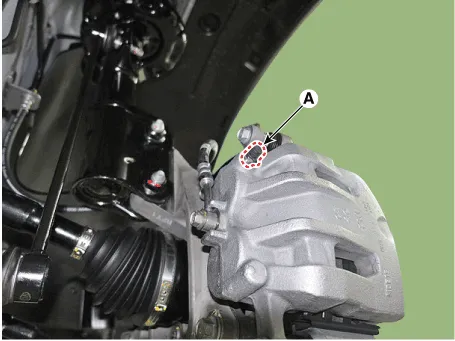
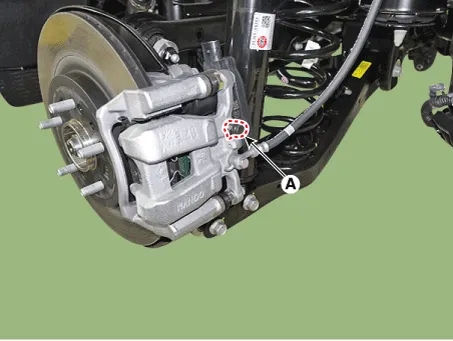
Loosen the bleed screw (A) and depress the brake pedal repeatedly several
times until the brake fluid reaches the caliper cylinder.
[Front]
[Rear]
|

| 5. |
Retighten the bleed screw and then make sure the brake fluid in the
reservoir is at the MAX (upper) level line.
|
| 6. |
Loosen the right-rear brake bleed screw (A) to allow air to escape from
the system. Then tighten the bleed screw securely.
[Front]
[Rear]
|

| 7. |
Re-tighten the bleed screw.
|
| 8. |
Have an assistant press the brake pedal several times to pressurize
it and keep it pressed.
|
| 9. |
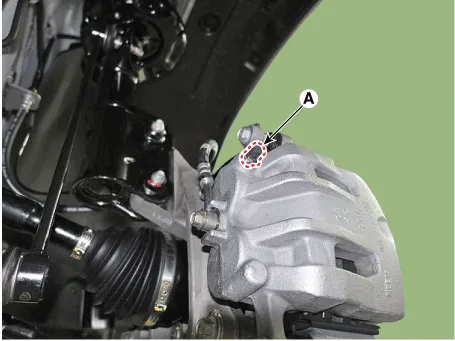
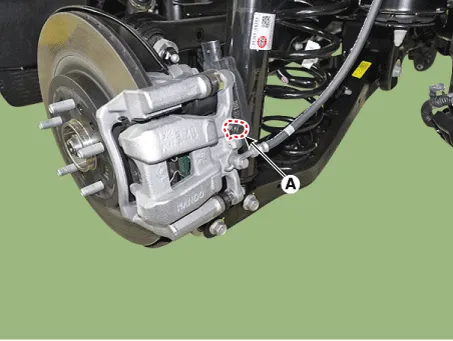
Pump the brake pedal several times, and then loosen the bleeder screw
until fluid starts to run out without bubbles. Then close the bleeder
screw.
[Front]
[Rear]
|

| 10. |
Repeat the procedure for wheel in the sequence until air bubbles no
longer appear in the fluid.
|
| 11. |
Connect the negative (-) cable.
|
| 12. |
Connect the brake fluid level sensor.
|
Components and components location Components
Components and components location Components 1. Brake member assembly 2. Stop lamp switch 3. Brake pedal arm assembly 4.
Other information:
Hyundai Palisade (LX2) 2020-2026 Service Manual: Ambient Temperature Sensor
Description and operation Description The ambient temperature sensor is located at the front of the condenser and detects ambient air temperature. It is a negative type thermistor; resistance will increase with lower temperature, and decrease with higher temperature.
Hyundai Palisade (LX2) 2020-2026 Service Manual: Parking/View Switch
Repair procedures Removal 1. Disconnect the negative (-) battery terminal. 2. Remove the floor console upper cover. (Refer to Body - "Floor Console Assembly") 3.
Categories
- Manuals Home
- Hyundai Palisade Owners Manual
- Hyundai Palisade Service Manual
- Engine Electrical System
- Resetting the Driver's Seat Memory System
- Scheduled maintenance services
- New on site
- Most important about car

Copyright © 2026 www.hpalisadelx.com - 0.013