Hyundai Palisade (LX2): Front Door / Front Door Module
Hyundai Palisade (LX2) 2020-2026 Service Manual / Body (Interior and Exterior) / Front Door / Front Door Module
Components and components location
| Component Location |
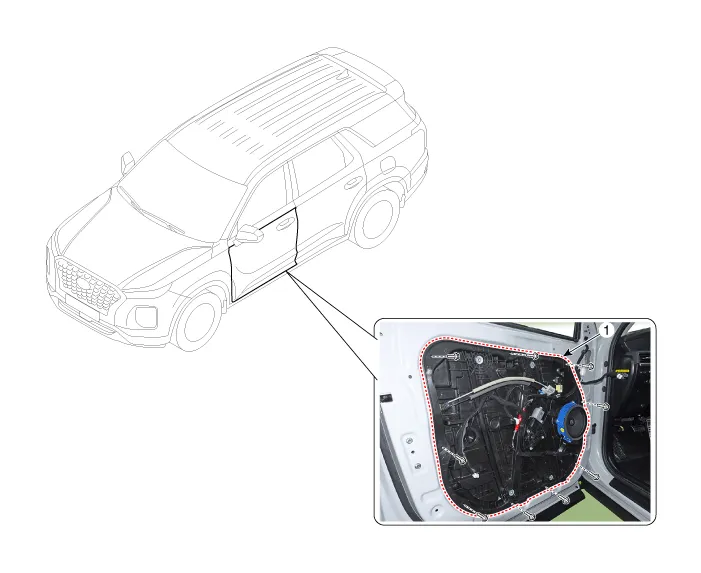
| 1. Front door module |
Repair procedures
| Replacement |
|

|

| 1. |
Remove the front door window glass.
(Refer to Front Door - "Front Door Window Glass")
|
| 2. |
Remove the front door outside handle.
(Refer to Front Door - "Front Door Outside Handle")
|
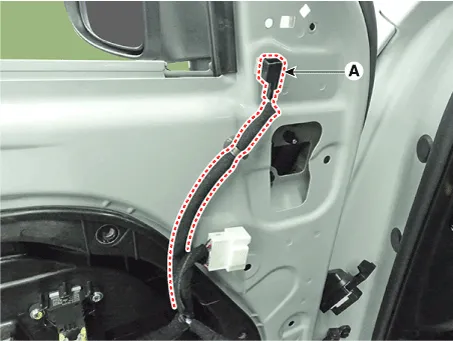
| 3. |
Press the lock pin and separate the front door main connector (A).
|
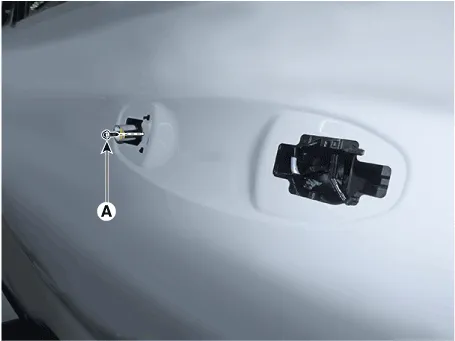
| 4. |
Loosen the front door outside handle screw (A).
|
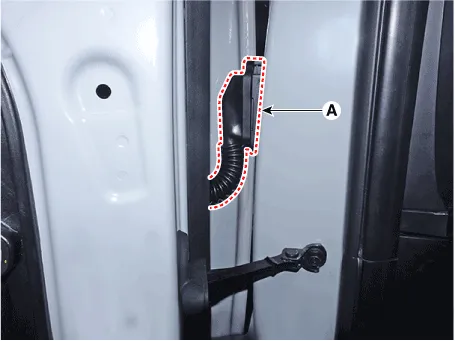
| 5. |
Press the loce pin and separate the outside rear view mirror connector
(A).
|
| 6. |
Loosen the front door latch screws.
|

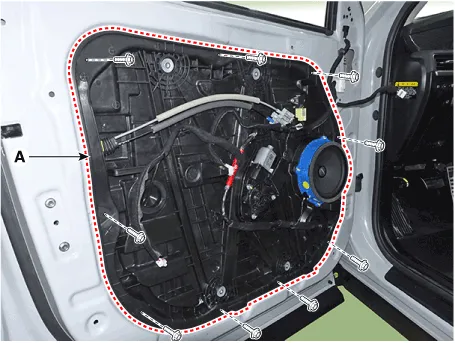
| 7. |
Loosen the front door moodule bolts and remove the front door module
(A).
|
| 8. |
Disconnect the various connector fron the front door module and separate
the front door module wiring harness (A).
|
| 9. |
Remove the front door latch assembly.
(Refer to Front Door - "Front Door Latch Assembly")
|
| 10. |
Remove the front power window motor.
(Refer to Body Electrical System - "Power Window Motor")
|
| 11. |
To install, reverse removal procedure.
|

Components and components location Component Location 1. Front door window glass Repair procedures Replacement • Put on gloves to prevent hand injuries.
Components and components location Component Location 1. Front door outside handle
Other information:
Hyundai Palisade (LX2) 2020-2026 Service Manual: Components and positions
Hyundai Palisade (LX2) 2020-2026 Service Manual: Power Mosfet (DATC)
Repair procedures Inspection 1. Turn the ignition switch ON. 2. Manually operate the control switch and measure the voltage of the blower motor. 3. Select the control switch to raise the voltage until high speed.
Categories
- Manuals Home
- Hyundai Palisade Owners Manual
- Hyundai Palisade Service Manual
- Repair procedures
- Components and components location
- Brake bleeding procedures
- New on site
- Most important about car

Copyright © 2026 www.hpalisadelx.com - 0.0134