Hyundai Palisade (LX2): Front Door / Front Door Window Glass
Components and components location
| Component Location |
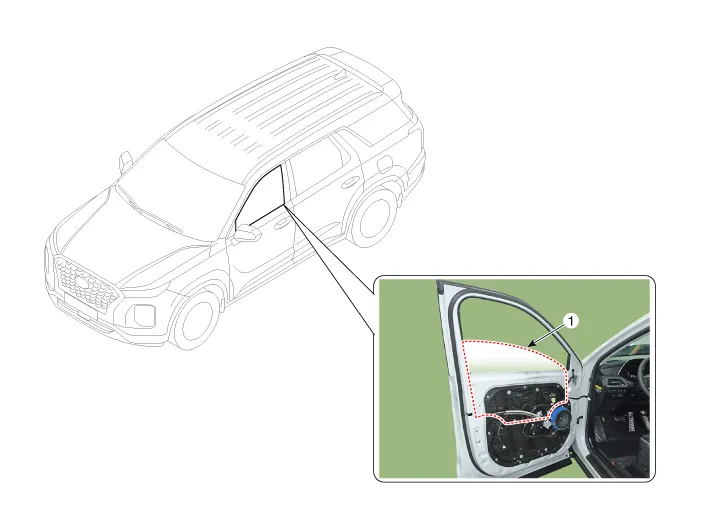
| 1. Front door window glass |
Repair procedures
| Replacement |
|

|

| 1. |
Remove the front door trim.
(Refer to Front Door - "Front Door Trim")
|
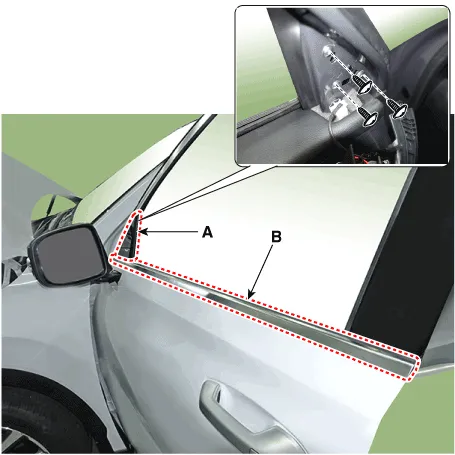
| 2. |
Loosen the mounting screws and remove the front door side garnish (A)
and remove the front door belt outside weatherstrip (B).
|
| 3. |
Remove the front door belt inside weatherstrip (A).
|

| 4. |
Remove the plug hole (A).
|
| 5. |
By operating the power window switch, pull down until the glass mounting
bolt on plug hole is visible.
|

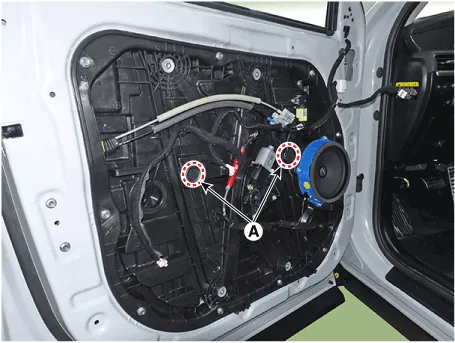
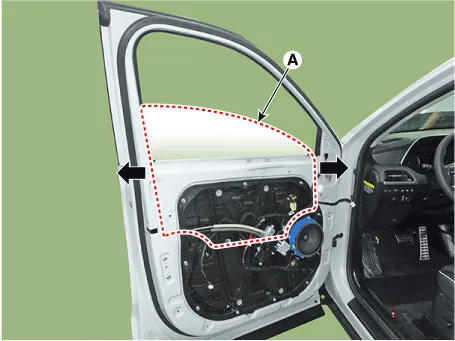
| 6. |
Loosen the mounting bolt and then pull out the front door window glass
(A) by tilting it sideways.
|
| 7. |
To install, reverse removal procedure.
|

Repair procedures Replacement 1. Remove the front door trim. (Refer to Front Door - "Front Door Trim") 2.
Components and components location Component Location 1. Front door module Repair procedures Replacement • Put on gloves to prevent hand injuries.
Other information:
Hyundai Palisade (LX2) 2020-2026 Service Manual: Rear Corner Radar Unit
Specifications Specifications [BCW, BCA] Items Blind-Spot Collision Warning (BCW) Blind-Spot Collision- Avoidance Assist (BCA) Rated voltage DC 12V Operating voltage 9V - 16V Operating speed 30 km/h
Hyundai Palisade (LX2) 2020-2026 Service Manual: Troubleshooting
Troubleshooting 1) After replacing H/UNIT, always check that the system operates properly. 2) If the failure persists after replacing the H/UNIT, do not replace the unit.
Categories
- Manuals Home
- Hyundai Palisade Owners Manual
- Hyundai Palisade Service Manual
- Maintenance
- Engine Electrical System
- Scheduled maintenance services
- New on site
- Most important about car
