Hyundai Palisade (LX2): Body Side Molding / Door Garnish
Repair procedures
| Replacement |
|

| 1. |
Loosen the mounting nuts and remove the front door garnish (A).
|
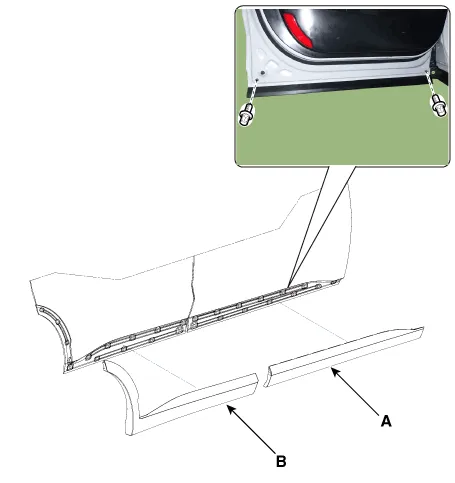
| 2. |
To install, reverse removal procedure.
|

|

| 1. |
Loosen the mounting nuts and remove the rear door garnish (A).
|
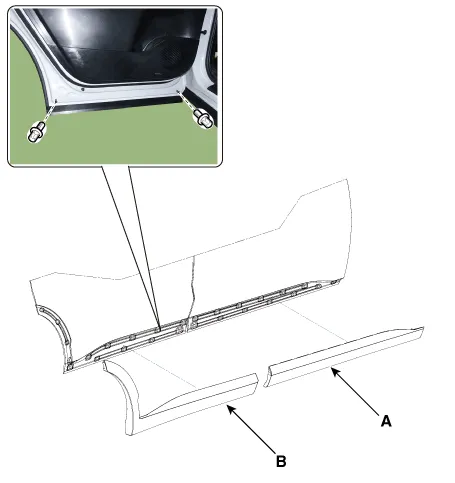
| 2. |
To install, reverse removal procedure.
|

Repair procedures Replacement • When removing with a flat-tip screwdriver or remover, wrap protective tape around the tools to prevent damage to components.
Other information:
Hyundai Palisade (LX2) 2020-2026 Service Manual: In-car Sensor
Description and operation Description The In-car air temperature sensor is built in the heater & A/C control unit. The sensor consists of a thermistor that measures the inside temperature. The signal decided by the resistance value that changes in accordance with perceived inside temperature, is delivered to heater co
Hyundai Palisade (LX2) 2020-2026 Service Manual: Warning Indicator
Components and components location Components 1. Warning indicator 2. SVM camera Repair procedures Removal 1. Disconnect the negative (-) battery terminal. 2.
Categories
- Manuals Home
- Hyundai Palisade Owners Manual
- Hyundai Palisade Service Manual
- Electronic Child Safety Lock System
- Body (Interior and Exterior)
- Emergency liftgate safety release
- New on site
- Most important about car
