Hyundai Palisade (LX2): SRSCM / SRS Control Module (SRSCM)
Components and components location
| Components |
| [LH] |
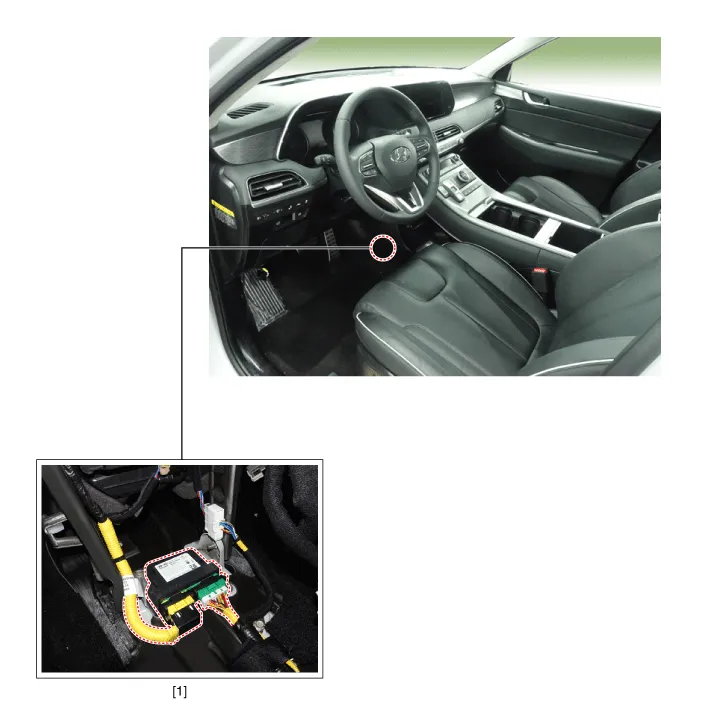
| 1. Supplemental Restraint System
Control Module (SRSCM) |
Description and operation
| Description |
Schematic diagrams
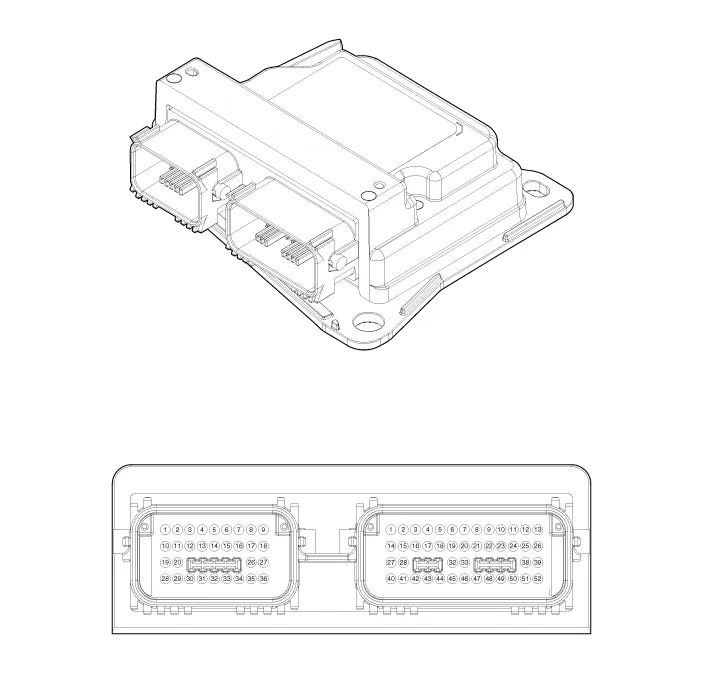
| Supplemental Restraint System Control Module (SRSCM) |
|
No |
Connector A |
Connector B |
|
1 |
- |
- |
|
2 |
- |
- |
|
3 |
- |
- |
|
4 |
- |
- |
|
5 |
- |
- |
|
6 |
- |
- |
|
7 |
- |
- |
|
8 |
- |
- |
|
9 |
- |
- |
|
10 |
B+ |
- |
|
11 |
Crash output |
- |
|
12 |
Passenger airbag 1st stage (Low) |
- |
|
13 |
Passenger airbag 1st stage (High) |
- |
|
14 |
- |
- |
|
15 |
- |
- |
|
16 |
Passenger airbag OFF lamp |
- |
|
17 |
Passenger airbag ON lamp |
Passenger curtain airbag (Low) |
|
18 |
- |
Passenger curtain airbag (High) |
|
19 |
Driver airbag 1st stage - (High) |
Driver curtain airbag (High) |
|
20 |
Driver airbag 1st stage (Low) |
Driver curtain airbag (Low) |
|
21 |
- |
Passenger side airbag (Low) |
|
22 |
- |
Passenger side airbag (High) |
|
23 |
- |
Driver side airbag (High) |
|
24 |
- |
Driver side airbag (Low) |
|
25 |
- |
- |
|
26 |
C-CAN (Low) |
- |
|
27 |
C-CAN (High) |
Driver seat belt pretensioner (Low) |
|
28 |
IGN 1 |
Driver seat belt pretensioner (High) |
|
29 |
Front driver impact sensor LH - (High) |
- |
|
30 |
Front impact sensor LH - (Low) |
- |
|
31 |
Front impact sensor RH - (Low) |
- |
|
32 |
Front impact sensor RH - (High) |
Passenger seat belt pretensioner (High) |
|
33 |
- |
Passenger seat belt pretensioner (Low) |
|
34 |
- |
- |
|
35 |
P-CAN (Low) |
- |
|
36 |
P-CAN (High)) |
- |
|
37 |
|
- |
|
38 |
- |
|
|
39 |
- |
|
|
40 |
Ground |
|
|
41 |
Driver side rear impact sensor (Low) |
|
|
42 |
Driver side rear impact sensor (High) |
|
|
43 |
Driver pressure side impact sensor (High) |
|
|
44 |
Driver pressure side impact sensor (Low) |
|
|
45 |
Passenger pressure side impact sensor (Low) |
|
|
46 |
Passenger pressure side impact sensor (High) |
|
|
47 |
Driver side impact sensor (High) |
|
|
48 |
Driver side impact sensor (Low) |
|
|
49 |
Passenger side impact sensor (Low) |
|
|
50 |
Passenger side impact sensor (High) |
|
|
51 |
Passenger side rear impact sensor (High) |
|
|
52 |
Passenger side rear impact sensor (Low) |
Repair procedures
| Removal |
| 1. |
Turn the engine OFF.
|
| 2. |
Disconnect the battery negative cable and wait for at least three minutes
before beginning work.
|
| 3. |
Remove the floor console assembly.
(Refer to Body - "Floor Console Assembly")
|
| 4. |
Loosen the mounting bolts and then remove the air duct.
|
| 5. |
Pull up the lock of the SRSCM connector to disconnect the connector.
|
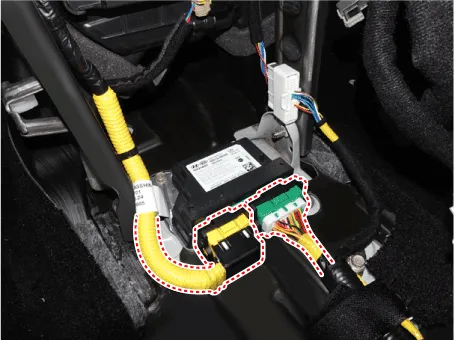
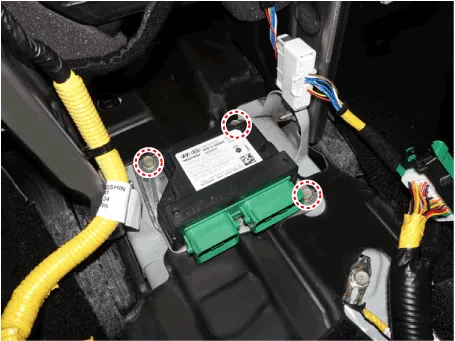
| 6. |
Remove the SRSCM mounting bolts and then remove the SRSCM.
|

| Installation |
| 1. |
Turn the engine OFF.
|
| 2. |
Disconnect the battery negative cable and wait for at least three minutes
before beginning work.
|
| 3. |
Install the SRSCM with the SRSCM mounting bolts (3EA).
|

| 4. |
Connect the SRSCM harness connector.
|
| 5. |
Install the rear air duct.
|
| 6. |
Install the floor console assembly.
(Refer to Body - "Floor Console Assembly")
|
| 7. |
Reconnect the battery negative cable.
|
| 8. |
After installing the SRSCM, confirm proper system operation:
Turn the ignition switch ON; the SRS indicator light should be turned
on for about six seconds and then go off.
|

| Variant Coding |
| 1. |
Connect the cable of GDS to the data link connector in driver side crash
pad lower panel, and turn on the GDS.
|
| 2. |
Select the 'S/W Management' and 'Car model'.
|
| 3. |
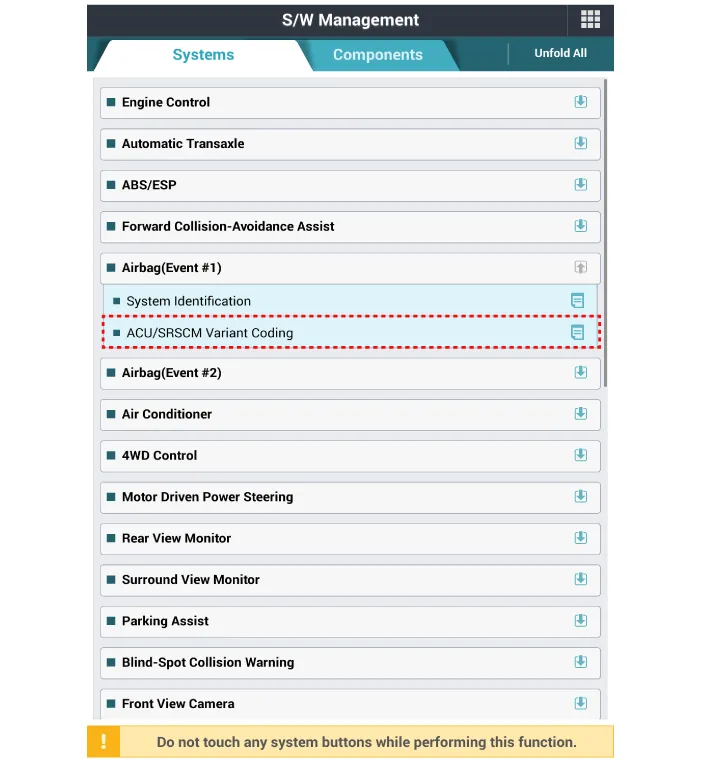
Select "Airbag" and "ACU/SRSCM Variant Coding".
|
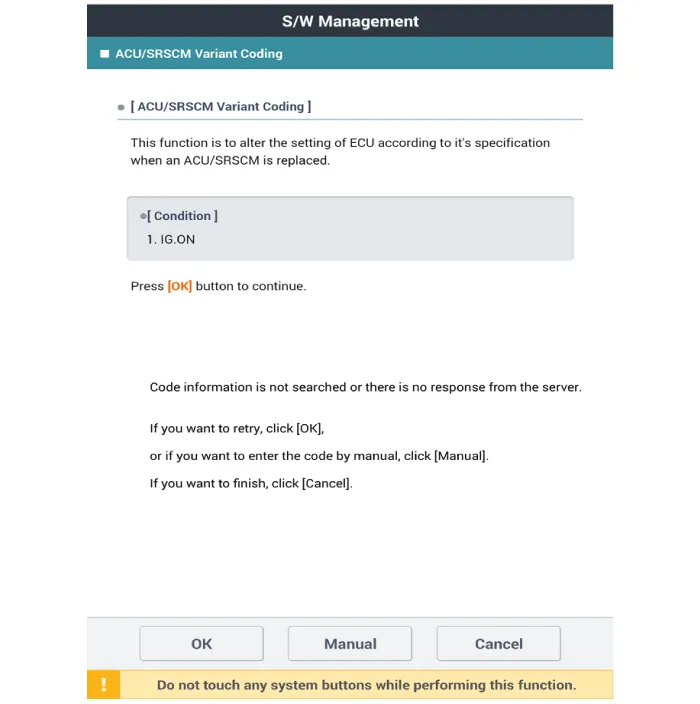
| 4. |
Perform the "ACU/SRSCM Variant Coding" procedure according to the GDS
screen message.
|
Components 1. Supplemental Restraint System Control Module (SRSCM) 2. Rear Gravity side Impact Sensor (G-SIS) 3.
Components and components location Components 1. Front impact sensor (FIS) 2. Front impact sensor (FIS) Description and operation Description The front impact sensor (FIS) is installed in the Front End Module (FEM).
Other information:
Hyundai Palisade (LX2) 2020-2026 Service Manual: PTC Heater (Diesel only)
Description and operation Description The PTC (Positive Temperature Coefficient) heater is installed at the exit or the backside of the heater core. The PTC heater is an electric heater using a PTC element as an auxiliary heating device that supplements deficiency of interior heat source in highly effective diesel engi
Hyundai Palisade (LX2) 2020-2026 Service Manual: Repair procedures
Replacement 1. Disconnect the negative (-) battery terminal. 2. Remove the luggage side trim (Refer to Body - "Luggage Side Trim ") 3. Separate the rear mode actuator connector (A), loosen the mounting screws and remove the rear mode ac
Categories
- Manuals Home
- Hyundai Palisade Owners Manual
- Hyundai Palisade Service Manual
- Automatic Transaxle System (A8LF1)
- Scheduled maintenance services
- Body (Interior and Exterior)
- New on site
- Most important about car
