Hyundai Palisade (LX2): Body Side Molding / Roof Side Molding
Repair procedures
| Replacement |
|

|

| 1. |
Using a flat-tip screwdriver or remover, remove the roof side molding
(A).
|
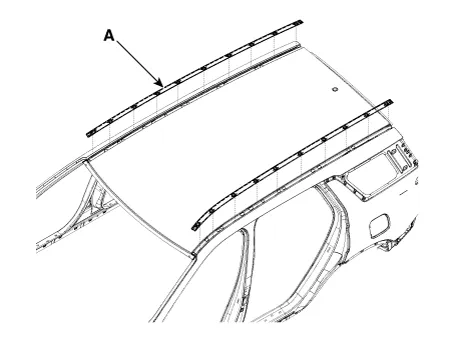
| 2. |
To install, reverse removal procedure.
|

Repair procedures Replacement • When removing with a flat-tip screwdriver or remover, wrap protective tape around the tools to prevent damage to components.
Components and components location Components Location 1. Roof rack assembly Repair procedures Removal • When removing with a flat-tip screwdriver or remover, wrap protective tape around the tools to prevent damage to components.
Other information:
Hyundai Palisade (LX2) 2020-2026 Service Manual: Auto Defogging Actuator
Description and operation Description The auto defogging sensor is installed on the front window glass. The sensor judges and sends signal if moisture occurs to blow out wind for defogging. The air conditioner control module receives a signal from the sensor and restrains moisture and eliminates defog by the intake actuato
Hyundai Palisade (LX2) 2020-2026 Service Manual: Repair procedures
Inspection 1. Turn the ignition switch ON. 2. Manually operate the control switch and measure the voltage of the blower motor. 3. Select the control switch to raise the voltage until it reaches high speed.
Categories
- Manuals Home
- Hyundai Palisade Owners Manual
- Hyundai Palisade Service Manual
- Troubleshooting
- Repair procedures
- PTG Spindle
- New on site
- Most important about car
