Hyundai Palisade (LX2): Indicators And Gauges / Repair procedures
| Removal |
| 1. |
Disconnect the negative (-) battery terminal.
|
| 2. |
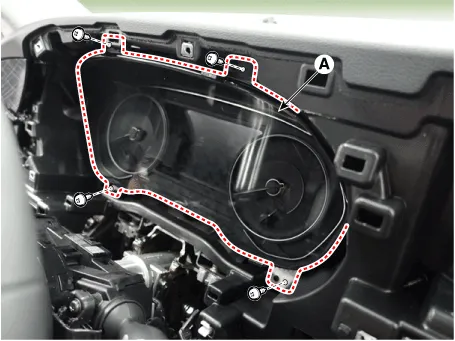
Remove the cluster fascia panel (A).
(Refer to Body - "Cluster Fascia Panel")
|
| 3. |
Remove the cluster (A) from the housing after removing screws.
|
| 4. |
Disconnect the cluster connecter (A) and then remove the cluster.
|

| Installation |
| 1. |
Connect the cluster connector.
|
| 2. |
Install the cluster assembly.
|
| 3. |
Install the cluster facia panel.
|
| 4. |
Connect the negative (-) battery terminal.
|
| Inspection |
| 1. |
Check point (Warning indicator)
|


| 2. |
Check point (Gauge)
|
| 3. |
Communication information
|
| 4. |
Other cluster check list
|
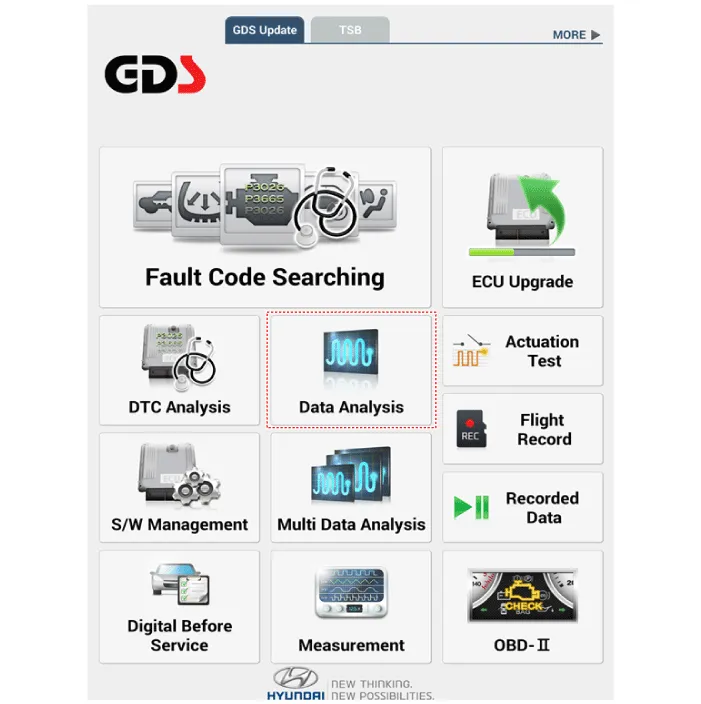
| 1. |
In the body electrical system, failure can be quickly diagnosed by using
the vehicle diagnostic system (Diagnostic tool).
The diagnostic system (Diagnostic tool) provides the following information.
|
| 2. |
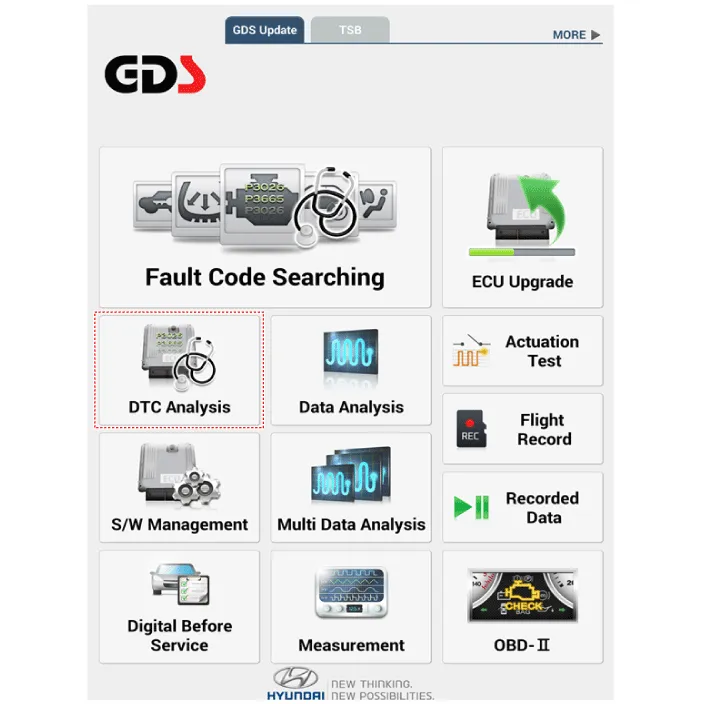
If diagnose the vehicle by Diagnostic tool, select "DTC Analysis" and
"Vehicle".
|
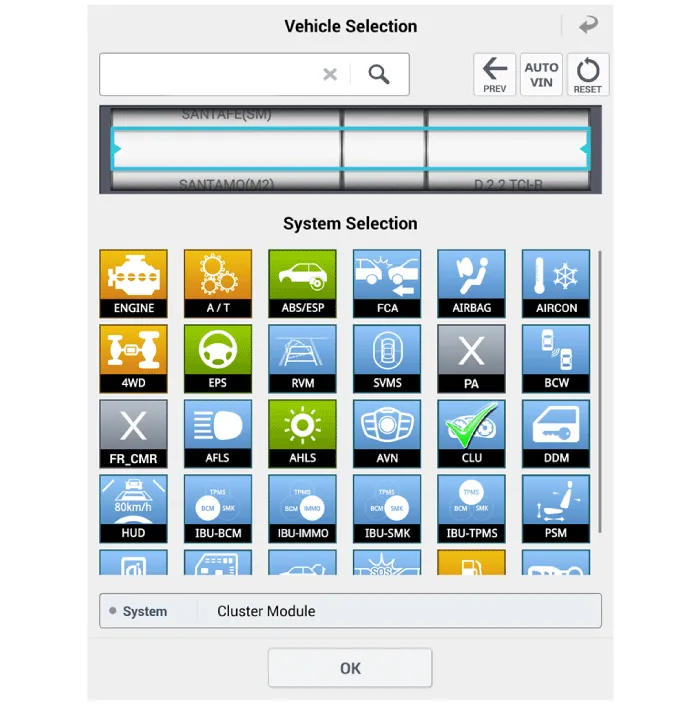
| 3. |
If check current status, select the "Data Analysis" and "Car model".
|
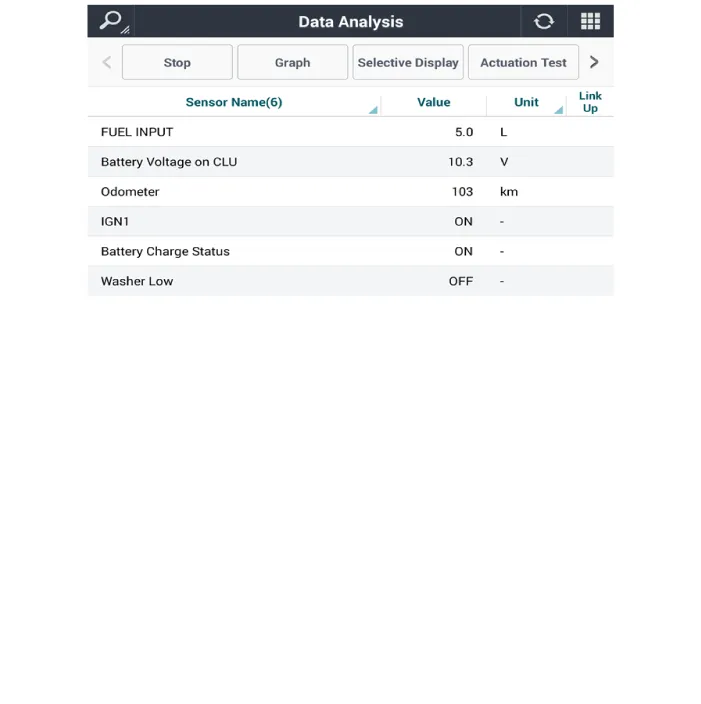
| 4. |
Select the 'CLU' to search the current state of the input/output data.
|
| 1. |
Connect the cable of Diagnostic tool to the data link connector in driver
side crash pad lower panel.
|
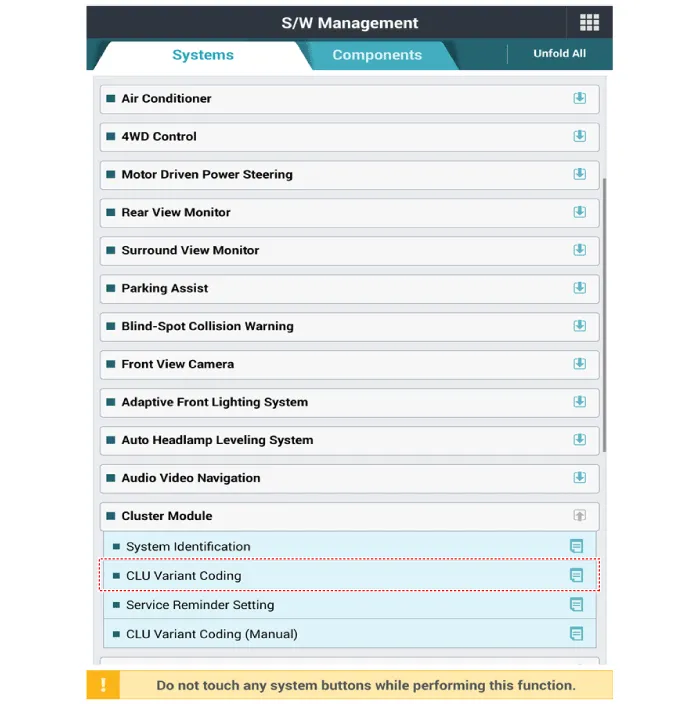
| 2. |
Select the 'S/W Management' and 'Car model'.
|

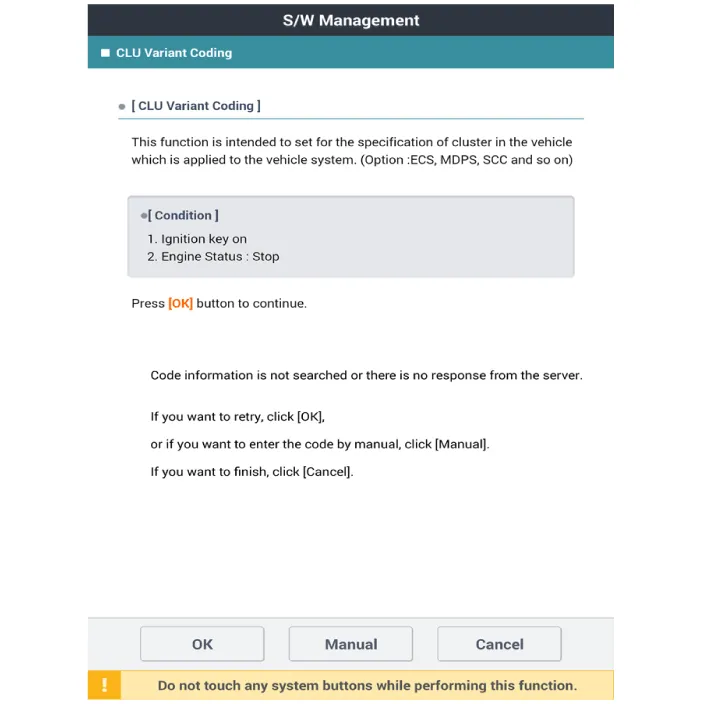
| 3. |
Select the 'Cluster Module' and 'CLU Variant Coding'.
|
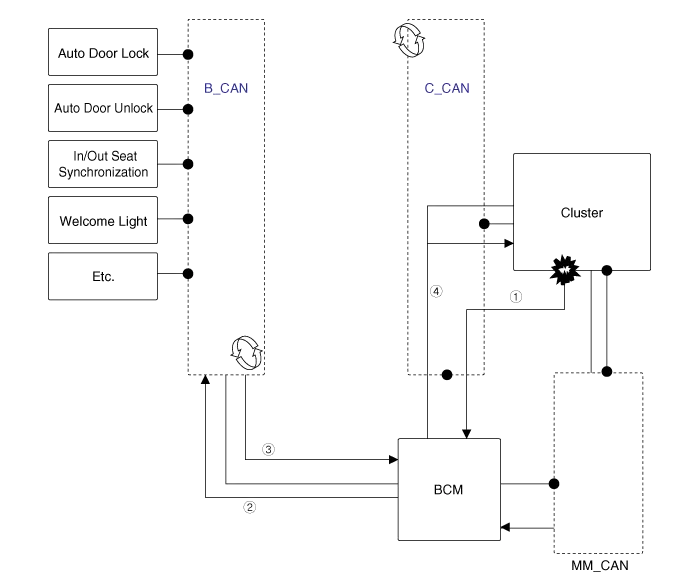
Description Communication Network Diagram Abbreviation Explanation IBU Interated Body Control Unit DDM Driver Door Module PTGM Power Tail Gate Module ICU Interated Control Unit ECU Engine Control Unit CLU Cluster MDPS Moter Driven Power Steering SVM Sorround View Monitor ACU Airbag Control Unit VDC Vehicle Dynamic Control SCC Smart Cruise Control LKA Lane Keeping Assist BCW Blind-Spot Collision Warning SAS Steering Angle Sensor HUD Head up Display TCU Transmission Control Unit FR DATC Dual Automatic Temp Control 4WD Four Wheel Drive F/PUMP Fuel Pump Control Module POCS Passenger Occupant Classification System IMS Integrated Memory System AMP Amplifier AVN Head Unit (Audio / AVN) HUD Head Up Display RR CAMERA Rrar View Camera FR CON Front Console Switch EOP Electric Oil Pump SBW Shift BY Wire W/CHAR Wireless Power Chager FR M/LP Front Mood Lamp 3ND FOLD 3ND Seat Folding Control Unit AUDIO Audio unit KEY BOARD Center Fascia Keyboard
Troubleshooting Symptom Possible cause Remedy Speedometer does not operate Cluster fuse (10A) blown Check for short and replace fuse Speedometer faulty Check speedometer CAN line faulty Check the EMS Wiring or ground faulty Repair if necessary Tachometer does not operate Cluster fuse (10A) blown Check for short and replace fuse Tachometer faulty Check tachometer CAN line faulty Check the EMS Wiring or ground faulty Repair if necessary Fuel gauge does not operate Cluster fuse (10A) blown Check for short and replace fuse Fuel gauge faulty Check gauge Fuel sender faulty Check fuel sender Wiring or ground faulty Repair if necessary Low fuel warning lamp does not light up Cluster fuse (10A) blown Check for short and replace fuse Bulb burned out Replace bulb Fuel sender faulty Check fuel sender Wiring or ground faulty Repair if necessary Water temperature gauge does not operate Cluster fuse (10A) blown Check for short and replace fuse Water temperature gauge faulty Check gauge Water temperature sender faulty Check sender CAN line faulty Check the EMS Wiring or ground faulty Repair if necessary Oil pressure warning lamp does not light up Cluster fuse (10A) blown Check for short and replace fuse Bulb burned out Replace bulb Oil pressure switch faulty Check switch Wiring or ground faulty Repair if necessary Parking brake warning lamp does not light up Cluster fuse (10A) blown Check for short and replace fuse Bulb burned out Replace bulb Brake fluid level warning switch faulty Check switch Parking brake switch faulty Check switch Wiring or ground faulty Repair if necessary Open door warning lamp and tailgate warning lamp do not light up Memory fuse (15A) blown Check for short and replace fuse Bulb burned out Replace bulb Door switch faulty Check switch Wiring or ground faulty Repair if necessary Seat belt warning lamp does not light up Cluster fuse (10A) blown Check for short and replace fuse Bulb burned out Replace bulb Seat belt switch faulty Check switch Wiring or ground faulty Repair if necessary Speedometer and odometer does not operate CAN line faulty Check the ABS ECU Wheel speed sensor faulty Check the wheel speed sensor
Other information:
Hyundai Palisade (LX2) 2020-2026 Service Manual: Repair procedures
Refrigerant System Service Basics (R-134a) Refrigerant Recovery Use only service equipment that is U.L-listed and is certified to meet the requirements of SAE J2210 to remove HFC-134a(R-134a) from the air conditioning system.
Hyundai Palisade (LX2) 2020-2026 Service Manual: Power Mosfet (DATC)
Repair procedures Inspection 1. Turn the ignition switch ON. 2. Manually operate the control switch and measure the voltage of the blower motor. 3. Select the control switch to raise the voltage until high speed.
Categories
- Manuals Home
- Hyundai Palisade Owners Manual
- Hyundai Palisade Service Manual
- Rain Sensor
- Maintenance
- Power Outlet
- New on site
- Most important about car
