Hyundai Palisade (LX2): Evaporative Emission Control System / Purge Control Solenoid Valve (PCSV)
Specifications
Item
|
Specification
|
Coil Resistance (Ω)
|
18.5 - 22.5 [20°C (68°F)]
|
Description and operation
Purge Control Solenoid Valve (PCSV) is installed on the surge tank and controls
the passage between the canister and the intake manifold. It is a solenoid valve
and is open when the ECM grounds the valve control line. When the passage is
open (PCSV ON), fuel vapor stored in the canister is transferred to the intake
manifold.

Schematic diagrams

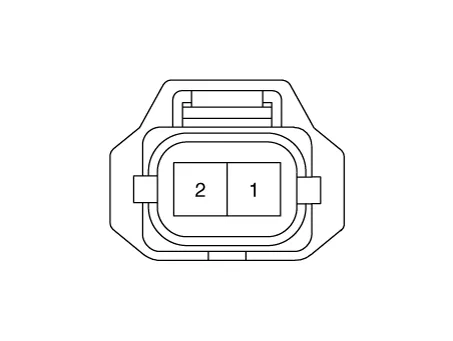
Harness Connector
Repair procedures
| 1. |
Turn the ignition switch OFF.
|
| 2. |
Disconnect the PCSV connector.
|
| 3. |
Measure resistance between the PCSV terminals 1 and 2.
|
| 4. |
Check that the resistance is within the specification.
|
Specification : Refer to "Specification"
|
|
| 1. |
Turn the ignition switch OFF and disconnect the battery negative (-)
terminal.
|
| 2. |
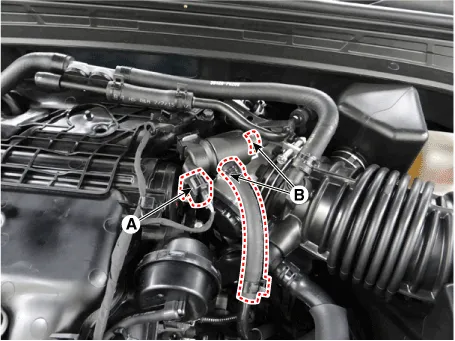
Disconnect the purge control solenoid valve connector (A).
|
| 3. |
Disconnect the vapor hoses (B) from the purge control solenoid valve.
|
| 4. |
Remove the valve from the bracket.
|
| • |
Install the component with the specified torques.
|
| • |
Note that internal damage may occur if the component drops.
In this case, inspect it before installation.
|
| • |
Be sure not to apply oil or lubricant to the end of the hoses
when connecting the PCSV hose.
|
| • |
Be careful of foreign materials not to flow into the valve.
|
|
| 1. |
To install, reverse the removal procedure.
|
Repair procedures
Removal
1.
Switch "OFF" the ignition and disconnect the negative (-) battery terminal.
2.
Repair procedures
Removal
1.
Switch "OFF" the ignition and disconnect the negative (-) battery terminal.
2.
Other information:
Description and operation
Description
The climate control air filter is located in the blower unit. It eliminates
foreign materials and odor. The particle filter performs a role as an odor filter
as well as a conventional dust filter to ensure comfortable interior environment.