Hyundai Palisade (LX2): Surround View Monitor (SVM) / Repair procedures
| Inspection |
| – |
Remove and install a wide camera.
|
| – |
Conduct a body task that causes the focus of the wide camera to change,
such as a trunk task.
|
| – |
Replace the door mirror that has a wide camera.
|
| – |
Replace the around view monitoring unit.
|
There are two types of tolerance compensation [manual tolerance compenstation]
and [automatic tolerance compensation].
The service center with the SVM exclusive workshop performs [automatic
tolerance compensation].
The maintenance environment lacking an SVM exclusive workshop performs
[manual tolerance compensation].
|

| 1. |
Advanced preparations will be made according to the following.
|
| 2. |
The following processes will be performed to confirm whether or not
the SVM ECU and camera are working properly before engaging tolerance
compensation mode.
|
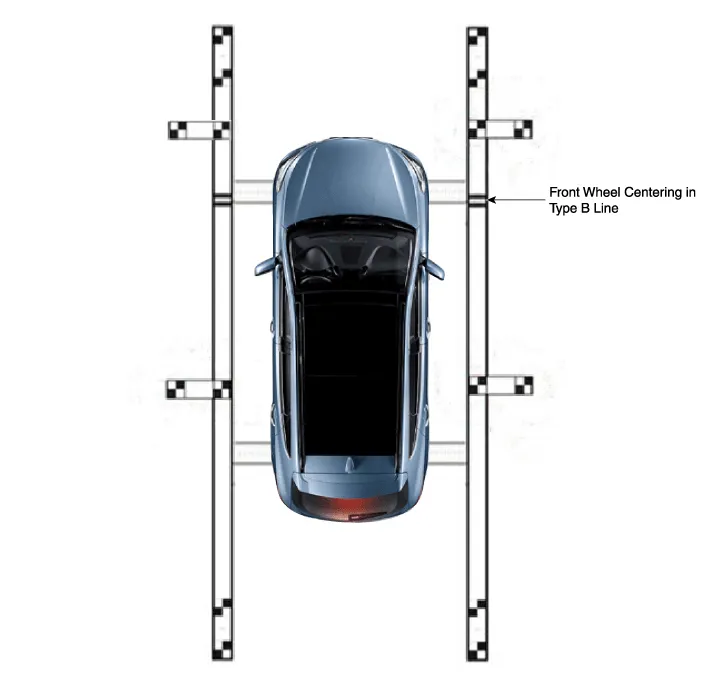
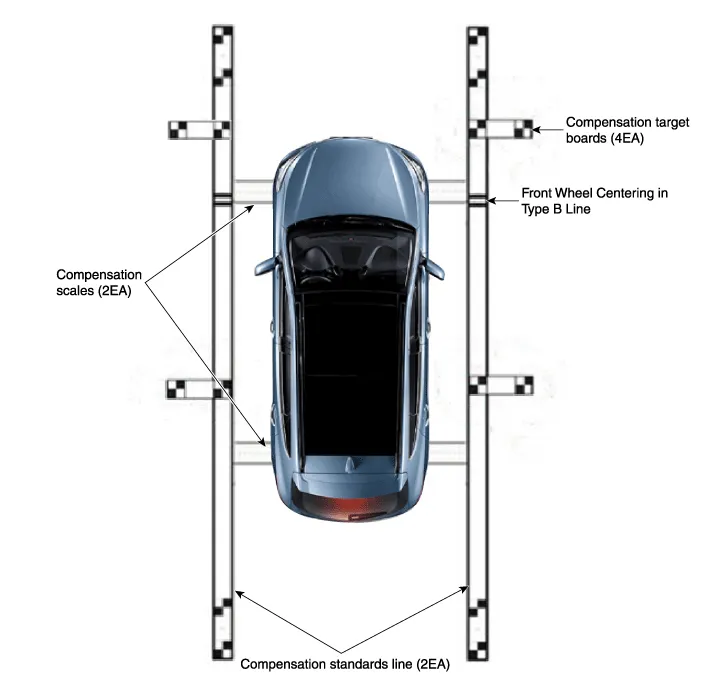
| 3. |
Install around the vehicle by referring to the guide that was provided
along with the compensation scales (2), compensation standard line boards
(2), and compensation target boards (4).
|

| 4. |
Keep the IG on while the car is stopped, confirm the location of the
gear stick is on ‘N’ and engage the parking brake on a flat area.
|
| 5. |
Perform the work with the SVM switch in the vehicle set to ‘ON.’
|
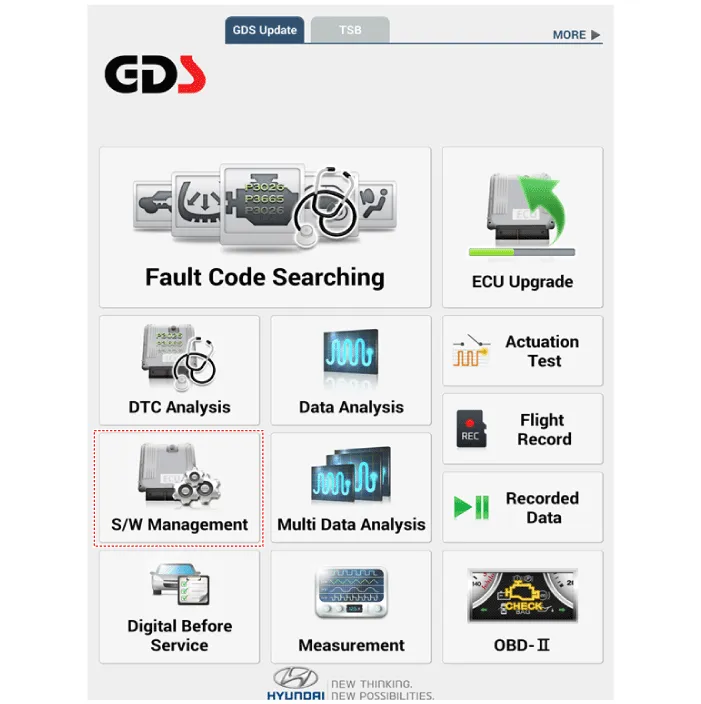
| 6. |
Perform SVM Calibration according to Diagnostic tool diagnostics display.
|
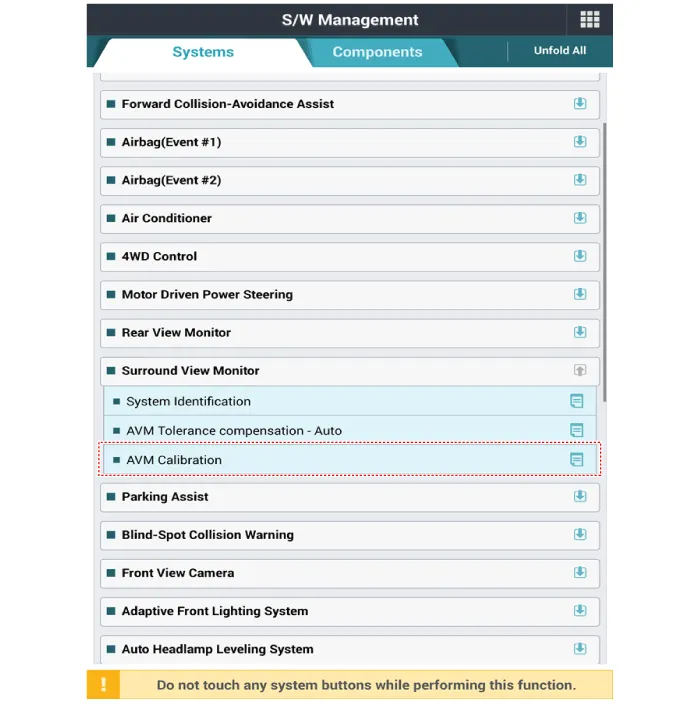
| 7. |
Proceed with the AVM calibration according to the Diagnostic tool screen.
|
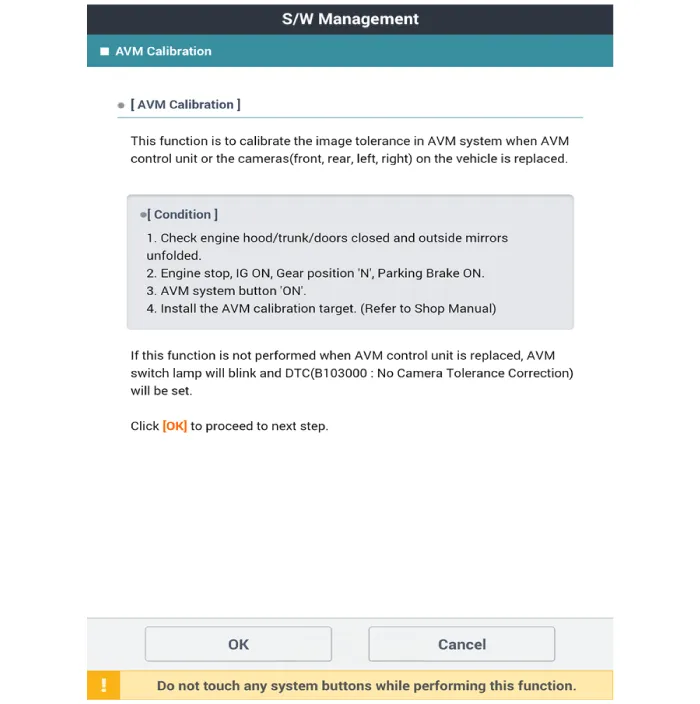
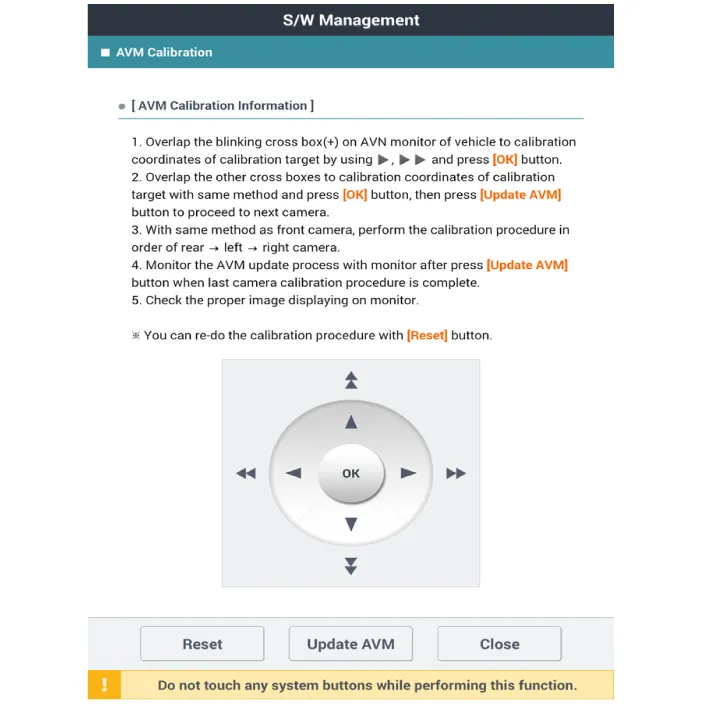

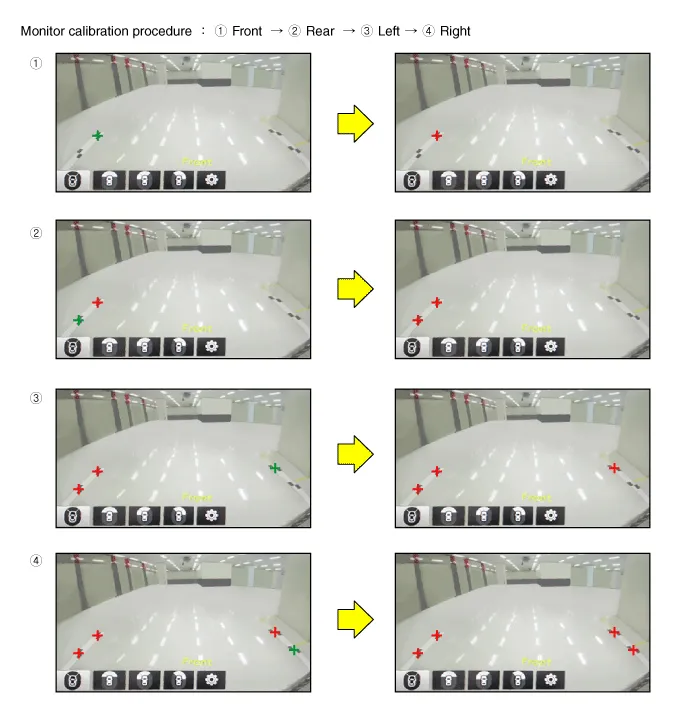

| 8. |
After checking the vehicle and calibration line on the AVN monitor screen
to see if the calibration has been performed properly, press the [OK]
button.
When calibration has not been performed properly, press the [Cancel]
button to match the calibration points again.
[AVN Monitor]
[Diagnostic tool Screen]
|
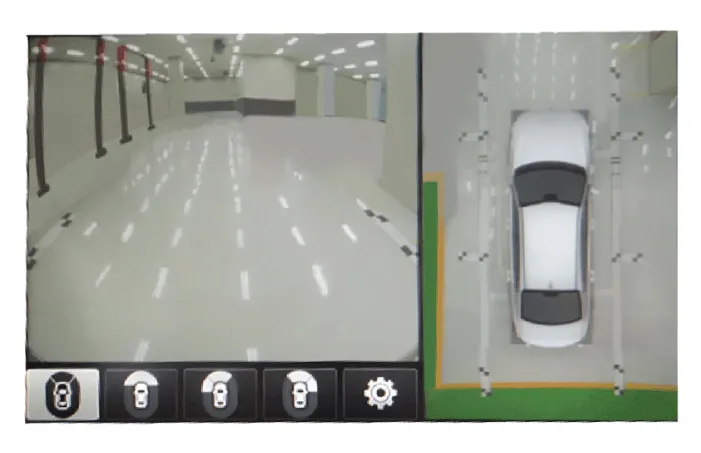

Description Surround View Monitor (SVM) is the system that allows video monitoring of 360 degrees around the vehicle. The system includes 4 ultra optical camera mounted around the vehicle (front, both sides, rear).
Troubleshooting 1) After replacing H/UNIT, always check that the system operates properly.
Other information:
Hyundai Palisade (LX2) 2020-2026 Service Manual: Heater Core
Repair procedures Replacement 1. Disconnect the negative (-) battery terminal. 2. Remove the heater and blower assembly. (Refer to Heater - "Heater Unit") 3.
Hyundai Palisade (LX2) 2020-2026 Service Manual: Intake Actuator
Description and operation Description The intake actuator is located at the blower unit. It regulates the intake door by a signal from the control unit. Pressing the intake selection switch will shift between recirculation and fresh air modes.
Categories
- Manuals Home
- Hyundai Palisade Owners Manual
- Hyundai Palisade Service Manual
- Power Outlet
- Components and components location
- Body Electrical System
- New on site
- Most important about car
