Hyundai Palisade (LX2): Air conditioning System / Receiver-Drier
Repair procedures
| SReplacement |
| 1. |
Remove the condenser.
(Refer to A/C System - "Condenser")
|
| 2. |
Remove the cap (B) on the bottom of the condenser with an L wrench (A).
|
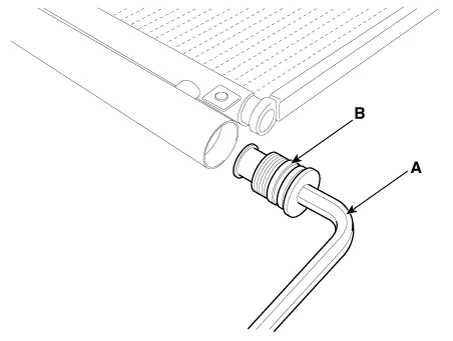
| 3. |
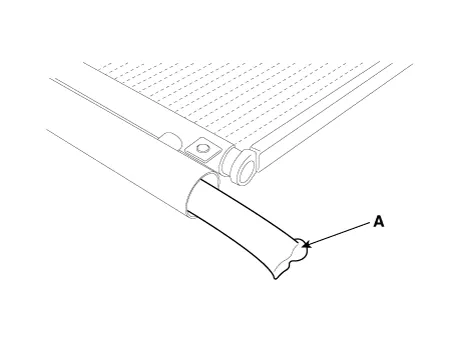
Remove the receiver-drier (A) from condenser using a long nose plier.
Check for crumbled receiver-drier and clogged bottom cap filter.
|
| 4. |
Install in the reverse order of removal.
|

Components and components location Components Location 1. Condensor
Description and operation Description The A/C Pressure Transducer (APT) converts the pressure value of high pressure line into voltage value after measuring it.
Other information:
Hyundai Palisade (LX2) 2020-2026 Service Manual: Troubleshooting
Troubleshooting Problem Symptoms Table Before replacing or repairing air conditioning components, first determine if the malfunction is due to the refrigerant charge, air flow or compressor. Use the table below to help you find the cause of the problem.
Hyundai Palisade (LX2) 2020-2026 Service Manual: Ultrasonic Sensor
Schematic diagrams Schematic Diagrams Repair procedures Removal 1. Remove the bumper cover. (Refer to Body - "Front Bumper Cover") (Refer to Body - "Rear Bumper Cover") 2.
Categories
- Manuals Home
- Hyundai Palisade Owners Manual
- Hyundai Palisade Service Manual
- How to reset the power liftgate
- Rain Sensor
- Automatic Transaxle System (A8LF1)
- New on site
- Most important about car
