Hyundai Palisade (LX2): Fuel Delivery System / Fuel Tank
Repair procedures
|

| Removal |
| 1. |
Release the residual pressure in fuel line.
(Refer to Fuel Delivery System - "Release Residual Pressure in Fuel
Line")
|
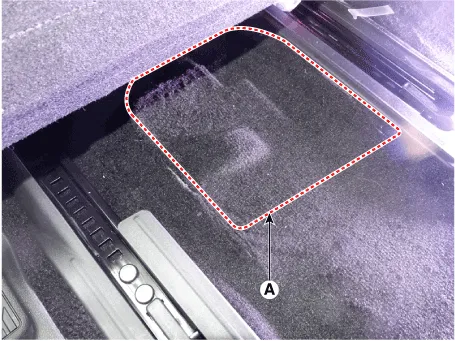
| 2. |
Remove the floor carpet service cover (A).
|
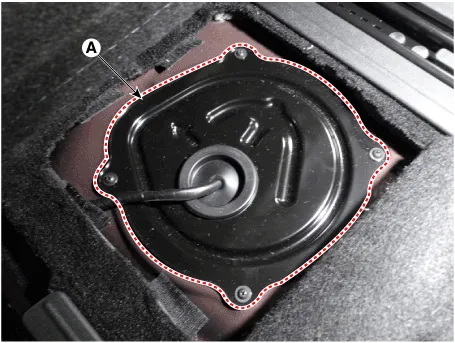
| 3. |
Remove the fuel pump service cover (A) after loosening the mounting
screws.
|
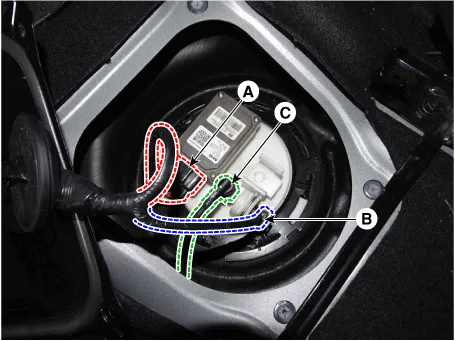
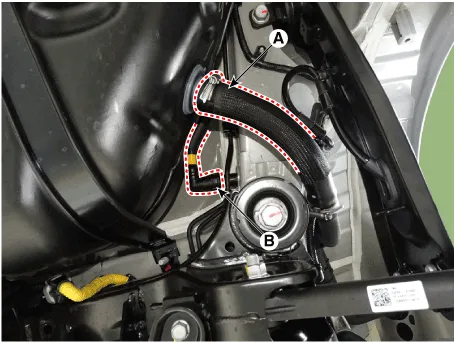
| 4. |
Disconnect the fuel pump control module connector (A) and fuel pressure
sensor connector (B).
|
| 5. |
Disconnect fuel feed tube quick-connector (C).
|
| 6. |
Lift the vehicle.
|
| 7. |
Remove the propeller shaft assembly [4WD].
(Refer to Driveshaft and Axle - "Propeller shaft Assembly")
|
| 8. |
Remove the coupling assembly. [4WD]
(Refer to 4 Wheel Drive (4WD) System - "Coupling Assembly")
|
| 9. |
Remove the muffler assembly.
(Refer to Engine Mechanical System - "Muffler")
|
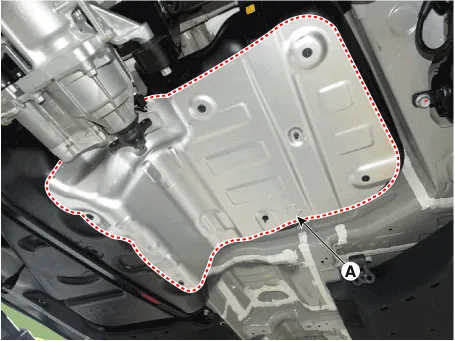
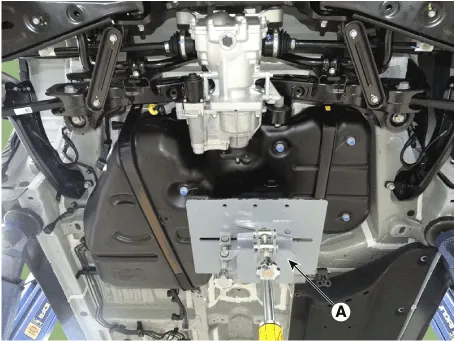
| 10. |
Remove the fuel tank protect (A) after loosening the mounting screws.
|
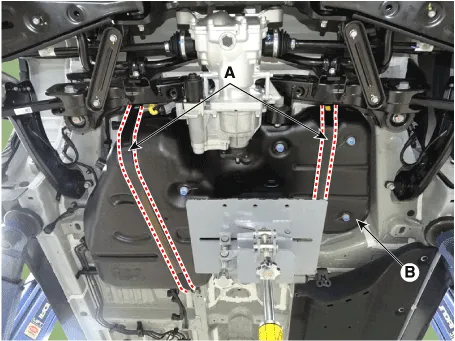
| 11. |
Disconnect the fuel filler hose (A).
|
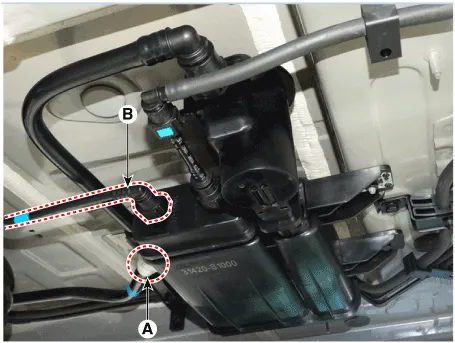
| 12. |
Disconnect the leveling hose (B).
|
| 13. |
ventilation hose quick-connector (A).
|
| 14. |
Disconnect the vapor hose quick-connector (B).
|
| 15. |
Support the fuel tank with a jack (A).
|
| 16. |
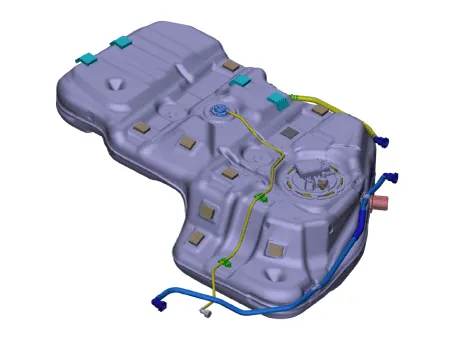
Remove the fuel tank band (A) after removing the installation bolts.
And then, remove the fuel tank (B).
|
| Installation |
| 1. |
Install in the reverse order of removal.
|
Release Residual Pressure in Fuel Line • Whenever the high pressure fuel fuse, fuel pipe, delivery pipe, or injector is removed immediately after shutting off the engine, an injury may be caused by the release of highly pressurized fuel.
Repair procedures Inspection 1. Turn ignition switch OFF and disconnect the negative (-)battery cable. 2.
Other information:
Hyundai Palisade (LX2) 2020-2026 Service Manual: Description and operation
Description • PDW consists of 8 sensors (front : 4 units, rear : 4 units) that are used to detect obstacles and transmit the result in three separate warning levels, the first, second and third to IBU via LIN communication.
Hyundai Palisade (LX2) 2020-2026 Service Manual: Repair procedures
Removal SVM Rear Camera • In case of bad quality or poor focus, be sure to check the camera lense surface condition and foreign materials.
Categories
- Manuals Home
- Hyundai Palisade Owners Manual
- Hyundai Palisade Service Manual
- General Tightening Torque Table
- Repair procedures
- Power Outlet
- New on site
- Most important about car
