Hyundai Palisade (LX2): Fuel Delivery System / Fuel Line
Repair procedures
| Removal |
|

|

| 1. |
Release the residual pressure in fuel line.
(Refer to Fuel Delivery System - "Release Residual Pressure in Fuel
Line")
|
| 2. |
Switch "OFF" the ignition and disconnect the negative (-) battery terminal.
|
| 3. |
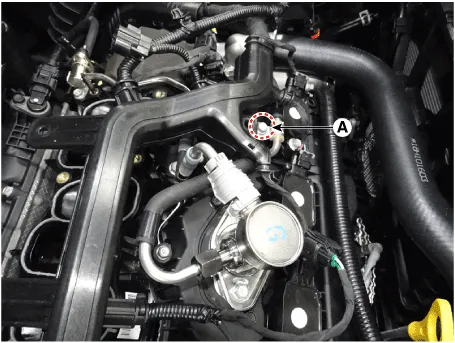
Remove the control wiring harness (A).
|

| 4. |
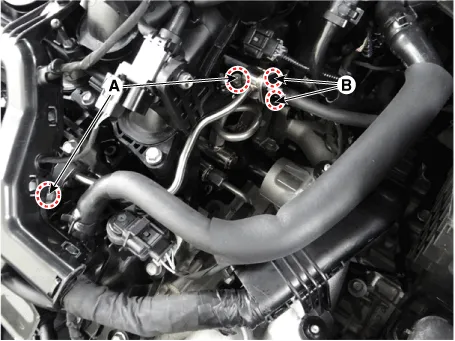
Remove the high pressure fuel pipe mounting bolts (A).
|

| 5. |
Remove the high pressure fuel pipe flange nut (B).
|


| 6. |
Remove the high pressure fuel pipe (A).
|

| 1. |
Release the residual pressure in fuel line.
(Refer to Fuel Delivery System - "Release Residual Pressure in Fuel
Line")
|
| 2. |
Switch "OFF" the ignition and disconnect the negative (-) battery terminal.
|
| 3. |
Remove the air cleaner assembly.
(Refer to Engine Mechanical System - "Air Cleaner")
|
| 4. |
Remove the surge tank.
(Refer to Engine Mechanical System - "Surge Tank")
|
| 5. |
Remove the intake manifold
(Refer to Engine Mechanical System - "Intake Manifold")
|
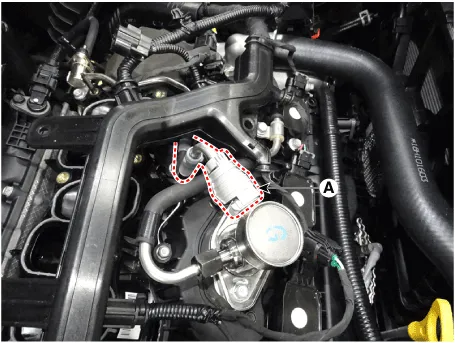
| 6. |
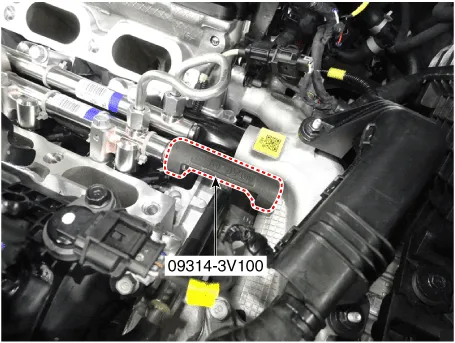
Remove the cross over high pressure fuel pipe (A).
|
| 1. |
Release the residual pressure in fuel line.
(Refer to Fuel Delivery System - "Release Residual Pressure in Fuel
Line")
|
| 2. |
Switch "OFF" the ignition and disconnect the negative (-) battery terminal.
|
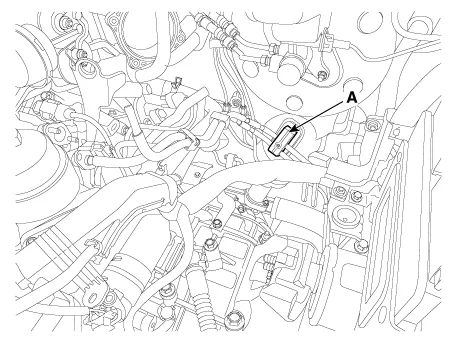
| 3. |
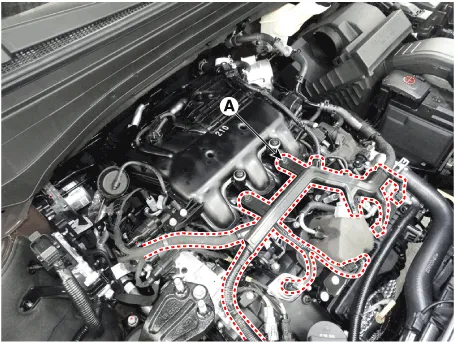
Remove the control wiring harness (A).
|
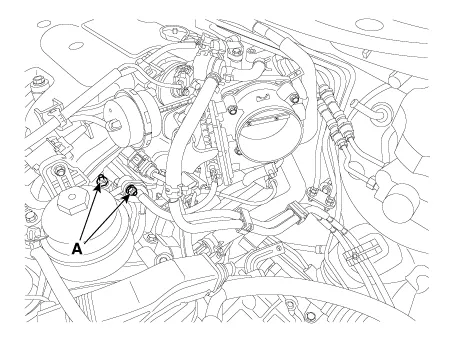
| 4. |
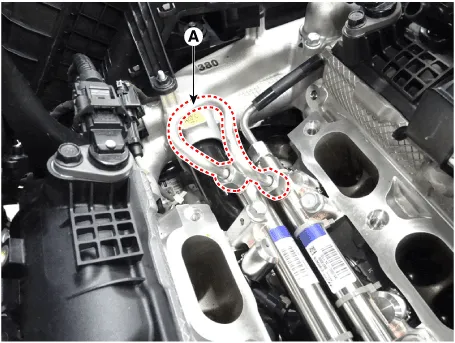
Remove the fuel line mounting bolts (A).
|
| 5. |
Remove the low pressure fuel line mounting nuts (B).
|
| 6. |
Remove the low pressure fuel line (A).
|
| 1. |
Release the residual pressure in fuel line.
(Refer to Fuel Delivery System - "Release Residual Pressure in Fuel
Line")
|
| 2. |
Turn ignition switch OFF and disconnect the negative (-) battery terminal.
|
| 3. |
Remove the air cleaner assembly.
(Refer to Engine Mechanical System - "Air Cleaner")
|
| 4. |
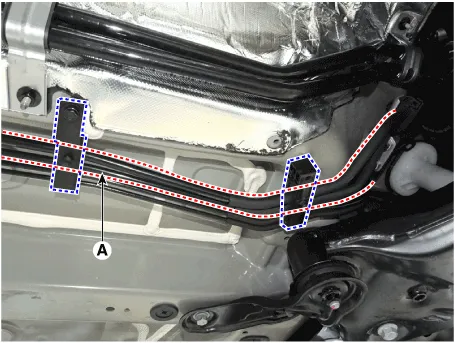
Remove the low fuel line (A) after loosening the mounting nuts.
|
| 5. |
Disconnect the vapor hose (B).
|
| 6. |
Remove the fuel line fixing clip (A).
|
| 7. |
Lift the vehicle.
|
| 8. |
Remove the fuel line fixing clip (A).
|
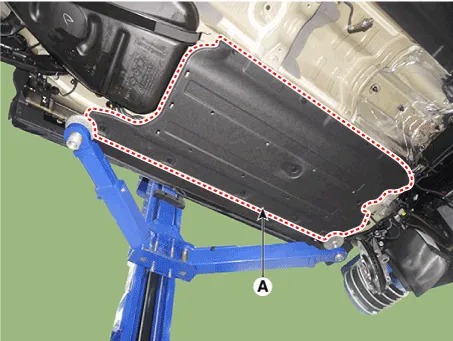
| 9. |
Remove the fuel tank.
(Refer to Fuel Delivery System - "Fuel Tank")
|
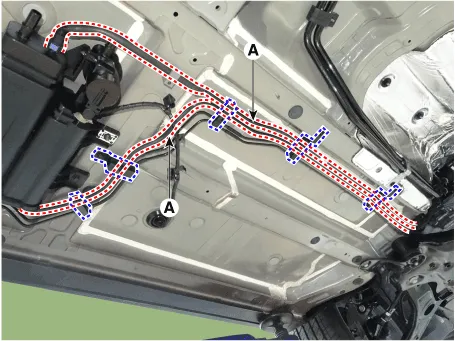
| 10. |
Open the vapor tube and fuel feed line fixing clip (A) to using driver.
|

| Installation |
| 1. |
Install in the reverse order of removal.
|
| Inspection |
| 1. |
Visually check the fuel lines for cracks, leakage, loose connections,
deformation or tank band looseness.
|
Repair procedures Removal 1. Remove the fuel pump. (Refer to Fuel Delivery System - "Fuel Pump") 2.
Repair procedures Removal 1. Turn the ignition switch OFF and disconnect the battery negative (-) cable. 2.
Other information:
Hyundai Palisade (LX2) 2020-2026 Service Manual: Rear Heater Unit
Components and components location Component Location 1. Rear Heater & A/C Unit Repair procedures Replacement • Be careful not to damage the parts located under the vehicle
Hyundai Palisade (LX2) 2020-2026 Service Manual: Description and operation
Description Blind-Spot Radar is a system that measures the relative speed and distance from the following vehicles by using two electromagnetic wave radar sensors attached to the rear bumper, and detects any vehicle within the blind spot zone and gives off alarm (visual and auditory).
Categories
- Manuals Home
- Hyundai Palisade Owners Manual
- Hyundai Palisade Service Manual
- Lift and Support Points
- Power Outlet
- Emergency liftgate safety release
- New on site
- Most important about car
