Hyundai Palisade (LX2): Engine And Transaxle Assembly / Engine Mounting
Components and components location
| Components |
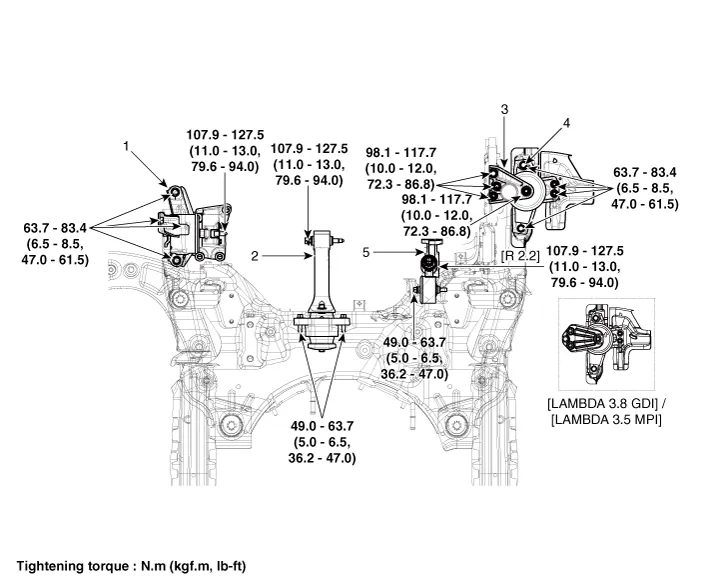
| 1. Transaxle mounting bracket 2. Roll rod bracket 3. Engine mounting support bracket |
4. Engine mounting bracket 5. Roll rod upper bracket |

Repair procedures
| Removal and Installation |
|

| [Engine mounting bracket] |
| 1. |
Remove the engine room under cover.
(Refer to Engine and Transaxle Assembly - "Engine Room Under Cover")
|
| 2. |
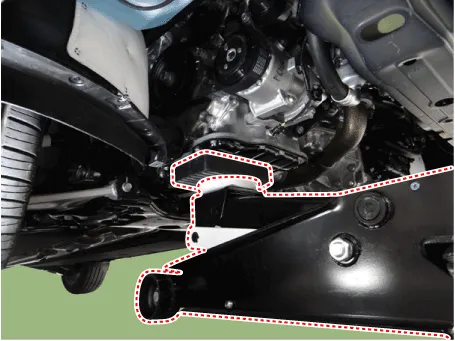
Install the jack to the edge of lower oil pan (A) to support the engine.
|

| 3. |
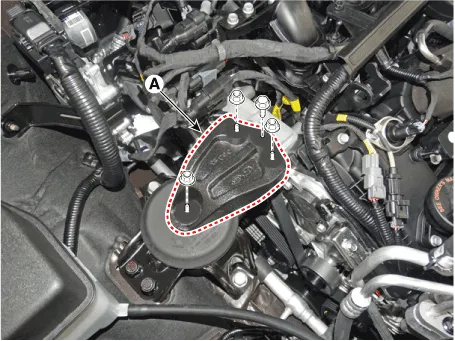
Remove the engine mounting support bracket (A).
|
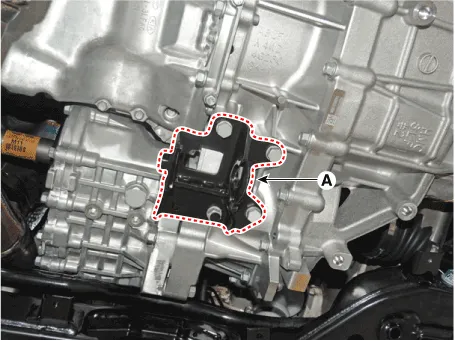
| 4. |
Remove the engine mounting bracket (A).
|

| 5. |
Install in the reverse order of removal.
|
| [Roll rod bracket] |
| 1. |
Remove the engine room under cover.
(Refer to Engine and Transaxle Assembly - "Engine Room Under Cover")
|
| 2. |
Remove the roll rod bracket (A).
|
| 3. |
Remove the roll rod mounting support bracket (A).
|
| 4. |
Install in the reverse order of removal.
|
| [Transaxle Mounting Bracket] |
| 1. |
Disconnect the battery negative terminal.
|
| 2. |
Remove the air duct.
(Refer to Intake and Exhaust System - "Air Cleaner")
|
| 3. |
Disconnect the battery positive terminal.
|
| 4. |
Remove the air cleaner assembly.
(Refer to Intake and Exhaust System - "Air Cleaner")
|
| 5. |
Remove the battery and battery tray.
(Refer to Engine Electrical System - "Battery")
|
| 6. |
Remove the engine control module (ECM).
(Refer to Engine Control / Fuel System - "Engine Control Module (ECM)")
|
| 7. |
Remove the engine room under cover.
(Refer to Engine and Transaxle Assembly - "Engine Room Under Cover")
|
| 8. |
Install jack under the transaxle to support it.
|

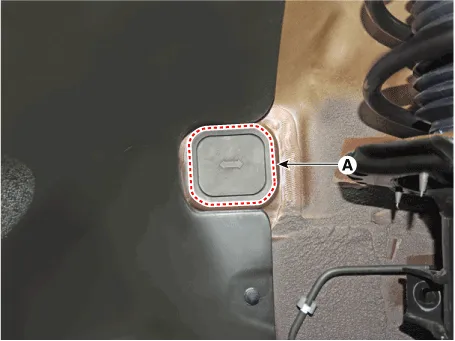
| 9. |
Remove the service cover (A).
|
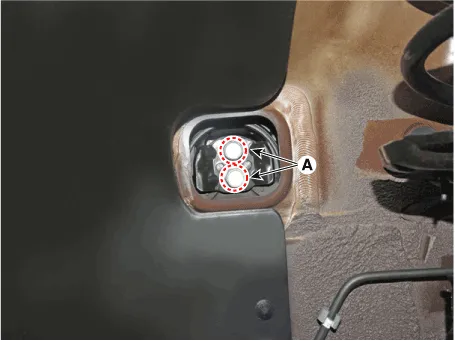
| 10. |
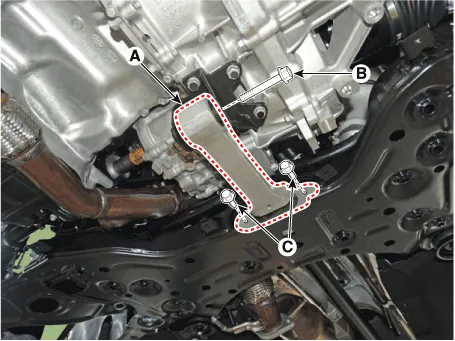
Remove the transaxle support bracket mounting bolts (A).
|
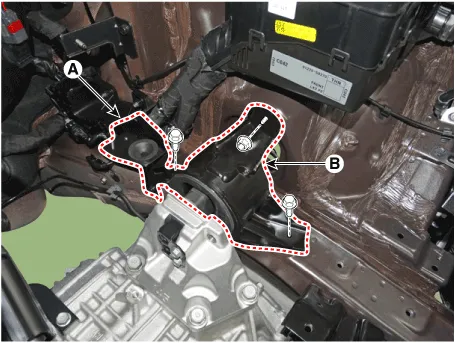
| 11. |
Remove the air cleaner bracket (A).
|
| 12. |
Remove the transaxle mounting bracket (B).
|
| 13. |
Install in the reverse order of removal.
|
Repair procedures Removal and Installation • Be careful not to damage the parts located under the vehicle (floor under cover, fuel filter, fuel tank and canister) when raising the vehicle using the lift.
Repair procedures Removal • Be careful not to damage the parts located under the vehicle (floor under cover, fuel filter, fuel tank and canister) when raising the vehicle using the lift.
Other information:
Hyundai Palisade (LX2) 2020-2026 Service Manual: Compressor
Description and operation Description The compressor is the power unit of the A/C system. It is located on the side of engine block and driven by a V-belt of the engine. The compressor changes low pressure and low temperature refrigerant gas into high pressure and high temperature refrigerant gas.
Hyundai Palisade (LX2) 2020-2026 Service Manual: Cluster Ionizer
Description and operation Description The cluster ionizer makes disinfection and decomposition of bad smell from the air-conditioner or inflow air. And it cleans the inside air of a vehicle. When the ignition switch is ON, the ionizer runs "CLEAN" mode and then "ION" mode, switching between both modes.
Categories
- Manuals Home
- Hyundai Palisade Owners Manual
- Hyundai Palisade Service Manual
- Convenient Features of Your Vehicle
- Resetting the Driver's Seat Memory System
- Scheduled maintenance services
- New on site
- Most important about car
