Hyundai Palisade (LX2): Interior Trim / Cowl Side Trim
Components and components location
| Component Location |

| 1. Cowl side trim |
Repair procedures
| Replacement |
|

|

| 1. |
Remove the front door body side weatherstrip.
|
| 2. |
Remove the front door scuff trim.
(Refer to Interior Trim - "Door Scuff Trim")
|
| 3. |
Remove the hood latch release handle.
(Refer to Hood - "Hood Latch Release Handle")
|
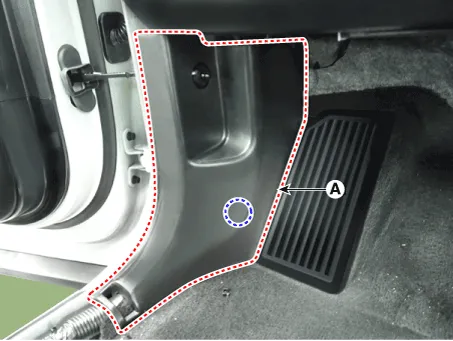
| 4. |
Using a flat-tip screwdriver or remover, remove the cowl side trim (A).
|
| 5. |
To install, reverse removal procedure.
|

Components and components location Component Location 1. Front Door Step Trim 2. Rear Door Step Trim
Components and components location Component Location 1. Front pillar trim
Other information:
Hyundai Palisade (LX2) 2020-2026 Service Manual: Heater Core
Repair procedures Replacement 1. Disconnect the negative (-) battery terminal. 2. Remove the heater and blower assembly. (Refer to Heater - "Heater Unit") 3.
Hyundai Palisade (LX2) 2020-2026 Service Manual: Special service tools
Special Service Tools Tool Name / Number Illustration Description LKA Compensator (09890-3V100) Used for compensating front view camera unit Tolerance Compensation Plate for Surround View Monitoring (09957-CM100)
Categories
- Manuals Home
- Hyundai Palisade Owners Manual
- Hyundai Palisade Service Manual
- Convenient Features of Your Vehicle
- Resetting the Driver's Seat Memory System
- Engine Mechanical System
- New on site
- Most important about car
