
Hyundai Palisade (LX2): Intake And Exhaust System / Air Cleaner
Components and components location
| Components |
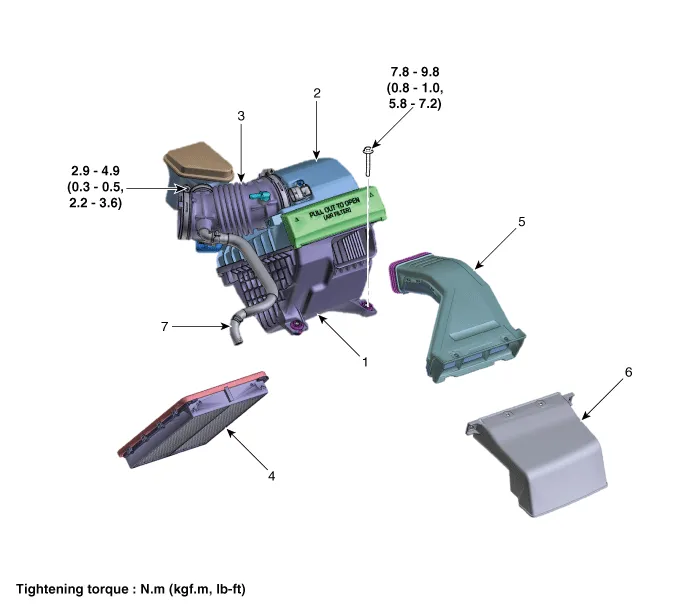
| 1. Air cleaner body 2. Air cleaner cover 3. Air intake hose 4. Air cleaner element |
5. Air duct 6. Air intake shield 7. Breather hose |
Repair procedures
| Removal and Installation |
| 1. |
Remove the engine cover.
(Refer to Engine and Transaxle Assembly - "Engine Cover")
|
| 2. |
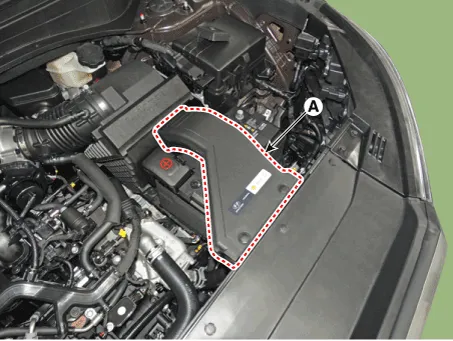
Remove the air duct (A).
|
| 3. |
Disconnect the battery positive terminal.
|
| 4. |
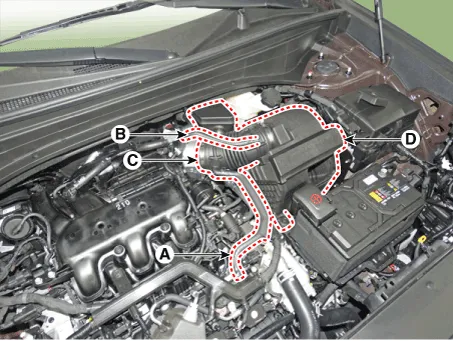
Disconnect the breather hose (A).
|
| 5. |
Disconnect the brake vacuum hose (B).
|
| 6. |
Disconnect the air intake hose (C).
|
| 7. |
Remove the air cleaner assembly (D).
|
| 8. |
Install in the reverse order of removal.
|
| 1. |
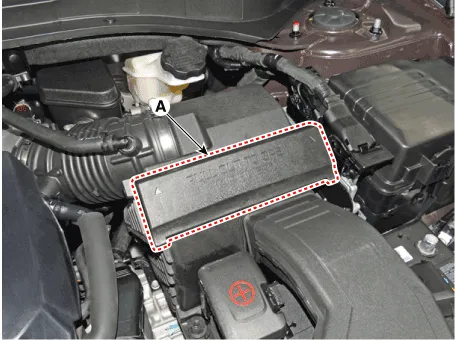
Open the air cleaner element cover (A) by lifting up the air cleaner
element cover handle.
|
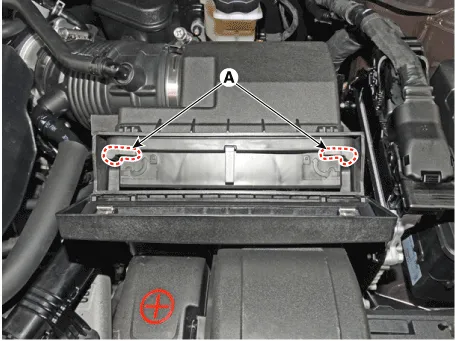
| 2. |
Unlock the air cleaner element camshaft (A) by turning in the direction
of arrow.
|
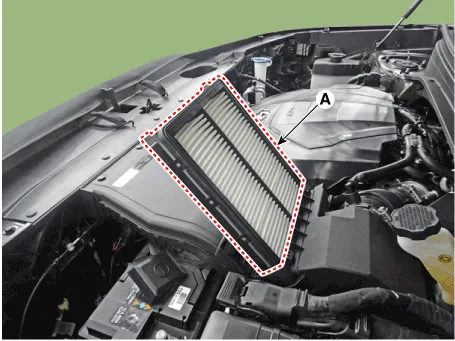
| 3. |
Replace the air cleaner element (A) with a new one.
|

| 4. |
Lock the air cleaner element camshaft and then close the air cleaner
element cover.
|
Components and components location Components 1. Surge tank 2. Surge tank stay 3. Positive crankcase ventilation (PCV) hose Repair procedures Removal and Installation 1.
Other information:
Hyundai Palisade (LX2) 2020-2026 Service Manual: Temperature Control Actuator
Description and operation Description The heater unit includes mode control actuator and temperature control actuator. The temperature control actuator is located at the heater unit. It regulates the temperature by the procedure as follows.
Hyundai Palisade (LX2) 2020-2026 Service Manual: Troubleshooting
Troubleshooting 1) After replacing H/UNIT, always check that the system operates properly. 2) If the failure persists after replacing the H/UNIT, do not replace the unit.
Categories
- Manuals Home
- Hyundai Palisade Owners Manual
- Hyundai Palisade Service Manual
- Lift and Support Points
- Troubleshooting
- Electronic Child Safety Lock System
- New on site
- Most important about car
