Hyundai Palisade (LX2): Brake System / Brake Pedal
Components and components location
| Components |
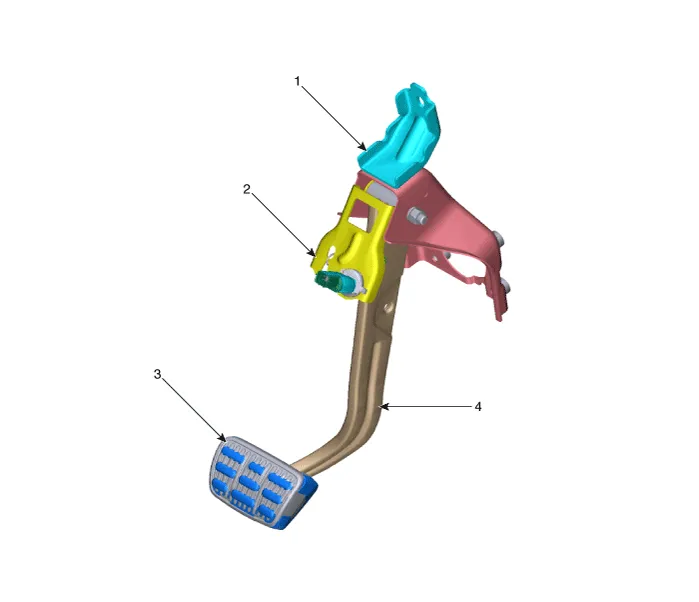
| 1. Brake member assembly 2. Stop lamp switch |
3. Brake pedal arm assembly 4. Brake pedal pad |
Repair procedures
| Removal |
| 1. |
Turn ignition switch OFF and disconnect the negative (-) battery cable.
|
| 2. |
Remove the crash pad lower panel.
(Refer to Body - "Crash Pad Lower Panel")
|
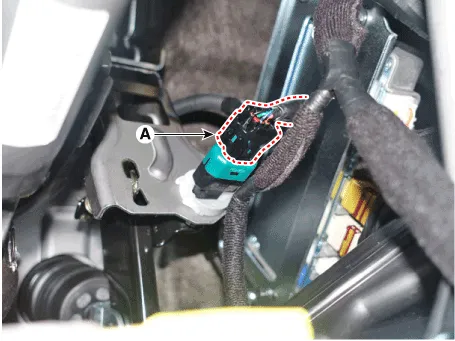
| 3. |
Disconnect the stop lamp switch connector (A).
|
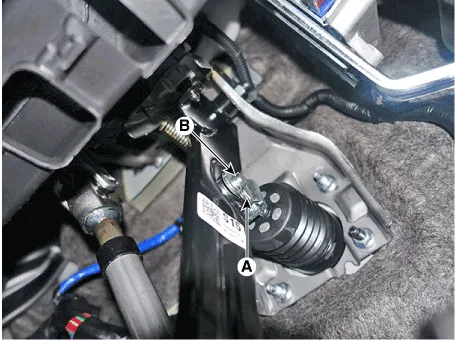
| 4. |
Separate the snap pin (A) and clevis pin (B).
|
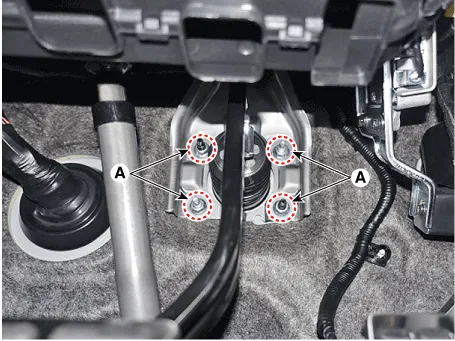
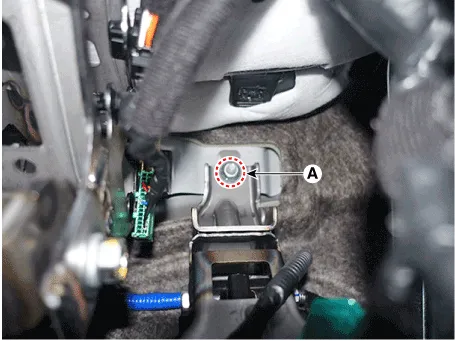
| 5. |
Remove the brake pedal assembly after loosening the mounting nuts (A).
|
| Inspection |
| 1. |
Check the brake pedal for bending or twisting.
|
| 2. |
Check the brake pedal return spring for damage.
|
| 3. |
Check the stop lamp switch.
(Refer to Brake System - "Stop Lamp Switch")
|
| Installation |
| 1. |
To install, reverse the removal procedures.
|

Specifications Specification Fluid Type DOT 3 or DOT 4 Reservoir Quantity (cc) Total A + B + C + D + E + F 460 ± 20 MAX LEVEL A + B + C + D + E 440 ± 20 MIN LEVEL B + C + D + E 165 ± 20 ON LEVEL C + D + E 135 ± 10 PARTIAL LEVEL D Pri : 60 ± 5 D Sec : 50 ± 5 CLUTCH LEVEL F 15 ± 5 Repair procedures Replacement • Be careful not to damage the parts located under the vehicle (floor under cover, fuel filter, fuel tank and canister) when raising the vehicle using the lift.
Components and components location Components 1. Caliper body 2. Pad inner shim 3. Brake pad 4. Pad retainer 5.
Other information:
Hyundai Palisade (LX2) 2020-2026 Service Manual: Components and components location
Component Location 1. Start Stop Button(SSB) 2. FOB key 3. Tailgate open switch 4. Interior antenna 1 5. Interior antenna 2 6. Intergrated Body Control Unit (IBU) 7. Trunk antenna 8. Door handle & door antenna 9.
Hyundai Palisade (LX2) 2020-2026 Service Manual: A/C Pressure Transducer
Description and operation Description The A/C Pressure Transducer (APT) converts the pressure value of high pressure line into voltage value after measuring it. By converted voltage value, engine ECU controls the cooling fan by operating it high speed or low speed.
Categories
- Manuals Home
- Hyundai Palisade Owners Manual
- Hyundai Palisade Service Manual
- Troubleshooting
- General Tightening Torque Table
- Lift and Support Points
- New on site
- Most important about car
