Hyundai Palisade (LX2): Sunroof / Sunroof Assembly
Repair procedures
| Replacement |
| [Front] |
| 1. |
Remove the roof trim assembly.
(Refer to Roof Trim - "Roof Trim Assembly")
|
| 2. |
Remove the front sunroof glass.
(Refer to Sunroof - "Sunroof Glass")
|
| 3. |
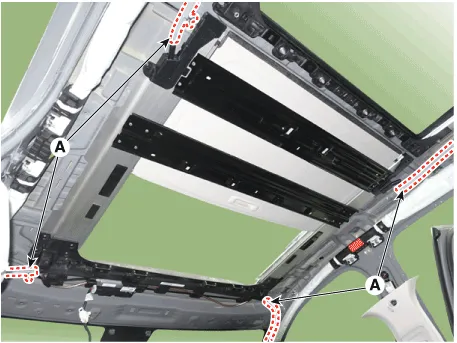
Press the lock pin and remove the drain hose (A).
|
| 4. |
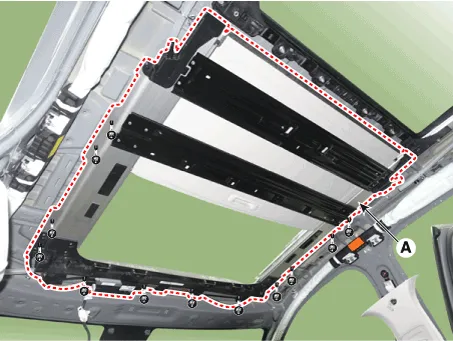
Loosen the mounting nuts and remove the front sunroof assembly (A).
|
| 5. |
Install in the reverse order of removal.
|

| [Rear] |
| 1. |
Remove the roof trim assembly.
(Refer to Roof Trim - "Roof Trim Assembly")
|
| 2. |
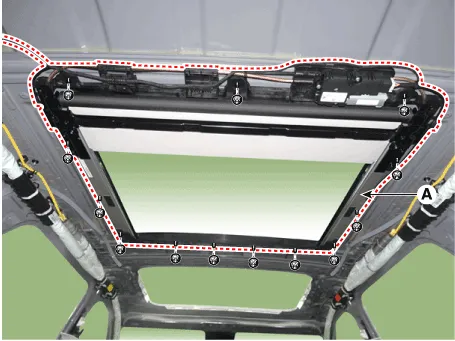
Loosen the mounting nuts and remove the rear sunroof assembly (A).
|
| 3. |
Install in the reverse order of removal.
|
Repair procedures Replacement 1. Completely open the moving glass using the wide sunroof switch. 2. Remove the wide sunroof deflector (A) after loosening the mounting screws located on the front.
Repair procedures Replacement 1. Remove the roof trim assembly. (Refer to Roof Trim - "Roof Trim Assembly") 2.
Other information:
Hyundai Palisade (LX2) 2020-2026 Service Manual: Blower Unit
Components and components location Components Location 1. Blower unit assembly Components 1. Intake seal 2. Intake upper case 3. Intake actuator 4. Intake door 5.
Hyundai Palisade (LX2) 2020-2026 Service Manual: Special service tools
Special Service Tools Tool Name / Number Illustration Description LKA Compensator (09890-3V100) Used for compensating front view camera unit Tolerance Compensation Plate for Surround View Monitoring (09957-CM100)
Categories
- Manuals Home
- Hyundai Palisade Owners Manual
- Hyundai Palisade Service Manual
- Troubleshooting
- Body (Interior and Exterior)
- PTG Spindle
- New on site
- Most important about car
