Hyundai Palisade (LX2): Rear Door / Rear Door Window Glass
Components and components location
| Component Location |
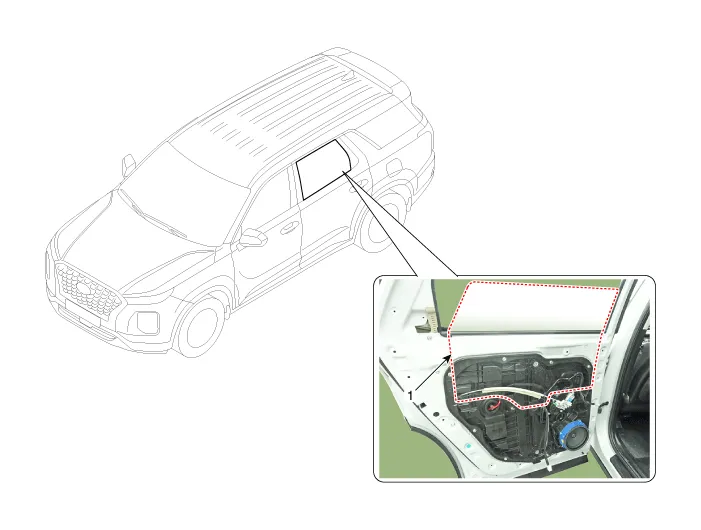
| 1. Rear door window glass |
Repair procedures
| Replacement |
| 1. |
Remove the rear door trim.
(Refer to Rear Door - "Rear Door Trim")
|
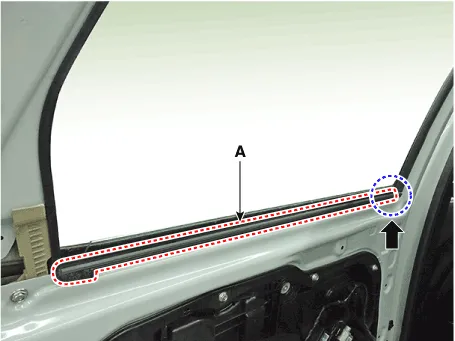
| 2. |
Using a remover and separate the rear door belt outside weatherstrip
(A).
|

| 3. |
Remove the rear door belt inside weatherstrip (A).
|
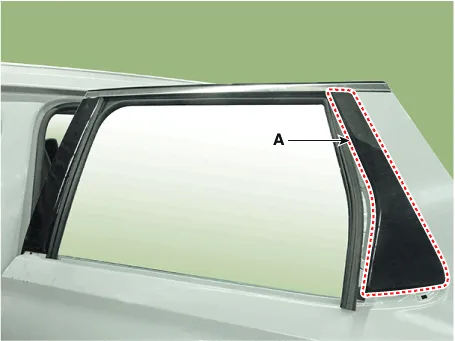
| 4. |
Using a remover and remove the rear door delta molding (A).
|
| 5. |
Unscrew the rear door channel mounting nut and bolt loosely.
|
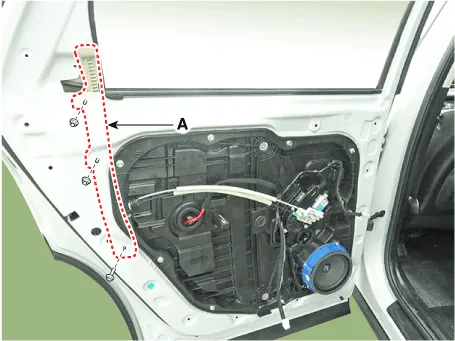
| 6. |
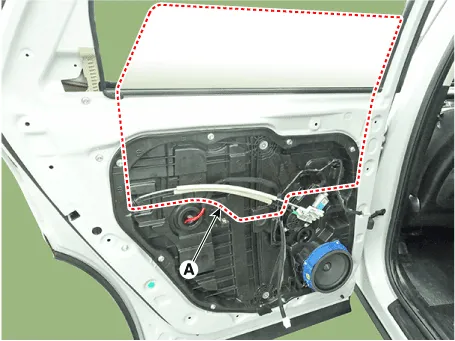
Remove the plug hole (A).
|

| 7. |
By operating the power window switch, pull down until the glass mounting
bolt on plug hole is visible.
|

| 8. |
Loosen the mounting bolt and then pull out the rear door window glass
(A) by tilting it sideways.
|
| 9. |
To install, reverse removal procedure.
|

Repair procedures Replacement 1. Remove the rear door trim. (Refer to Rear Door - "Rear Door Trim") 2.
Components and components location Component Location 1. Rear door module Repair procedures Replacement 1.
Other information:
Hyundai Palisade (LX2) 2020-2026 Service Manual: PTC Heater (Diesel only)
Description and operation Description The PTC (Positive Temperature Coefficient) heater is installed at the exit or the backside of the heater core. The PTC heater is an electric heater using a PTC element as an auxiliary heating device that supplements deficiency of interior heat source in highly effective diesel engi
Hyundai Palisade (LX2) 2020-2026 Service Manual: Schematic diagrams
System Block Diagram Component Parts And Function Outline Component part Function Vehicle-speed sensor, ESP/ABS Control Module Converts vehicle speed to pulse. ECM Receives signals from sensor and control switches.
Categories
- Manuals Home
- Hyundai Palisade Owners Manual
- Hyundai Palisade Service Manual
- Scheduled maintenance services
- Lift and Support Points
- General Tightening Torque Table
- New on site
- Most important about car
