Hyundai Palisade (LX2): Rear Door / Rear Door Latch
Components and components location
| Component Location |
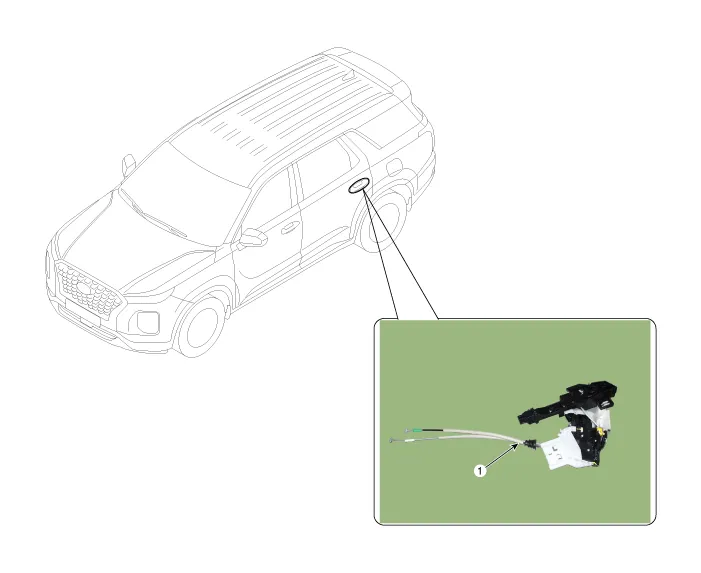
| 1. Rear door latch |
Repair procedures
| Replacement |
|

|

| 1. |
Remove the rear door module.
(Refer to Rear Door - "Rear door module")
|
| 2. |
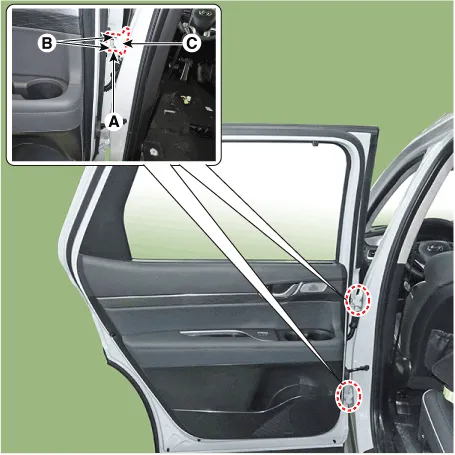
Remove the rear door inside handle case (A).
|
| 3. |
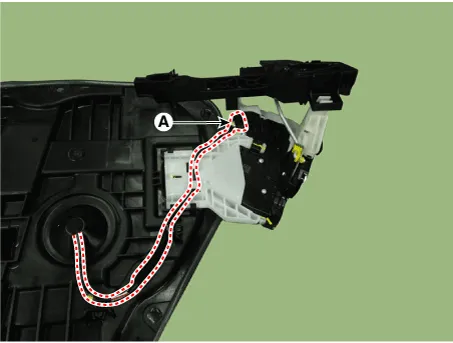
Separate the rear door outside handle base connector and wiring harness
(A).
|
| 4. |
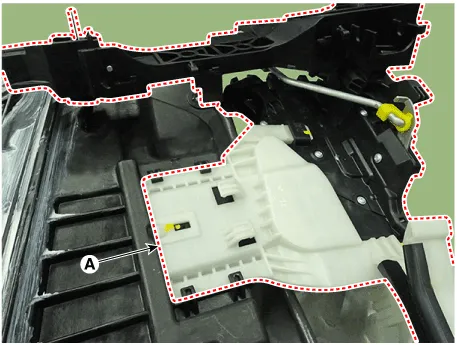
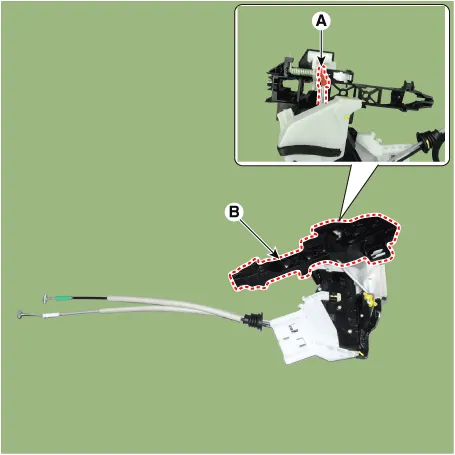
Press the lock pin and remove the rear door latch assembly (A).
|
| 5. |
Separate the rod (A) and remove the rear door outside handle base (B).
|
| 6. |
To install, reverse removal procedure.
|

Components and components location Component Location 1. Rear door outside handle Repair procedures Replacement 1.
Repair procedures Replacement 1. Pull down the rear door window glass to the lowest level by pressing the power window glass switch.
Other information:
Hyundai Palisade (LX2) 2020-2026 Service Manual: Heater Core
Repair procedures Replacement 1. Disconnect the negative (-) battery terminal. 2. Remove the heater and blower assembly. (Refer to Heater - "Heater Unit") 3.
Hyundai Palisade (LX2) 2020-2026 Service Manual: Cruise Control (CC) Switch
Components and components location Components 1. Remote control switch (Audio swtich) 2. Remote control switch (Cruise control switch) Schematic diagrams Circuit Diagram Repair procedures Removal 1.
Categories
- Manuals Home
- Hyundai Palisade Owners Manual
- Hyundai Palisade Service Manual
- Scheduled maintenance services
- General Tightening Torque Table
- Automatic Transaxle System (A8LF1)
- New on site
- Most important about car
