Hyundai Palisade (LX2): Floor Console / Rear Console Cover
Components and components location
| Component Location |
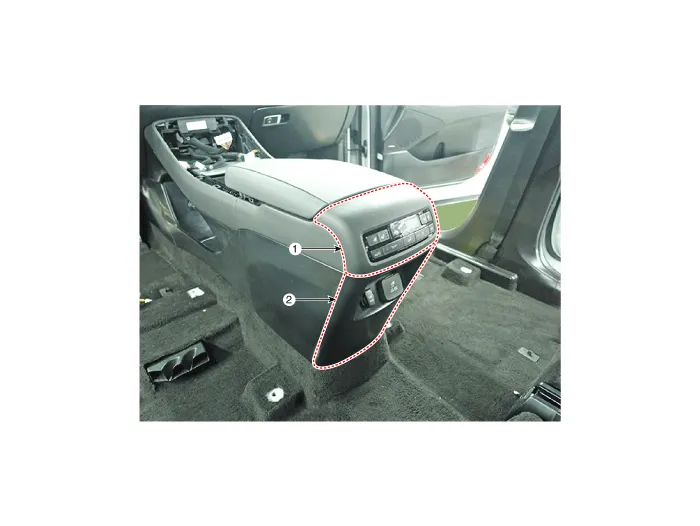
| 1. Rear console upper cover |
2. Rear console under cover |
Repair procedures
| Replacement |
|

|

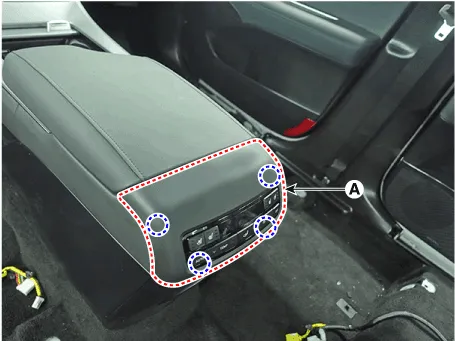
| 1. |
Using a flat-tip screwdriver or remover and remove the rear console
upper cover (A).
|
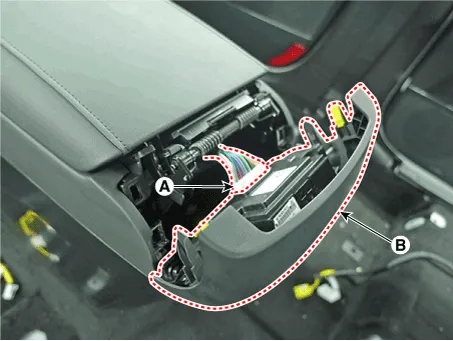
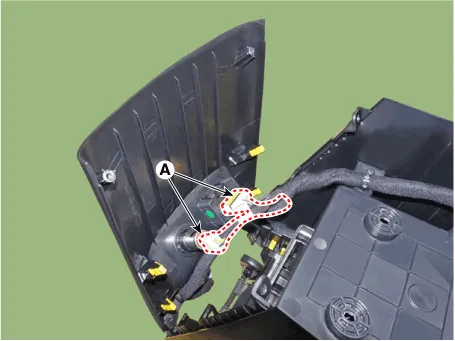
| 2. |
Separate the rear console upper cover connector (A) and remove the rear
console upper cover (B).
|
| 3. |
To install, reverse removal procedure.
|

|

|

| 1. |
Remove the rear console assembly.
(Refer to Floor console - "Floor console assembly")
|
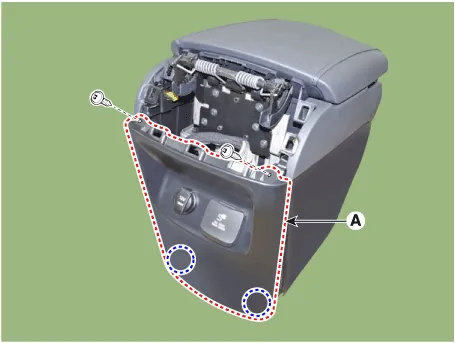
| 2. |
Loosen the mounting screws and remove the rear console under cover (A).
|
| 3. |
Press the lock pin and separate the connector (A).
|
| 4. |
To install, reverse removal procedure.
|

Components and components location Component Location 1. Front console assembly 2. Rear console assembly Repair procedures Replacement • When removing with a flat-tip screwdriver or remover, wrap protective tape around the tools to prevent damage to components.
Components and components location Component Location 1. Console armrest Repair procedures Replacement • When removing with a flat-tip screwdriver or remover, wrap protective tape around the tools to prevent damage to components.
Other information:
Hyundai Palisade (LX2) 2020-2026 Service Manual: Repair procedures
Variant Coding When you need variant coding: – Replace Front View Camera with a new one ※ EOL Variant Coding and calibration required for new replacement Front View Camera Variant Coding
Hyundai Palisade (LX2) 2020-2026 Service Manual: Description and operation
Description The smart cruise control system allows a driver to program the vehicle to control the speed and following distance by detecting the vehicle ahead without depressing the brake pedal or the accelerator pedal. 1.
Categories
- Manuals Home
- Hyundai Palisade Owners Manual
- Hyundai Palisade Service Manual
- Electrochromatic Mirror (ECM) with homelink system
- Rear Heater Unit
- Emergency liftgate safety release
- New on site
- Most important about car
