Hyundai Palisade (LX2): Intake And Exhaust System / Muffler
Components and components location
| Components |
[2WD]

| 1. Front muffler 2. Catalytic converter & Center muffler assembly 3. Rear muffler |
4. Gasket 5. Hanger |
[AWD]

| 1. Front muffler 2. Catalytic converter & Center muffler assembly 3. Rear muffler |
4. Gasket 5. Hanger |
Repair procedures
| Removal and Installation |
|

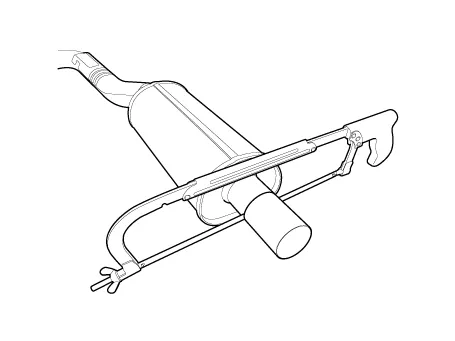
Front Muffler
| 1. |
Remove the engine room under cover.
(Refer to Engine and Transaxle Assembly - "Engine Room Under Cover")
|
| 2. |
Remove the roll rod bracket.
(Refer to Engine and Transaxle Assembly - "Engine Mounting")
|
| 3. |
Remove the sub frame.
(Refer to Suspension System - "Sub Frame")
|
| 4. |
Remove the front muffler (A).
|
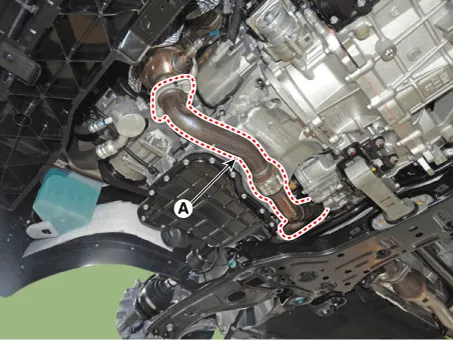

| 5. |
Install in the reverse order of removal.
|

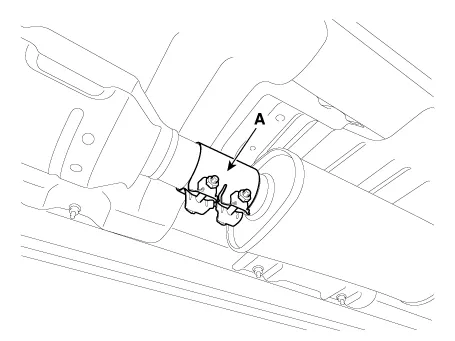
Catalytic converter & Center Muffler Assembly
| 1. |
Remove the catalytic converter & center muffler assembly (A).
|
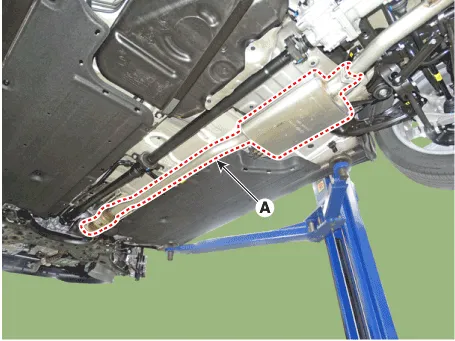
| 2. |
Install in the reverse order of removal.
|

Rear Muffler
| 1. |
Remove the rear muffler (A).
|
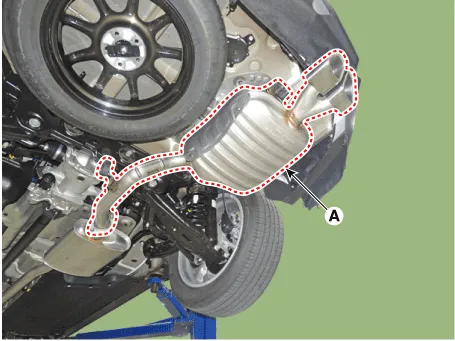
| 2. |
Install in the reverse order of removal.
|

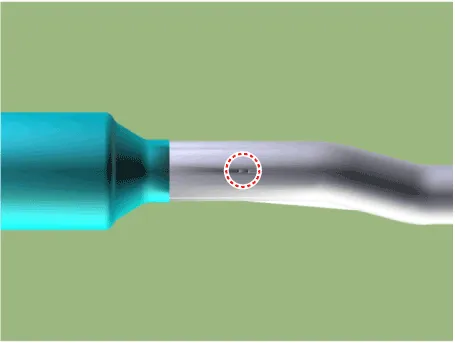
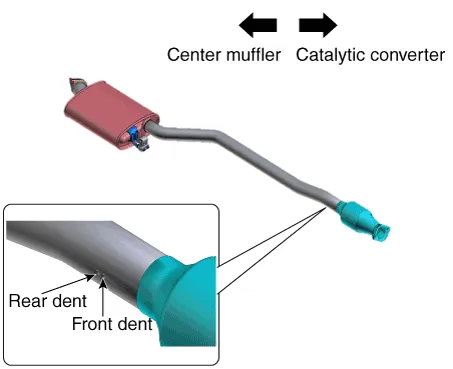
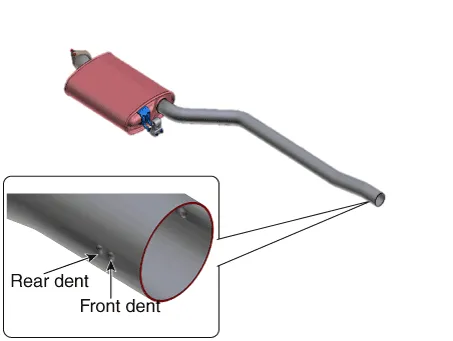
Replacement procedure of catalytic converter & center muffler assembly using
clamp
Under warranty : Replace the catalytic converter & center muffler assembly.
Out of warranty : Catalytic converters and center muffler assemblies can be
replaced in the following procedure:
| 1. |
Check if the clamping part of the catalytic converter & center muffler
assembly is damaged or deformed.
If the muffler is too corroded to clamp, replace the catalytic converter
& center muffler assembly.
|
| 2. |
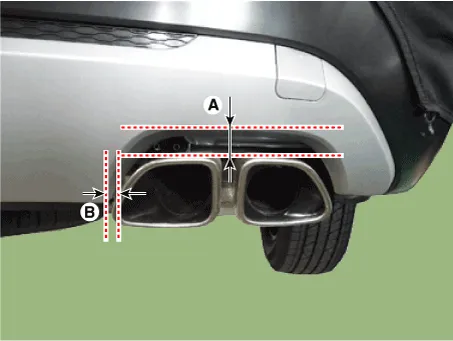
Record the gap (A, B) between the tail pipe and the rear bumper.
|
| 3. |
Remove the catalytic converter & center muffler assembly (A).
|

| 4. |
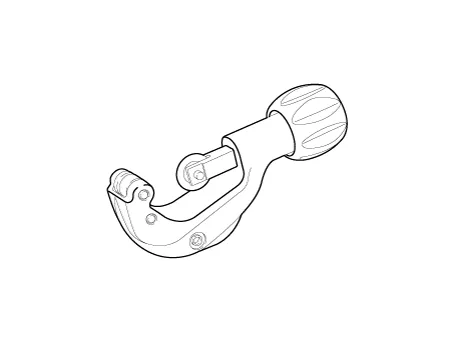
Cut the catalytic converter & center muffler assembly as in the instruction
below.
[Replacement muffler]
|


| 5. |
Install the center muffler.
|


Components and components location Components 1. LH Exhaust manifold gasket 2. LH Exhaust manifold 3. LH Heat protector 4.
Other information:
Hyundai Palisade (LX2) 2020-2025 Service Manual: Blower Unit
Components and components location Components Location 1. Blower unit assembly Components 1. Intake seal 2. Intake upper case 3. Intake actuator 4. Intake door 5.
Hyundai Palisade (LX2) 2020-2025 Service Manual: Parking/View Switch
Repair procedures Removal 1. Disconnect the negative (-) battery terminal. 2. Remove the floor console upper cover. (Refer to Body - "Floor Console Assembly") 3.
Categories
- Manuals Home
- Hyundai Palisade Owners Manual
- Hyundai Palisade Service Manual
- Rear Heater Unit
- Body Electrical System
- Engine Mechanical System
- New on site
- Most important about car

Copyright © 2025 www.hpalisadelx.com - 0.0154