Hyundai Palisade (LX2): Intake And Exhaust System / Exhaust Manifold
Hyundai Palisade (LX2) 2020-2026 Service Manual / Engine Mechanical System / Intake And Exhaust System / Exhaust Manifold
Components and components location
| Components |
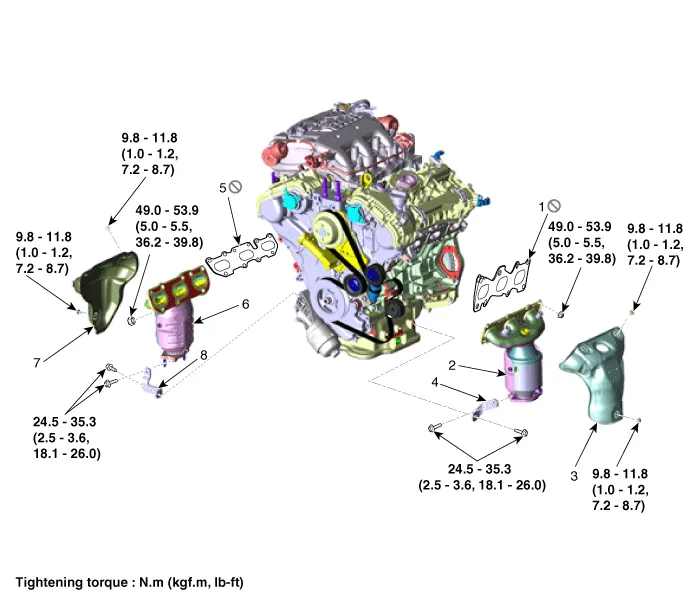
| 1. LH Exhaust manifold gasket 2. LH Exhaust manifold 3. LH Heat protector 4. LH Exhaust manifold stay |
5. RH Exhaust manifold gasket 6. RH Exhaust manifold 7. RH Heat protector 8. RH Exhaust manifold stay |
Repair procedures
| Removal and Installation |
|

[LH Exhaust Manifold]
| 1. |
Disconnect the battery negative terminal.
|
| 2. |
Remove the engine cover.
(Refer to Engine and Transaxle Assembly - "Engine Cover")
|
| 3. |
Remove the engine room under cover.
(Refer to Engine and Transaxle Assembly - "Engine Room Under Cover")
|
| 4. |
Remove the front muffler.
(Refer to Intake And Exhaust System - "Muffler")
|
| 5. |
Remove the oil level gauge.
(Refer to Lubrication System - "Oil Level Gauge & Pipe")
|
| 6. |
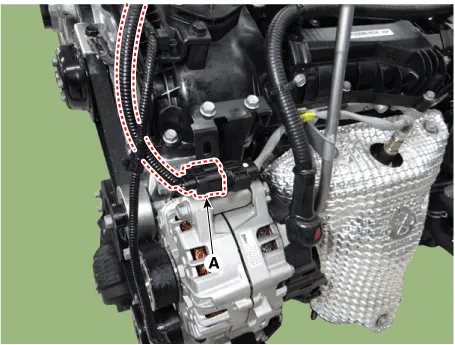
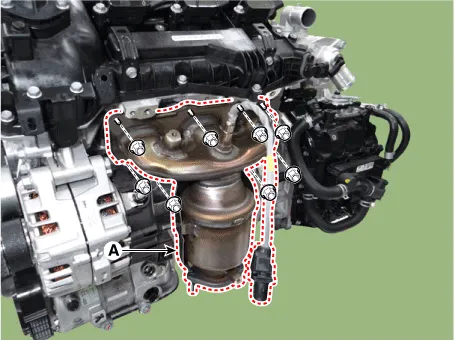
Disconnect the LH front oxygen sensor (HO2S) connector (A).
|
| 7. |
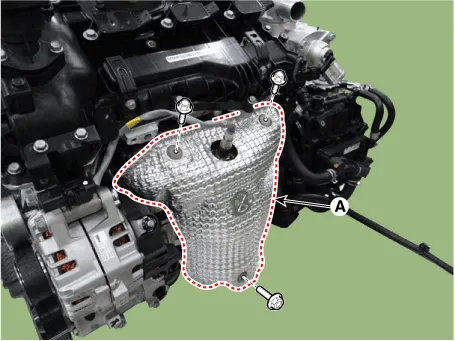
Remove the LH exhaust manifold heat protector (A).
|
| 8. |
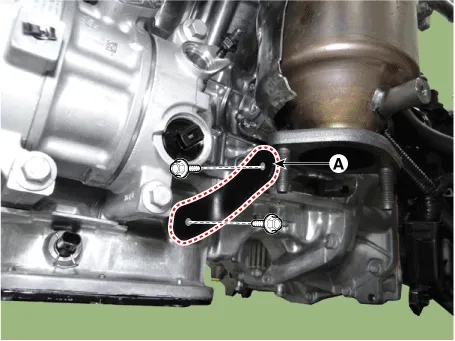
Disconnect the LH rear oxygen sensor (HO2S) connector (A).
|

| 9. |
Remove the LH exhaust manifold stay (A).
|
| 10. |
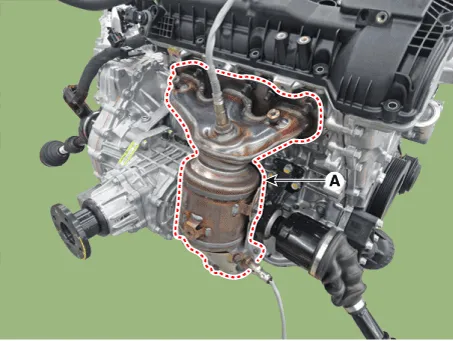
Remove the LH exhaust manifold (A).
|
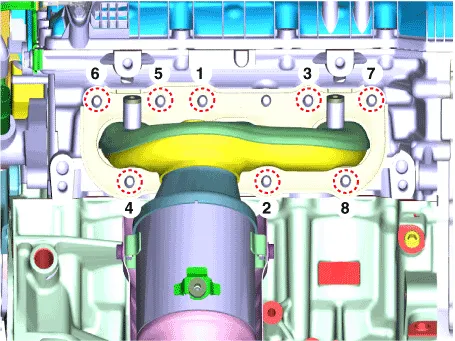
| 11. |
Install in the reverse order of removal.
|


[RH Exhaust Manifold]
| 12. |
Disconnect the battery negative terminal.
|
| 13. |
Remove the engine cover.
(Refer to Engine and Transaxle Assembly - "Engine Cover")
|
| 14. |
Remove the engine room under cover.
(Refer to Engine and Transaxle Assembly - "Engine Room Under Cover")
|
| 15. |
Remove the front muffler.
(Refer to Intake And Exhaust System - "Muffler")
|
| 16. |
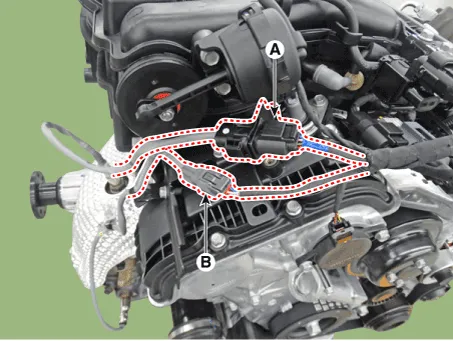
Disconnect the RH front / rear oxygen sensor (HO2S) connectors (A).
|
| 17. |
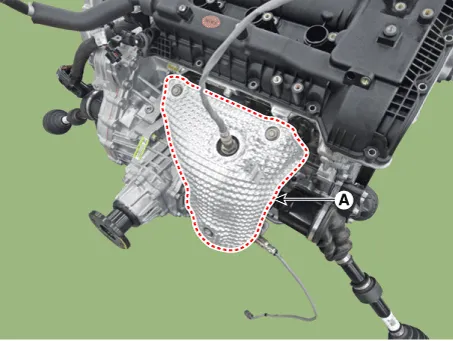
Remove the RH exhaust manifold heat protector (A).
|
| 18. |
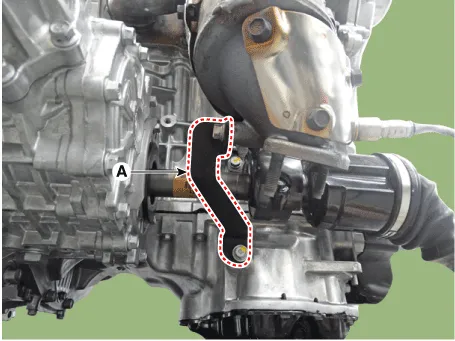
Remove the RH exhaust manifold stay (A).
|
| 19. |
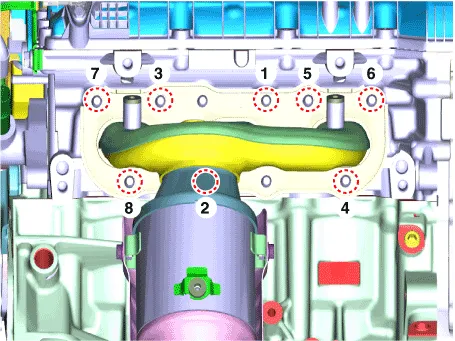
Remove the RH exhaust manifold (A).
|
| 20. |
Install in the reverse order of removal.
|

Components and components location Components 1. Intake manifold 2. Intake manifold gasket Repair procedures Removal and Installation 1.
Components and components location Components [2WD] 1. Front muffler 2. Catalytic converter & Center muffler assembly 3.
Other information:
Hyundai Palisade (LX2) 2020-2026 Service Manual: Description and operation
Hyundai Palisade (LX2) 2020-2026 Service Manual: Warning Indicator
Components and components location Components 1. Warning indicator 2. SVM camera Repair procedures Removal 1. Disconnect the negative (-) battery terminal. 2.
Categories
- Manuals Home
- Hyundai Palisade Owners Manual
- Hyundai Palisade Service Manual
- General Tightening Torque Table
- Engine Mechanical System
- Scheduled maintenance services
- New on site
- Most important about car

Copyright © 2026 www.hpalisadelx.com - 0.0169