
Hyundai Palisade (LX2): Timing System / Timing Chain
Repair procedures
| Removal |
|

| 1. |
Set No.1 cylinder to TDC/compression.
|
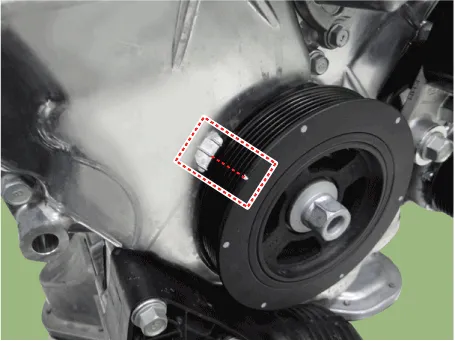
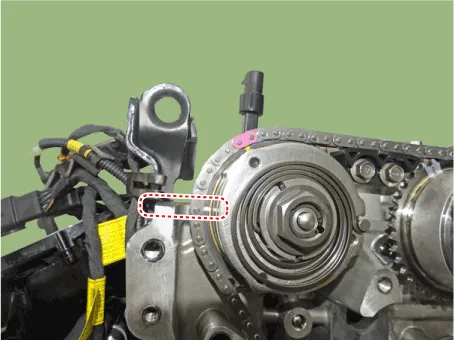

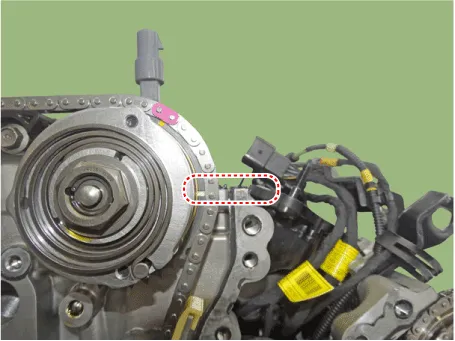
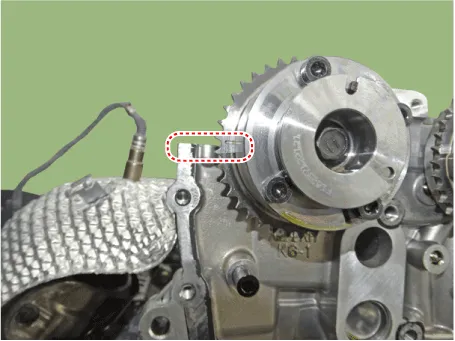

| 2. |
Remove the timing chain cover.
(Refer to Timing System - "Timing Chain Cover")
[RH]
[LH]
|


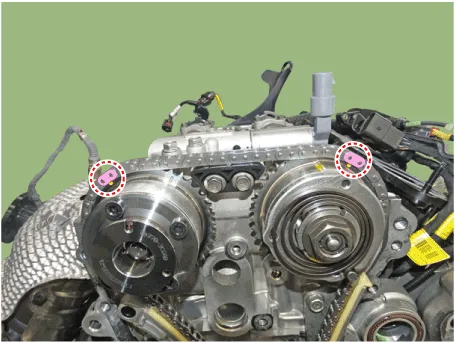
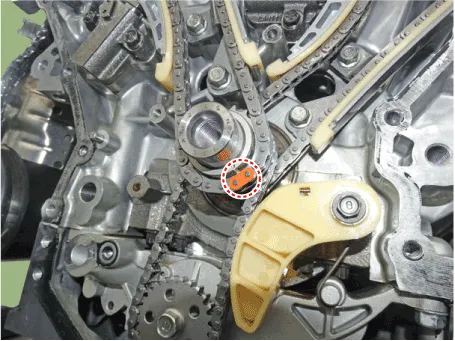
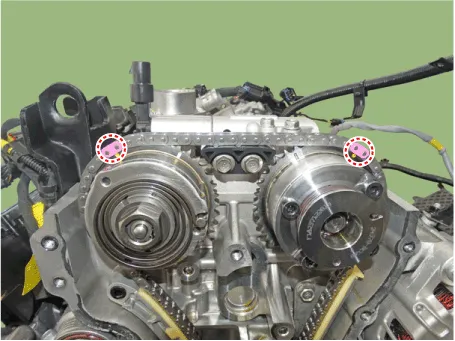

| 3. |
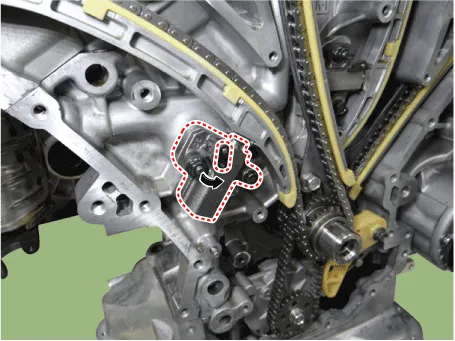
Release the ratchet by pulling the link down using a thin rod. Compress
the piston and then insert a stopper pin into the hole on the ratchet
to hold the compressed piston.
|
| 4. |
Remove the RH timing chain cam to cam guide (A).
|

| 5. |
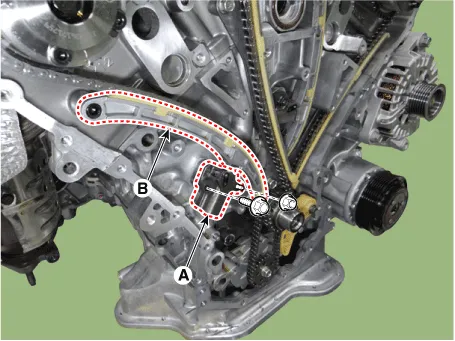
Remove the RH timing chain auto tensioner (A) and the RH timing chain
tensioner arm (B).
|
| 6. |
Remove the RH timing chain guide (A).
|

| 7. |
Remove the RH timing chain (A).
|

| 8. |
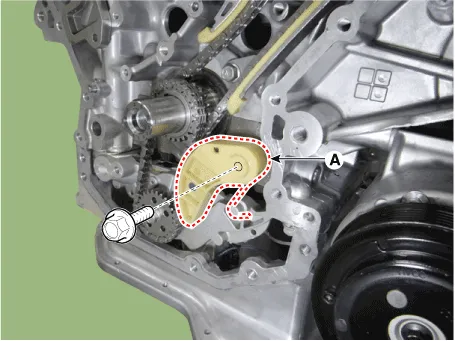
Remove the oil pump chain tensioner assembly (A).
|
| 9. |
Remove the crankshaft chain sprocket (A) (RH camshaft drive).
|
| 10. |
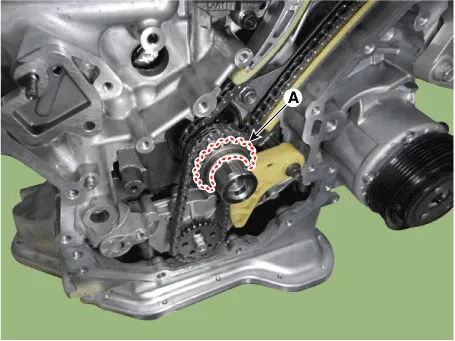
Remove the oil pump chain sprocket (A) and oil pump chain (B).
|

| 11. |
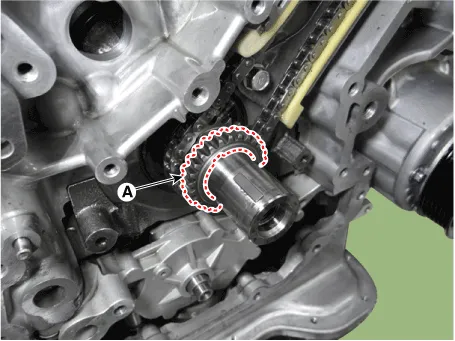
Remove the crankshaft sprocket (A) (Oil pump drive).
|
| 12. |
Release the ratchet by pulling the link down using a thin rod. Compress
the piston and then insert a stopper pin into the hole on the ratchet
to hold the compressed piston.
|

| 13. |
Remove the LH timing chain cam to cam guide (A).
|
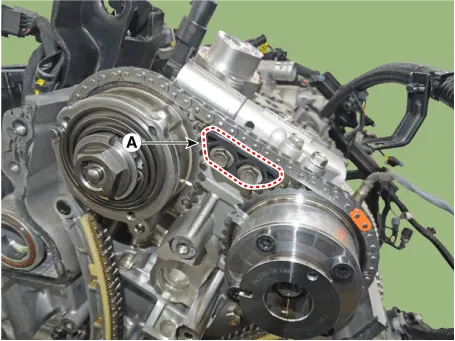
| 14. |
Remove the LH timing chain auto tensioner (A).
|

| 15. |
Remove the LH timing chain tensioner arm (A).
|
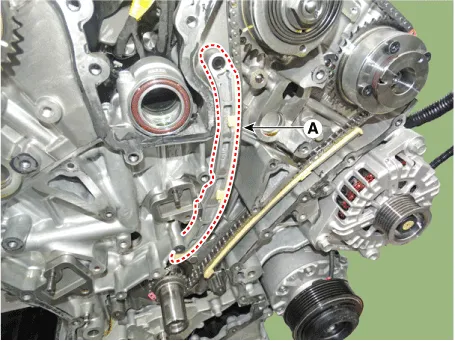
| 16. |
Remove the LH timing chain guide (A).
|
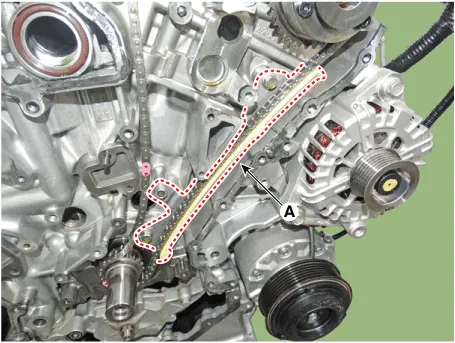
| 17. |
Remove the LH timing chain (A).
|
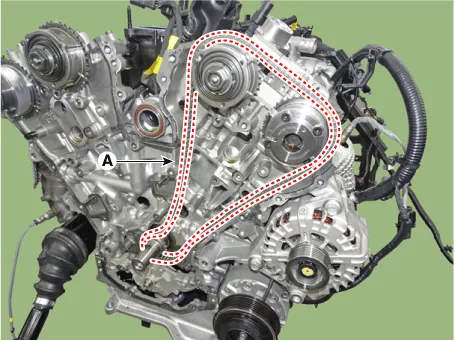
| 18. |
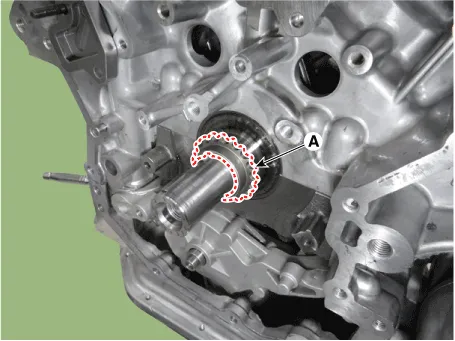
Remove the crankshaft chain sprocket (A). (LH camshaft drive).
|
| 19. |
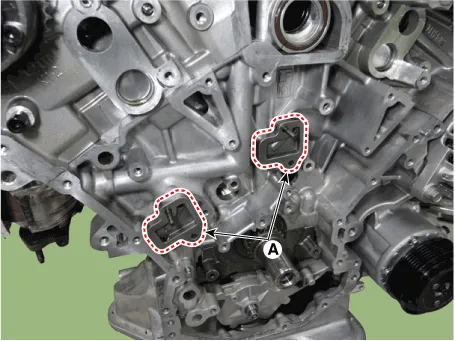
Remove the tensioner adapter assembly (A).
|
| Inspection |
| 1. |
Check the camshaft sprocket and crankshaft sprocket for abnormal wear,
cracks, or damage. Replace as necessary.
|
| 2. |
Inspect the tensioner arm and chain guide for abnormal wear, cracks,
or damage. Replace as necessary.
|
| 3. |
Check that the tensioner piston moves smoothly when the ratchet pawl
is released with thin rod.
|
| Installation |
| 1. |
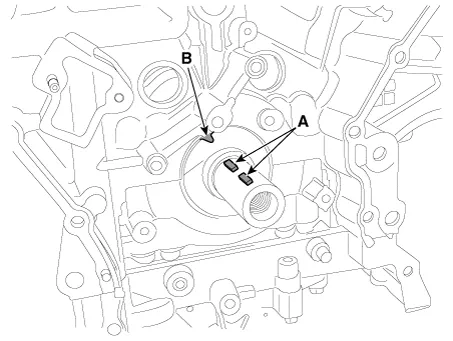
The key (A) of crankshaft should be aligned with the timing mark (B)
of block. As a result of this, the piston of No.1 cylinder is placed
at the top dead center on compression stroke.
|
| 2. |
Install the tensioner adapter assembly (A).
|

| 3. |
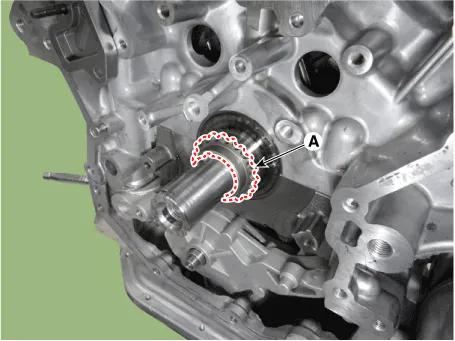
Install the crankshaft chain sprocket (A). (LH camshaft drive).
|
| 4. |
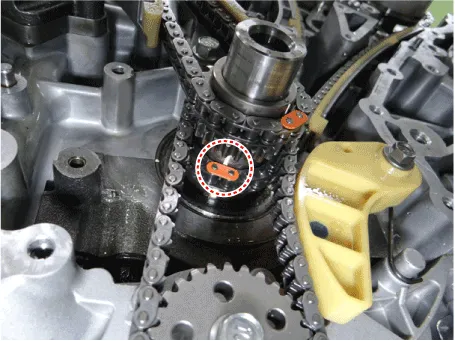
Install the LH timing chain (A).
|



| 5. |
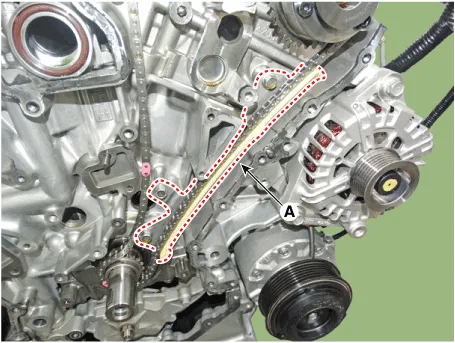
Install the LH timing chain guide (A).
|
| 6. |
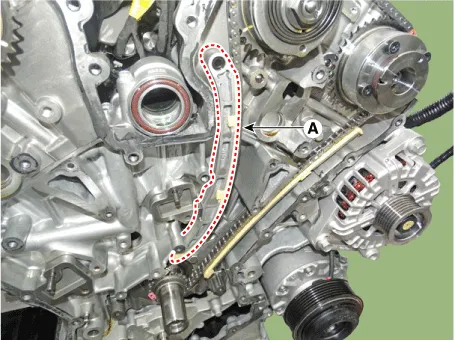
Install the LH timing chain tensioner arm (A).
|
| 7. |
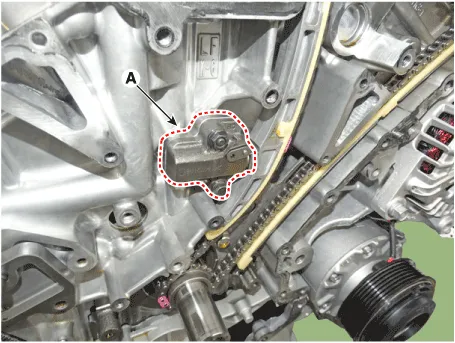
Install the LH timing chain auto tensioner (A).
|
| 8. |
Install the LH timing chain cam to cam guide (A).
|
| 9. |
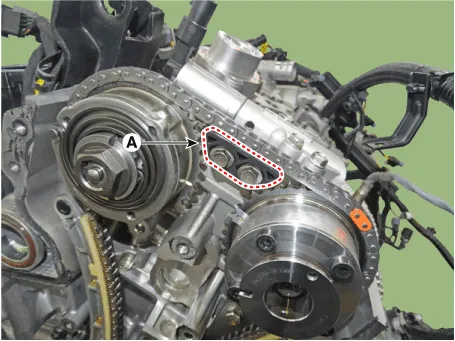
Pull out the pins (A) of LH timing chain auto tensioner.
|

| 10. |
Install the crankshaft sprocket (A) (Oil pump drive).
|
| 11. |
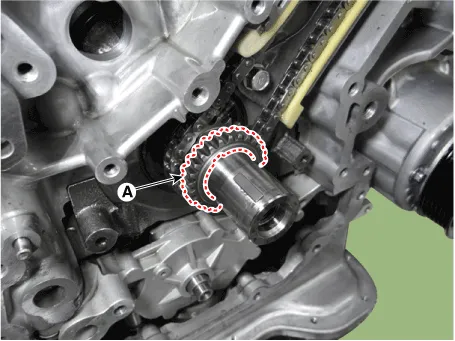
Install the oil pump chain sprocket (A) and oil pump chain (B).
|

| 12. |
Install the oil pump chain tensioner assembly (A).
|

| 13. |
Install the camshaft chain sprocket (A). (RH camshaft drive)
|
| 14. |
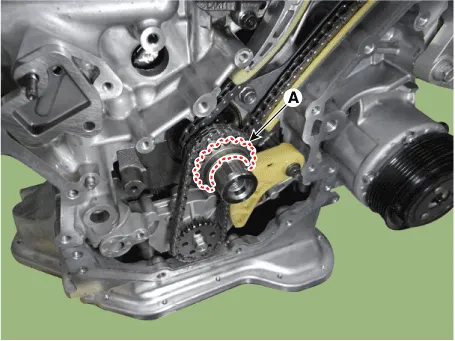
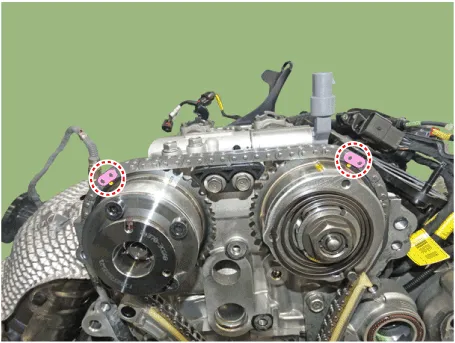
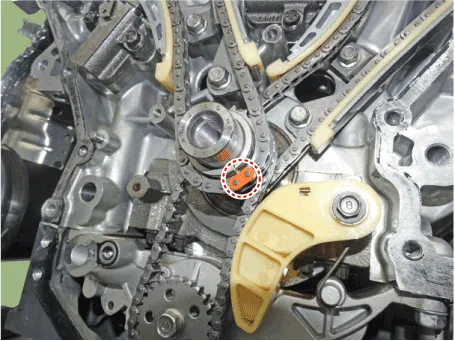
Install the RH timing chain (A).
|

| 15. |
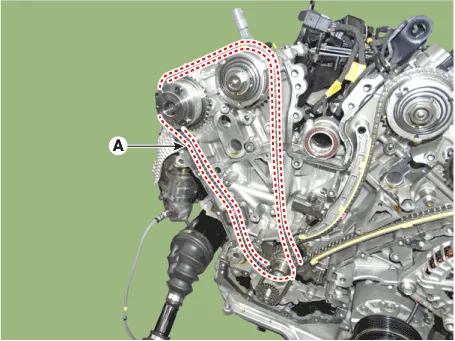
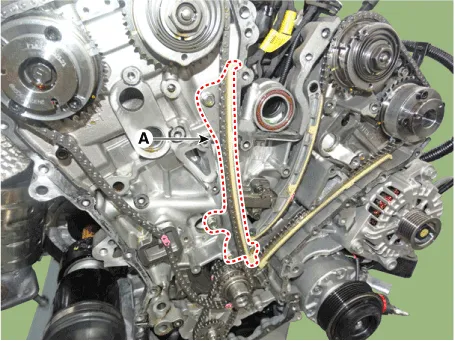
Install the RH timing chain guide (A).
|
| 16. |
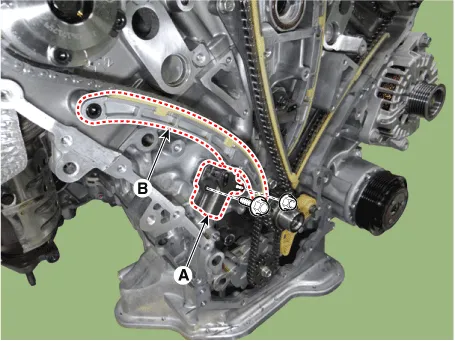
Install the RH timing chain auto tensioner (A) and the RH timing chain
tensioner arm (B).
|
| 17. |
Install the RH timing chain cam to cam guide (A).
|

| 18. |
Pull out the pins (A) of RH timing chain auto tensioner.
|

| 19. |
After rotating the crankshaft 2 revolutions in regular direction (clockwise
viewed from front), confirm the timing mark.
|

| 20. |
Install the timing chain cover.
(Refer to Timing System - "Timing Chain Cover")
|
| 21. |
Install the remaining parts in the reverse order of removal.
|

Repair procedures Removal • Be careful not to damage the parts located under the vehicle (floor under cover, fuel filter, fuel tank and canister) when raising the vehicle using the lift.
Other information:
Hyundai Palisade (LX2) 2020-2026 Service Manual: Front Radar Unit
Specifications Specification Item Specification Power supply (V) 12 Operation voltage (V) 9 - 16 Description and operation Description The smart cruise control unit is installed on the front right-hand side of the chass
Hyundai Palisade (LX2) 2020-2026 Service Manual: Description and operation
Description The cruise control system is engaged by the cruise "ON/OFF" main switch located on right of steering wheel column. The system has the capability to cruise, coast, accelerate and resume speed. It also has a safety interrupt, engaged upon depressing brake or shifting select lever.
Categories
- Manuals Home
- Hyundai Palisade Owners Manual
- Hyundai Palisade Service Manual
- Lift and Support Points
- Engine Control/Fuel System
- General Tightening Torque Table
- New on site
- Most important about car
