
Hyundai Palisade (LX2): Lighting System / Room Lamp
Repair procedures
| Removal |
| 1. |
Disconnect the negative (-) battery terminal.
|
| 2. |
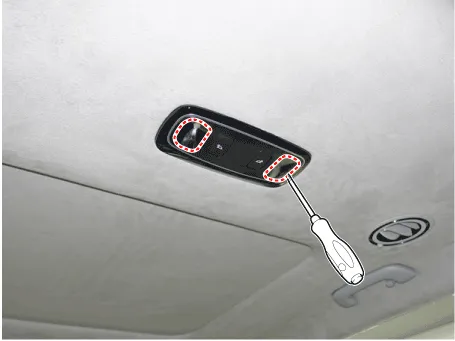
Detach the lamp lens (A) from the room lamp with a flat-tip screwdriver.
|
| 3. |
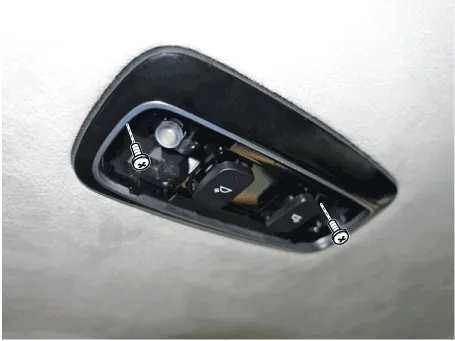
Separate the room lamp from the roof trim after loosening the screws.
|
| 4. |
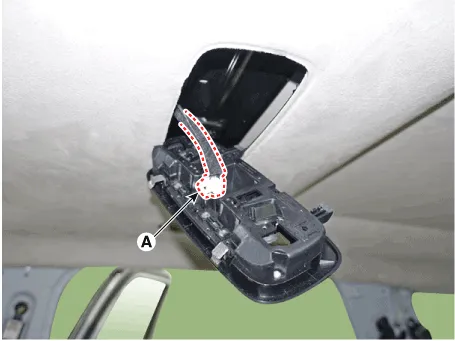
Remove the room lamp after disconnecting the connector (A).
|
| 1. |
Disconnect the negative (-) battery terminal.
|
| 2. |
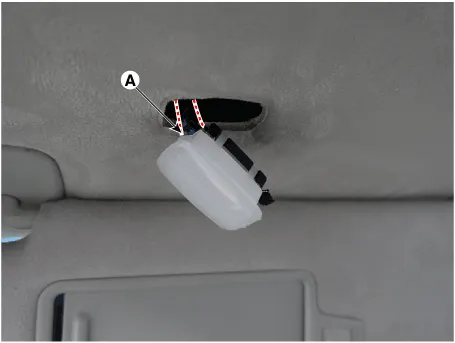
Using a flat-tip screwdriver, remove the vanity lamp.
|

| 3. |
Disconnect the connecotr (A).
|
| Installation |
| 1. |
Install the room lamp after connecting the lamp connector.
|
| 2. |
Connect the negative (-) battery terminal.
|
| 1. |
Install the vanity lamp after connecting the lamp connector.
|
| 2. |
Connect the negative (-) battery terminal.
|
Repair procedures Removal Door mirror turn signal lamp • Put on gloves to prevent hand injuries.
Schematic diagrams Circuit Diagram Repair procedures Inspection 1. Remove the overhead console lamp connector (A) then check for continuity between terminals.
Other information:
Hyundai Palisade (LX2) 2020-2026 Service Manual: General safety information and caution
Instructions (R-134a) When Handling Refrigerant 1. R-134a liquid refrigerant is highly volatile. A drop on the skin of your hand could result in localized frostbite. When handling the refrigerant, be sure to wear gloves.
Hyundai Palisade (LX2) 2020-2026 Service Manual: Special service tools
Special Service Tools Tool Name / Number Illustration Description LKA Compensator (09890-3V100) Used for compensating front view camera unit Tolerance Compensation Plate for Surround View Monitoring (09957-CM100)
Categories
- Manuals Home
- Hyundai Palisade Owners Manual
- Hyundai Palisade Service Manual
- Electrochromatic Mirror (ECM) with homelink system
- Repair procedures
- Brake bleeding procedures
- New on site
- Most important about car
