
Hyundai Palisade (LX2): Fender / Repair procedures
Hyundai Palisade (LX2) 2020-2026 Service Manual / Body (Interior and Exterior) / Fender / Repair procedures
| Replacement |
|

| 1. |
Remove the front bumper.
(Refer to Front Bumper - "Front Bumper Cover")
|
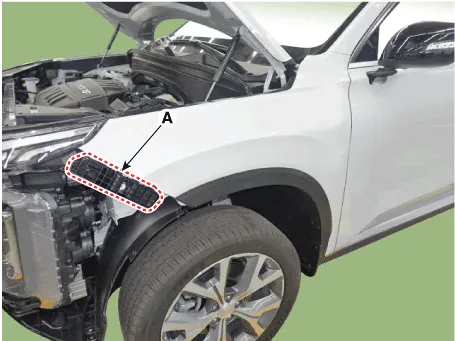
| 2. |
Loosen the mounting bolts and then remove the front bumper side mounting
bracket (A).
|
| 3. |
Loosen the mounting bolts and then remove the front bumper side mounting
bracket (A).
|
| 4. |
Remove the DRL (Daytime Running Lights) assembly.
(Refer to Body Electrical System - "DRL (Daytime Running Lights)")
|
| 5. |
Remove the front wheel guard.
(Refer to Body Side Molding - "Front Wheel Guard")
|
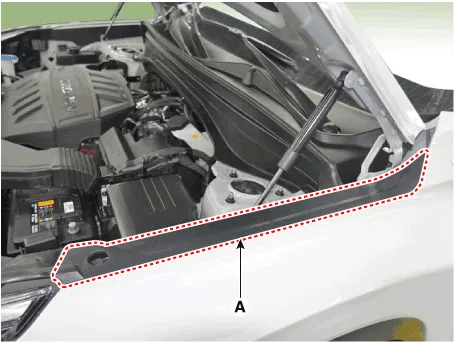
| 6. |
Remove the fender garnish.
(Refer to Body Side Molding - "Fender Garnish.")
|
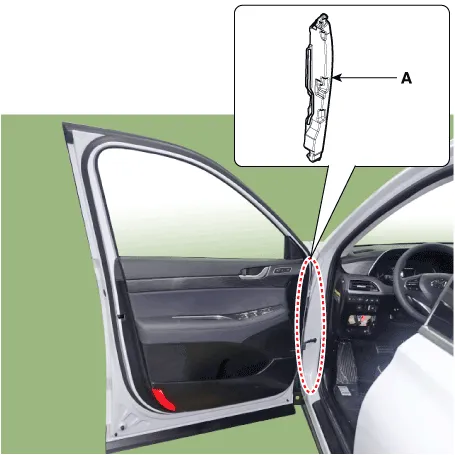
| 7. |
Remove the fender insulator (A).
|
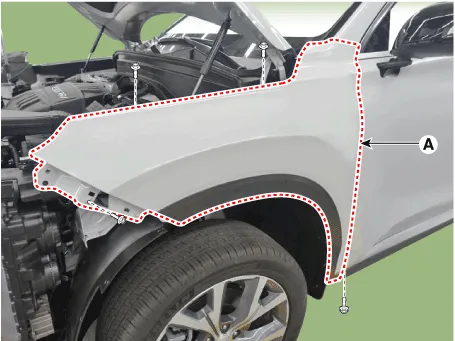
| 8. |
Loosen the mounting bolts and then remove the front bumper side mounting
bracket (A).
|
| 9. |
To install, reverse removal procedure.
|

Component Location 1. Fender assembly
Other information:
Hyundai Palisade (LX2) 2020-2026 Service Manual: Wireless Power Charging Unit
Components and positions Components Circuit diagram Circuit Diagram Repair procedures Removal Handling wireless charging system parts by wet hands may cause electric shock.
Hyundai Palisade (LX2) 2020-2026 Service Manual: Rear Temperature Control Actuator
Repair procedures Replacement 1. Disconnect the negative (-) battery terminal. 2. Remove the luggage side trim (Refer to Body - "Luggage Side Trim ") 3. Separate the rear temperature actuator connector (A), loosen the mounting screws a
Categories
- Manuals Home
- Hyundai Palisade Owners Manual
- Hyundai Palisade Service Manual
- Identification Numbers
- Resetting the Driver's Seat Memory System
- Brake bleeding procedures
- New on site
- Most important about car

Copyright © 2026 www.hpalisadelx.com - 0.0129