Hyundai Palisade (LX2): Interior Trim / Luggage Side Trim
Components and components location
| Component Location |
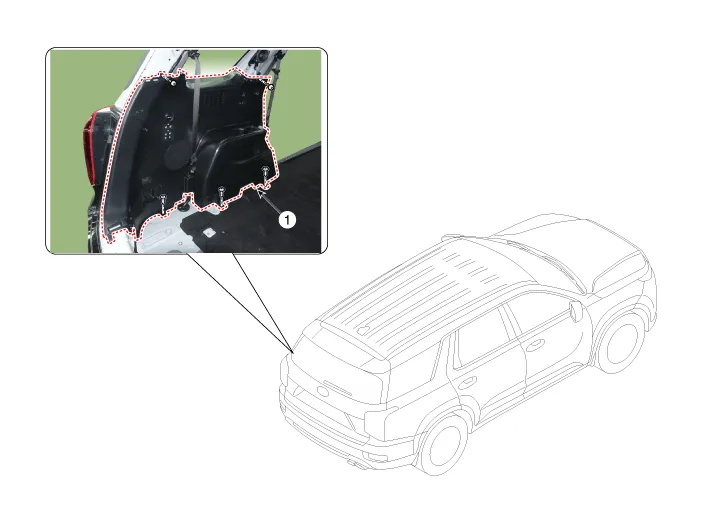
| 1. Luggage side trim |
Repair procedures
| Replacement |
|

|

| 1. |
Remove the third row seat assembly.
(Refer to Rear Seat - "Rear Seat Assembly")
|
| 2. |
Remove the rear door body side weatherstrip.
(Refer to Rear Door - "Rear Door Body Side Weatherstrip")
|
| 3. |
Remove the tailgate weatherstrip.
(Refer To Tailgate - "Tailgate Weatherstrip")
|
| 4. |
Remove the rear door scuff trim.
(Refer to Interior Trim - "Door Scuff Trim")
|
| 5. |
Remove the rear pillar trim.
(Refer to Interior Trim - "Rear Pillar Trim")
|
| 6. |
Remove the tailgate pillar trim.
(Refer to Interior Trim - "Rear Pillar Trim")
|
| 7. |
Remove the Rear transverse trim.
(Refer to Interior Trim - "Rear Transverse Trim")
|
| 8. |
Push the second row seat towards the front of the vehicle as far as
possible.
|
| 9. |
Loosen the mounting screws and remove the luggage side trim (A).
|

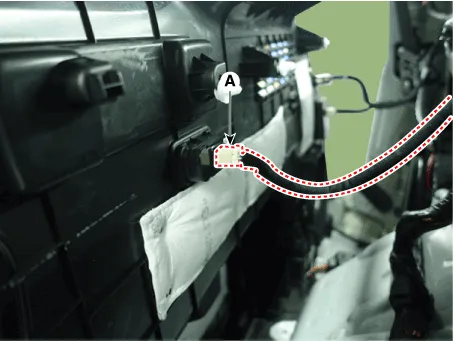
| 10. |
Press the lock pin and separate the various connectors (A).
|

| 11. |
To install, reverse removal procedure.
|

Components and components location Component Location 1. Rear transverse trim
Components and components location Component Location 1. Rear pillar trim 2. Tailgate fillar trim Repair procedures Replacement [Rear pillar trim] • When removing with a flat-tip screwdriver or remover, wrap protective tape around the tools to prevent damage to components.
Other information:
Hyundai Palisade (LX2) 2020-2026 Service Manual: Heater & A/C Control Unit (Rear)
Components and components location Component Connector Pin Function Connector PIN No Pin Function Connector PIN No Pin Function A 1 Battery A 17 IGN2 2
Hyundai Palisade (LX2) 2020-2026 Service Manual: General safety information and caution
General Safety Information and Caution 1. Be careful when driving the vehicle using the smart cruise control system as follows. (1) On curves or inclines/declines • The smart cruise control system may have limits to detect
Categories
- Manuals Home
- Hyundai Palisade Owners Manual
- Hyundai Palisade Service Manual
- Body (Interior and Exterior)
- Power Outlet
- Rain Sensor
- New on site
- Most important about car
