Hyundai Palisade (LX2): Engine Control System / Heated Oxygen Sensor (HO2S)
Description and operation
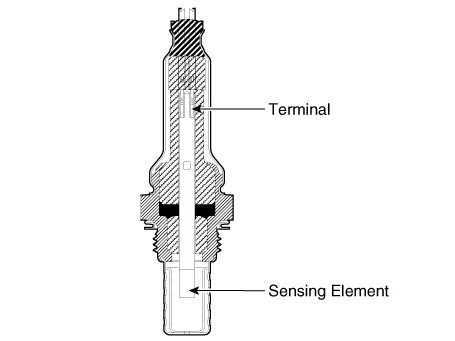
| Description |
Specifications
| Specification |
|
Item |
Specification |
|
Heater Resistance (Ω) |
2.4 - 4.0 [20°C (68°F)] |
|
Operation Voltage (V) |
12 |
|
pin |
6 |
|
Item |
Specification |
|
Heater Resistance (Ω) |
3.3 - 4.1 [20°C (68°F)] |
|
pin |
4 |
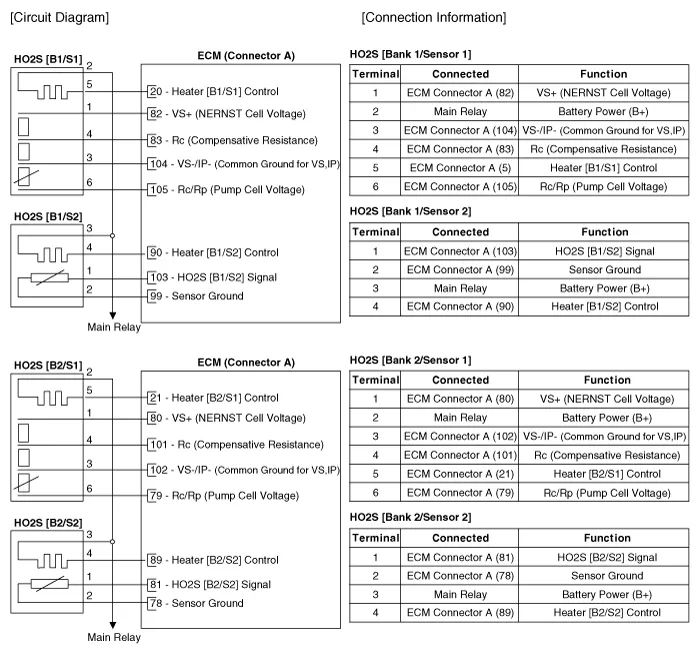
Schematic diagrams
| Circuit Diagram |
Repair procedures
| Inspection |
| 1. |
Switch "OFF" the ignition.
|
| 2. |
Disconnect the HO2S connector.
|
| 3. |
Measure resistance between the HO2S terminals 2 and 5 [Bank 1 / Sensor
1, Bank 2 / Sensor 1]
Measure resistance between the HO2S terminals 1 and 2 [Bank 1 / Sensor
2, Bank 2 / Sensor 2]
|
| 4. |
Check that the resistance is within the specification.
|
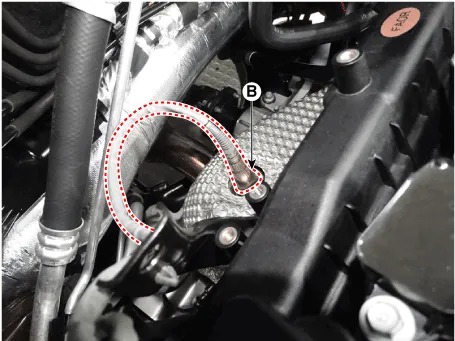
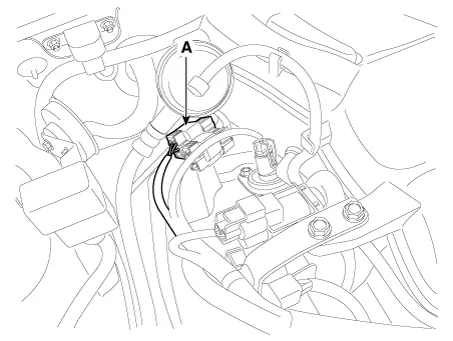
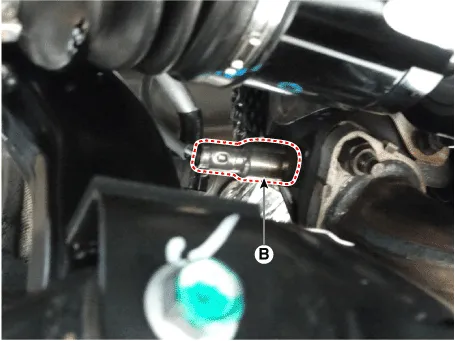
| Removal |
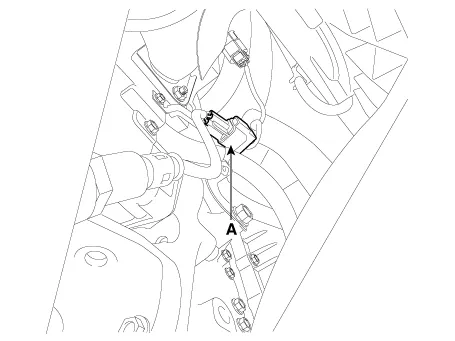
| 1. |
Switch "OFF" the ignition and disconnect the negative (-) battery terminal.
|
| 2. |
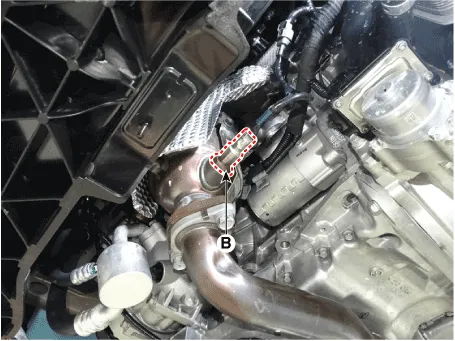
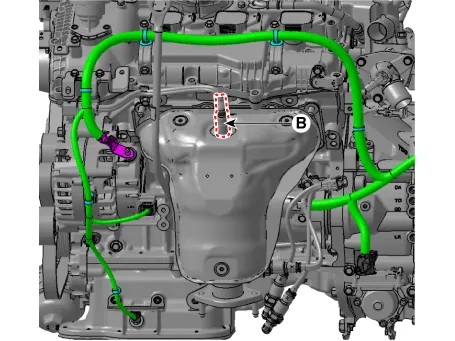
Remove the oxygen sensor (B) after disconnect the Connector (A).
[Bank 1 / Sensor 1]
[Bank 1 / Sensor 2]
[Bank 2 / Sensor 1]
[Bank 2 / Sensor 2]
|


| Installation |
|

| 1. |
Install in the reverse order of removal.
|
Description and operation Description Knocking is a phenomenon characterized by undesirable vibration and noise that can cause engine damage.
Description and operation Description Installed on the delivery pipe, the Rail Pressure Sensor (RPS) measures the instantaneous fuel pressure in the delivery pipe.
Other information:
Hyundai Palisade (LX2) 2020-2026 Service Manual: Schematic diagrams
Trouble Symptom Charts Component Parts and Function Outline Component part Function Cruise Control Switch Input the set speed and distance to the SCC ECU. Instrument Cluster Display various information inputted from SCC.
Hyundai Palisade (LX2) 2020-2026 Service Manual: Description and operation
Description Rear view camera will activate when the backup light is ON with the ignition switch ON and the shift lever in the R position. This system is a supplemental system that shows behind the vehicle through the AV monitor or the ECM (Reverse Display Room Mirror) mirror while backing-up.
Categories
- Manuals Home
- Hyundai Palisade Owners Manual
- Hyundai Palisade Service Manual
- Repair procedures
- Rain Sensor
- Troubleshooting
- New on site
- Most important about car
