Hyundai Palisade (LX2): Air conditioning System / Evaporator Temperature Sensor
Description and operation
| Description |

Repair procedures
| Inspection |
| 1. |
Turn the ignition switch OFF.
|
| 2. |
Disconnect the evaporator temperature sensor connector.
|
| 3. |
Measure resistance between terminal "+" and "-" of the evaporator temperature
sensor.
Specification
|

| 4. |
Connect the evaporator temperature sensor connector.
|
| 5. |
Run the engine and turn the A/C switch ON, then measure the voltage
between the terminals of the harness connector.
|
| Replacement |
| 1. |
Disconnect the negative (-) battery terminal.
|
| 2. |
Loosen the mounting screws and remove the evaporator core cover (A).
|

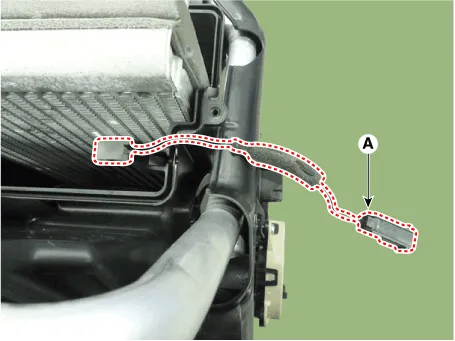
| 3. |
Separate the evaporator temperature sensor (A) from the evaporator core.
|
| 4. |
Install in the reverse order of removal.
|
Description and operation Description The A/C Pressure Transducer (APT) converts the pressure value of high pressure line into voltage value after measuring it.
Description and operation Description The In-car air temperature sensor is built in the heater & A/C control unit. The sensor consists of a thermistor that measures the inside temperature.
Other information:
Hyundai Palisade (LX2) 2020-2026 Service Manual: Blower Motor
Repair procedures Inspection 1. Connect the battery voltage and check the blower motor rotation. 2. If the blower motor does not operate well, substitute with a known-good blower motor and check for proper operation.
Hyundai Palisade (LX2) 2020-2026 Service Manual: Description and operation
Description • PDW consists of 8 sensors (front : 4 units, rear : 4 units) that are used to detect obstacles and transmit the result in three separate warning levels, the first, second and third to IBU via LIN communication.
Categories
- Manuals Home
- Hyundai Palisade Owners Manual
- Hyundai Palisade Service Manual
- Automatic Transaxle Fluid (ATF)
- Engine Electrical System
- Electrochromatic Mirror (ECM) with homelink system
- New on site
- Most important about car
