Hyundai Palisade (LX2): Electro Chromic Inside Rear View Mirror / Description and operation
| Description |
| 1. |
The forward facing sensor sees if the brightness of the surroundings
is low enough for the mirror to operate its function.
|
| 2. |
The rearward looking sensor detects glaring of the reflecting light
from a vehicle behind.
|
| 3. |
The ECM is darkened to the level as determined by the rearward looking
sensor. When the glaring is no longer detected, the mirror stops functioning.
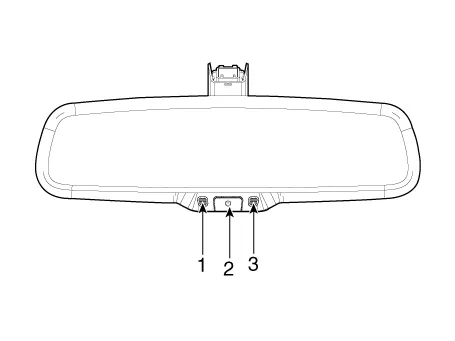
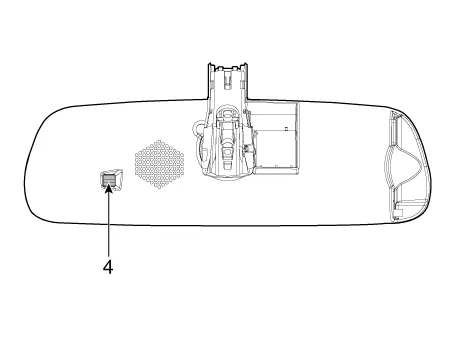
(1. LED indicator , 2. ON/OFF Switch , 3. Rearward looking sensor ,
4. Forward looking sensor )
|
| Automatic-dimming Function |
| 1. |
Pressing and holding the Feature Control button for more than 3 but
less than 6 seconds turns the auto-dimming function OFF which is indicated
by the green Status Indicator LED turning off.
|
| 2. |
Pressing and holding the Feature Control button again for more than
3 but less than 6 seconds turns the auto-dimming function ON which is
indicated by the green Status Indicator LED turning on.
|
Components ECM Home Link + ECM
Inspection Check it by the procedure below to see if the function of the ECM is normal. 1. Turn the ignition key to the "ON" position.
Other information:
Hyundai Palisade (LX2) 2020-2026 Service Manual: Components and components location
Component Location 1. Start Stop Button(SSB) 2. FOB key 3. Tailgate open switch 4. Interior antenna 1 5. Interior antenna 2 6. Intergrated Body Control Unit (IBU) 7. Trunk antenna 8. Door handle & door antenna 9.
Hyundai Palisade (LX2) 2020-2026 Service Manual: Special service tools
Special Service Tools Tool Name / Number Illustration Description LKA Compensator (09890-3V100) Used for compensating front view camera unit Tolerance Compensation Plate for Surround View Monitoring (09957-CM100)
Categories
- Manuals Home
- Hyundai Palisade Owners Manual
- Hyundai Palisade Service Manual
- Removing and Storing the Spare Tire
- How to reset the power liftgate
- Rain Sensor
- New on site
- Most important about car


