Hyundai Palisade (LX2): Interior Trim / Center Pillar Trim
Components and components location
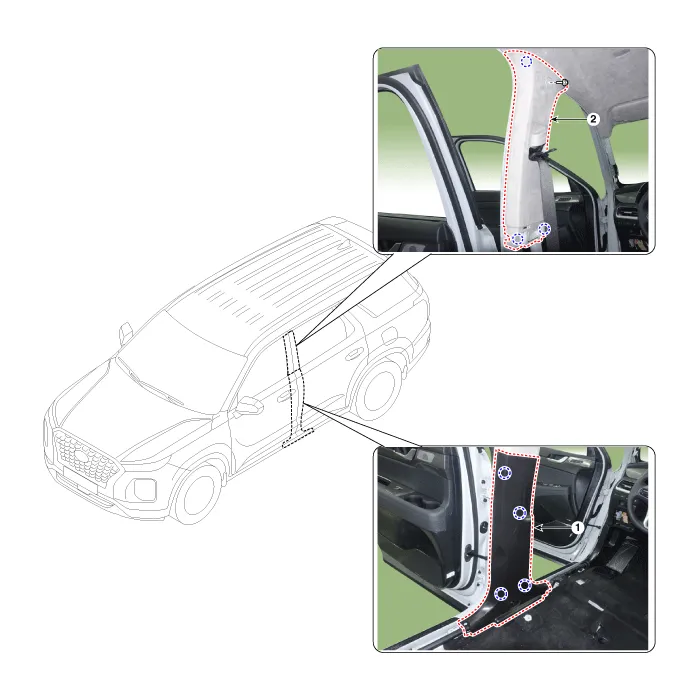
1. Center pillar lower trim
|
2. Center pillar upper trim
|
Repair procedures
[Center pillar lower trim]
| • |
When removing with a flat-tip screwdriver or remover, wrap protective
tape around the tools to prevent damage to components.
|
| • |
Put on gloves to prevent hand injuries.
|
|
| • |
Take care not to bend or scratch the trim and panels.
|
|
| 1. |
Remove the front door body side weatherstrip.
|
| 2. |
Remove the rear door body side weatherstrip.
|
| 3. |
Remove the front door scuff trim.
(Refer to Interior Trim - "Door Scuff Trim")
|
| 4. |
Remove the rear door scuff trim.
(Refer to Interior Trim - "Rear Scuff Trim")
|
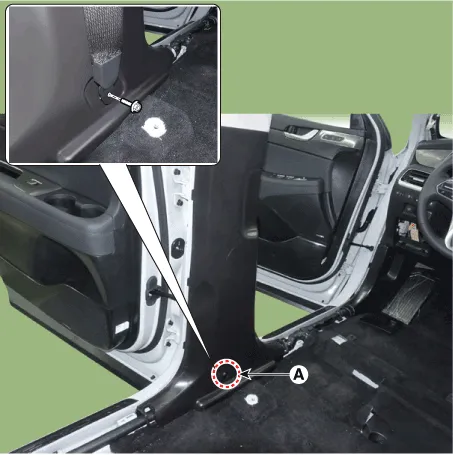
| 5. |
Open the front seat belt lower cover (A) and loosen the mounting bolt.
|
| 6. |
Using a flat-tip screwdriver or remover and remove the center pillar
lower trim (A).

|
| 7. |
To install, reverse removal procedure.
| •
|
Replace any damaged clips (or pin-type retainers).
|
|
|
[Center pillar upper trim]
| • |
When removing with a flat-tip screwdriver or remover, wrap protective
tape around the tools to prevent damage to components.
|
| • |
Put on gloves to prevent hand injuries.
|
|
| • |
Take care not to bend or scratch the trim and panels.
|
|
| 1. |
Remove the center pillar lower trim.
(Refer to Interior Trim -"Center Pillar Lower Trim")
|
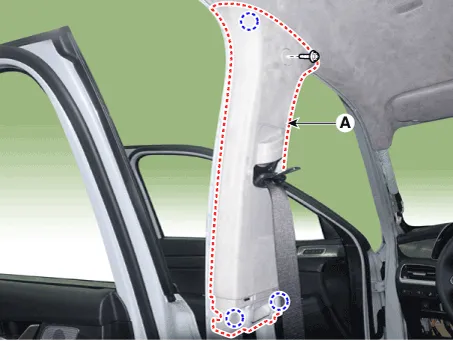
| 2. |
Loosen the mounting bolt and remove the center pillar upper trim (A).
|
| 3. |
To install, reverse removal procedure.
| •
|
Replace any damaged clips (or pin-type retainers).
|
|
|
Components and components location
Component Location
1. Front pillar trim
Components and components location
Component Location
1. Rear transverse trim
Other information:
Repair procedures
Removal
1.
Disconnect the negative (-) battery terminal.
2.
Remove the crash pad lower panel.
(Refer to Body - "Crash Pad Lower Panel")
3.
Description and operation
Description
The A/C Pressure Transducer (APT) converts the pressure value of high pressure
line into voltage value after measuring it. By converted voltage value, engine
ECU controls the cooling fan by operating it high speed or low speed.


