Hyundai Palisade (LX2): Electro Chromic Inside Rear View Mirror / Repair procedures
| Inspection |
| 1. |
Turn the ignition key to the "ON" position.
|
| 2. |
Cover the forward facing sensor.
|
| 3. |
Head a light to the rearward looking sensor.
|
| 4. |
The ECM should be darkened as soon as the rearward looking sensor detects
the light.
|

| 5. |
When the reverse gear is engaged, the ECM should not be darkened.
When heading lights to both the forward facing and rearward looking
sensors, the ECM should not be darkened.
|
| Removal |
| 1. |
Disconnect the negative (-) battery terminal.
|
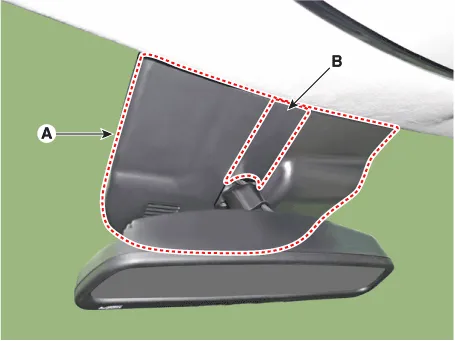
| 2. |
Remove the mirror wiring cover (A) and (B).
|
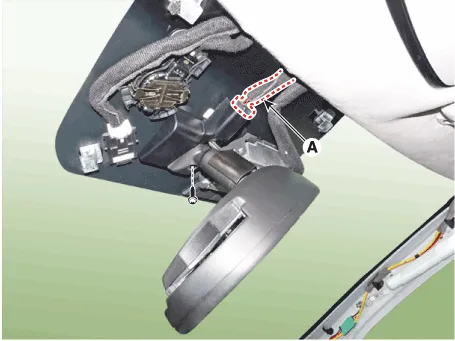
| 3. |
Remove the mirror mounting screw and connector (A).
|
| 4. |
Remove the mirror pulling up in the arrow direction.
|

| Installation |
| 1. |
Install the mirror making sure the mounting bracket not to be damaged.
|
| 2. |
Install the mirror wiring cover after reconnecting the connector and
tightening the screw.
|
Description The ECM (Electro Chromatic inside rear view Mirror) is intended dim the reflecting light in the rear view mirror. The forward facing sensor detects brightness of the surroundings, while the rearward looking sensor is for the light from the rear.
Other information:
Hyundai Palisade (LX2) 2020-2026 Service Manual: Surround View Monitor (SVM) Camera
Components and components location Components [Ultra Optical Camera - RH/LH] [Ultra Optical Camera - Front] [Ultra Optical Camera - Rear] Repair procedures Removal • In case of bad quality or poor
Hyundai Palisade (LX2) 2020-2026 Service Manual: Description and operation
Description The cruise control system is engaged by the cruise "ON/OFF" main switch located on right of steering wheel column. The system has the capability to cruise, coast, accelerate and resume speed. It also has a safety interrupt, engaged upon depressing brake or shifting select lever.
Categories
- Manuals Home
- Hyundai Palisade Owners Manual
- Hyundai Palisade Service Manual
- Resetting the Driver's Seat Memory System
- Scheduled maintenance services
- Body Electrical System
- New on site
- Most important about car
