Hyundai Palisade: Cylinder Block / Rear Oil Seal
		
		
		Repair procedures


				| •  | 
				
				 
					Be careful not to damage the parts located under the vehicle 
					(floor under cover, fuel filter, fuel tank and canister) when 
					raising the vehicle using the lift. 
				
					(Refer to General Information - "Lift and Support Points") 
				 | 
			 
		 
		 | 
	
	
		| 1. | 
		
		 
			Remove the transaxle assembly. 
		
			(Refer to Automatic Transaxle System - "Automatic Transaxle") 
		 | 
	
	
		| 2. | 
		
		 
			Remove the drive plate.  
		
			(Refer to Cylinder Block - "Drive Plate") 
		 | 
	
	
		| 3. | 
		
		 
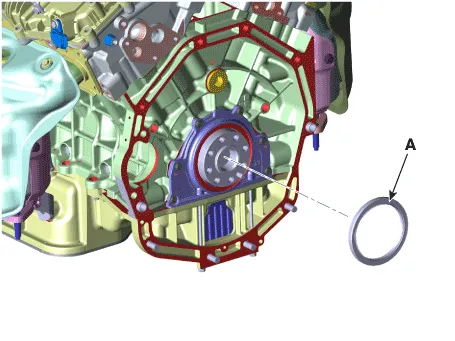
			Remove the rear oil seal (A). 
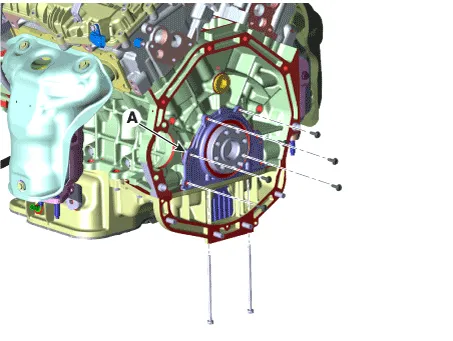
		
		  
		 | 
	
	
		| 4. | 
		
		 
			Remove the rear oil seal case (A). 
		
		  
		 | 
	
	
		| 1. | 
		
		 
			Install the rear oil seal case (A). 
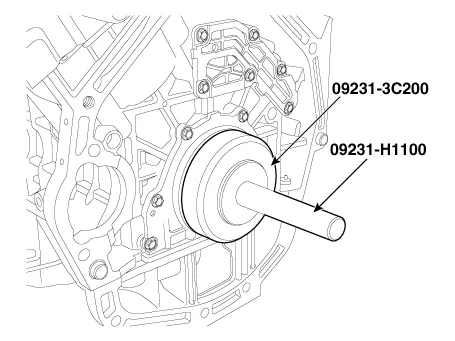
		
			
				| 
				 
					Tightening torque :  
				
					9.8 - 11.8 N.m (1.0 - 1.2 kgf.m, 7.2 - 8.7 lb.ft) 
				 | 


						| •
						 | 
						
						 
							Clean the sealing face before assembling two parts. 
						 | 


						| •
						 | 
						
						 
							Remove harmful foreign materials on the sealing face 
							before applying sealant 
						 | 


						| •
						 | 
						
						 
							Before assembling rear oil seal case, the liquid sealant 
							TB1217H should be applied to the rear oil seal case. 
						 | 


						| •
						 | 
						
						 
							Assemble the parts within 5 minutes of applying sealant. 
						 | 


						| •
						 | 
						
						 
							Apply sealant to the inner threads of the bolt holes. 
						
						  
						 | 
					 
				 
				 | 
			 
		 
		 | 
	
	
		| 2. | 
		
		 
			Using SSTs (09231-3C200, 09231-H1100), install the rear oil seal. 


						| •
						 | 
						
						 
							Do not reuse the rear oil seal. 
						 | 
					 
				 
				 | 
			 
		 
		 | 
	
	
		| 3. | 
		
		 
			Install the remaining parts in the reverse order of removal. 
		 | 
	
   Repair procedures
	
		Removal and Installation


				• 
				
				
					Be careful not to damage the parts located under the vehicle 
					(floor under cover, fuel filter, fuel tank and canister) when 
					raising the vehicle using the lift...
   
 
   Repair procedures
	
		Disassembly


				• 
				
				
					Be careful not to damage the parts located under the vehicle 
					(floor under cover, fuel filter, fuel tank and canister) when 
					raising the vehicle using the lift...
   
 
   Other information:
   
	
		Description
	
	It's a system that uses illumination sensor to automatically turn ON the tail 
	lamp and head lamp based on the change in surrounding environment's illumination 
	condition. It activates when the vehicle enters/exits tunnel, or when the illumination 
	condition in surrounding environment changes due to rain, snow, or fog...
   
   
The rear passengers can adjust the 
direction of air flow from the rear 
vents on the headliner.
If you operate the rear climate control 
with rear vents closed, a noise 
may sound. When operating the rear 
climate control, open two or more 
rear vents...


		Categories


To lock your vehicle using the door 
handle button or the Smart Key:
1.Make sure all doors, the hood and 
the liftgate are closed.
2.Make sure you have the smart key 
in your possession.
read more