Hyundai Palisade (LX2): Audio / Speakers
Repair procedures
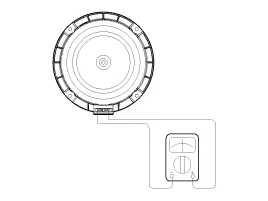
| Inspection |
| 1. |
Troubleshooting for Speaker
|


| Removal |
| 1. |
Remove the front door trim.
(Refer to Body - "Front Door Trim")
|
| 2. |
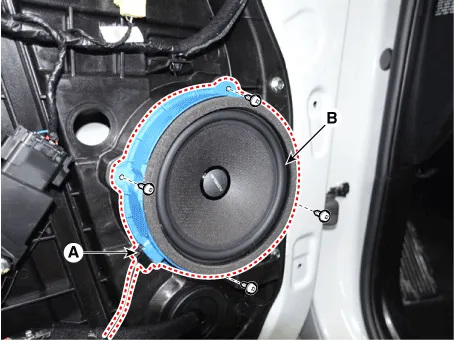
Disconnect the speaker connector (A).
|
| 3. |
Remove the front speaker (B) after loosening the screws.
|
| 1. |
Remove the rear door trim.
(Refer to Body - "Rear Door Trim")
|
| 2. |
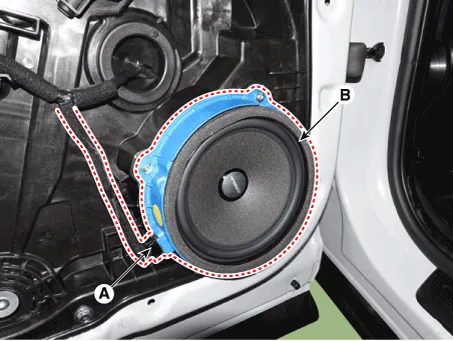
Disconnect the speaker connector (A).
|
| 3. |
Remove the rear speaker (B) after loosening the screws.
|
| 1. |
Using a screwdriver or remover, remove the front door quadrant inner
cover (A).
|
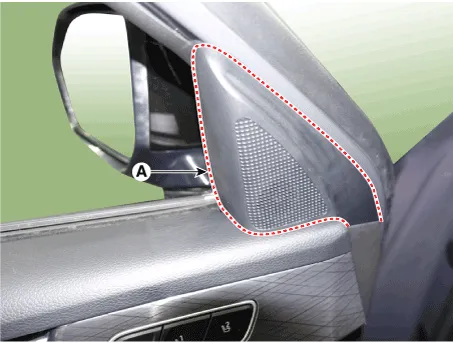
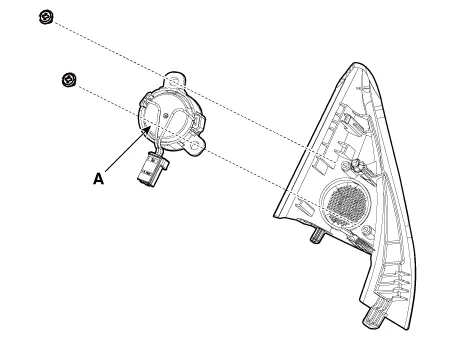
| 2. |
Loosen mounting screws and then Remove the tweeter speaker (A) by disconnecting
the speaker connector.
|
| Installation |
| 1. |
Install the front speaker.
|
| 2. |
Install the front door trim.
|
| 1. |
Install the rear speaker.
|
| 2. |
Install the rear door trim.
|
| 1. |
Connect the connector.
|
| 2. |
Install the tweeter speaker and quadrant inner cover.
|
Components and components location Components Connector Pin Information No Connector A Connector B 1 Rear left speaker (+) - 2 Rear left speaker (-) Mic (+) 3 - - 4 - - 5 - Antenna power 6 Camera _Power Illumination (+) 7 Camera_ Video MM CAN High 8 - - 9 - - 10 - Battery (+) 11 DTC Battery (+) 12 Steering wheel remote Ground 13 Front left speaker (+) Ground 14 Front left speaker (-) - 15 Front right speaker (-) Mic (+) 16 Front right speaker (+) - 17 - - 18 - - 19 - Illumination (-) 20 Camera power_Ground MM CAN Low 21 Camera video_Ground - 22 - ACC 23 - - 24 - - 25 - - 26 Steering wheel remote ground - 27 Rear right speaker (-) - 28 Rear right speaker (+) - 29 - - 30 - - 31 - - 32 - Ignition 33 Camera shield _Ground - 34 - - 35 - - 36 - 37 - 38 - 39 Speed Repair procedures Removal 1.
Components and components location Components Repair procedures Removal 1. Remove the roof trim assembly.
Other information:
Hyundai Palisade (LX2) 2020-2026 Service Manual: Special service tools
Hyundai Palisade (LX2) 2020-2026 Service Manual: Troubleshooting
Troubleshooting Problem Symptoms Table Before replacing or repairing air conditioning components, first determine if the malfunction is due to the refrigerant charge, air flow or compressor. Use the table below to help you find the cause of the problem.
Categories
- Manuals Home
- Hyundai Palisade Owners Manual
- Hyundai Palisade Service Manual
- Convenient Features of Your Vehicle
- Rear Heater Unit
- Components and components location
- New on site
- Most important about car
