Hyundai Palisade (LX2): Coupling Assembly / Relif Valve
Description and operation
When the pressure inside the coupling exceeds the set pressure value, this valve
maintains the pressure under the set value by discharging the partial or whole
amount.
Repair procedures
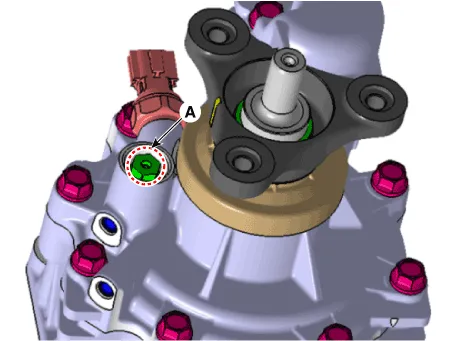
| 1. |
Remove the coupling assembly.
(Refer to 4 Wheel Drive (AWD) System - "Coupling Assembly")
|
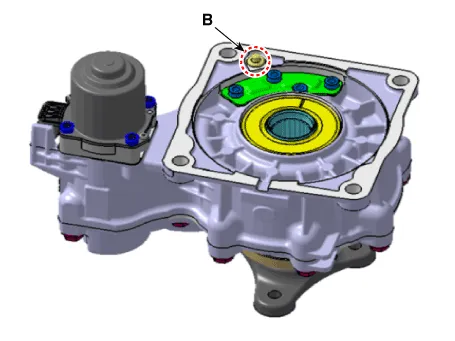
| 2. |
Remove the relief valve (A) from the coupling assembly.
|
Tightening torque:
26.5 - 32.4 N.m (2.7 - 3.3 kgf.m, 19.5 - 23.9 lb-ft)
|
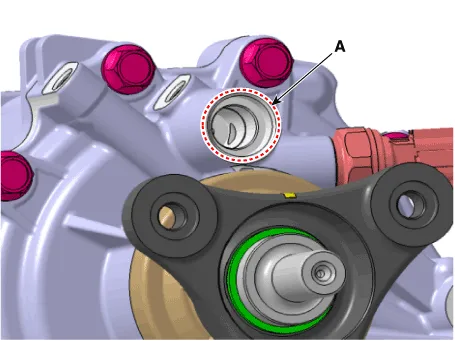
| •
|
Use a tool (A) that allows the auxiliary operator to
hold or seat the coupling in a vertical position.
|
| •
|
Be careful not to let the air bleeder’s hole area (B)
be pressed.

|
|
|
| 1. |
To install, reverse the removal procedures.
|
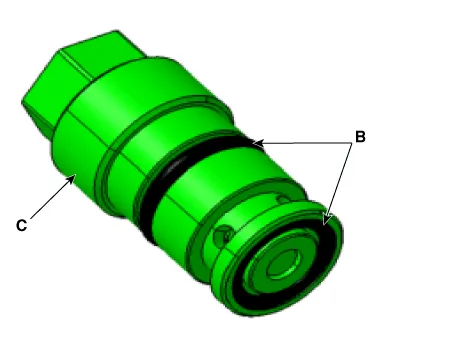
| • |
Wipe foreign substance on the cover tab (A) with a clean cloth
before assembling.
|
| • |
Check the O-ring (B) of the relief and apply suitable amount
of Loctite 592 on the screw area (C)
|
| • |
Be careful not to let any foreign substance inside the relief
valve and cover
|
|
Description and operation
Description
The AWD ECU makes a Motor Pump(Actuator) turn round for generating an oil pressure.
And then it presses a multiple disk clutch and transfers the generated torque
into rear wheels.
Other information:
Instructions (R-134a)
When Handling Refrigerant
1.
R-134a liquid refrigerant is highly volatile. A drop on the skin of
your hand could result in localized frostbite. When handling the refrigerant,
be sure to wear gloves.
Diagnosis with Diagnostic tool
1.
In the body electrical system, failure can be quickly diagnosed by using
the vehicle diagnostic system (Diagnostic tool).
The diagnostic system (Diagnostic tool) provides the following information.


