Hyundai Palisade (LX2): Crash Pad / Crash Pad Center Panel
Components and components location
| Component Location |
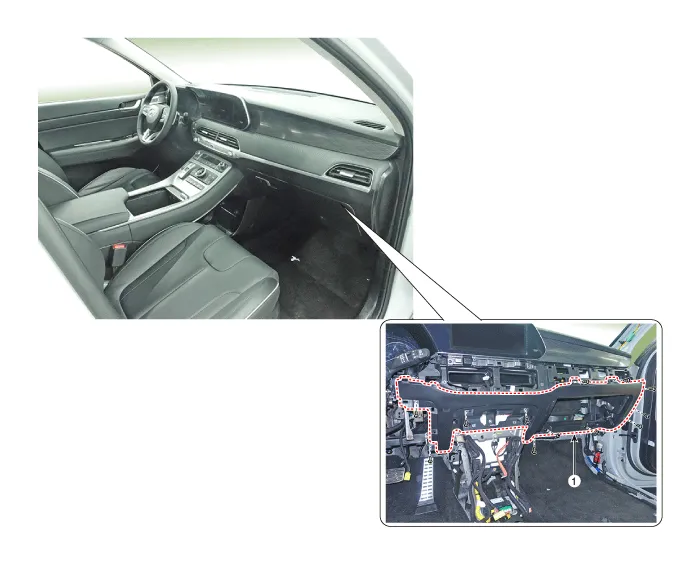
| 1. Crash pad center panel |
Repair procedures
| Replacement |
|

|

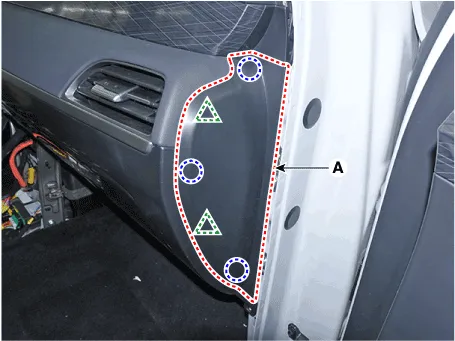
| 1. |
Using a flat-tip screwdriver or remover and remove the crash pad side
cover [RH] (A).
|
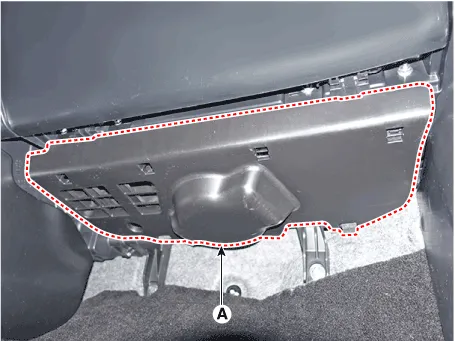
| 2. |
Remove the crash pad under cover (A).
|
| 3. |
Remove the floor console.
(Refer to Floor Console - "Floor Console Assembly")
|
| 4. |
Remove the cowl side trim.
(Refer to Interior Trim - "Cowl Side Trim")
|
| 5. |
Remove the glove box.
(Refer to Crash Pad - "Glove Box")
|
| 6. |
Remove the Crash Pad lower panel.
(Refer to Crash Pad - "Crash Pad Lower Panel")
|
| 7. |
Remove the crash pad center garnish.
(Refer to Crash pad - "Crash pad garnish")
|
| 8. |
Remove the AVN keyboard assembly
(Refer to Body Electrical System - "AVN keyboard unit")
|
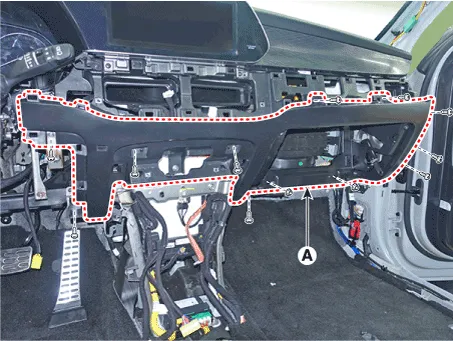
| 9. |
Loosen the mounting screws, nuts, bolt and remove the crash pad center
panel (A).
|
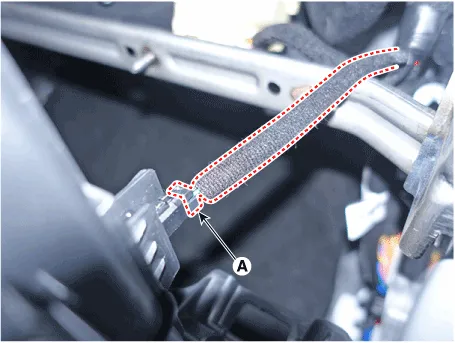
| 10. |
Press the lock pin and separate the incar sensor connector (A).
|

| 11. |
Separate the glove box lamp switch connector (A) and glove box lamp
connector (B).
|
| 12. |
To install, reverse removal procedure.
|

Components and components location Component Location 1. Glove box
Components and components location Component Location 1. Main crash pad assembly
Other information:
Hyundai Palisade (LX2) 2020-2026 Service Manual: Auto Defogging Actuator
Description and operation Description The auto defogging sensor is installed on the front window glass. The sensor judges and sends signal if moisture occurs to blow out wind for defogging. The air conditioner control module receives a signal from the sensor and restrains moisture and eliminates defog by the intake actuato
Hyundai Palisade (LX2) 2020-2026 Service Manual: Surround View Monitor (SVM) Camera
Components and components location Components [Ultra Optical Camera - RH/LH] [Ultra Optical Camera - Front] [Ultra Optical Camera - Rear] Repair procedures Removal • In case of bad quality or poor
Categories
- Manuals Home
- Hyundai Palisade Owners Manual
- Hyundai Palisade Service Manual
- Body Electrical System
- Body (Interior and Exterior)
- Emergency liftgate safety release
- New on site
- Most important about car
