
Hyundai Palisade (LX2): Wireless Power Charger System / Wireless Charging Lamp
Components and positions
| Components |
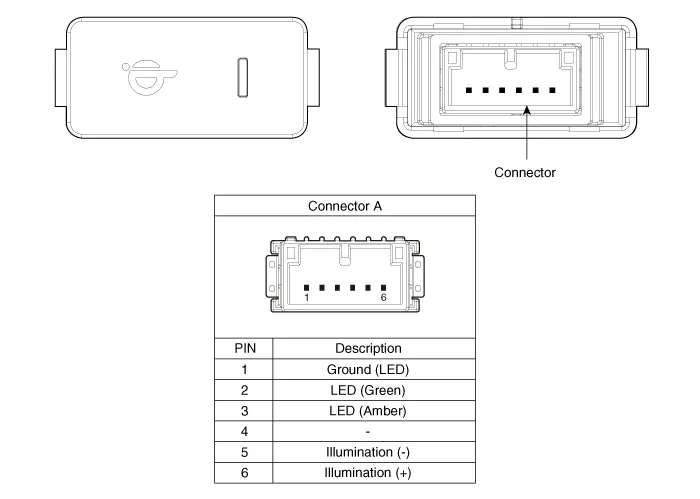
Repair procedures
| Removal |
Handling wireless charging system parts by wet hands may cause electric
shock.
|

| 1. |
Disconnect the negative (-) battery terminal.
|
| 2. |
Remove the floor console upper cover assembly.
(Refer to Body - "Floor Console Assembly")
|
| 3. |
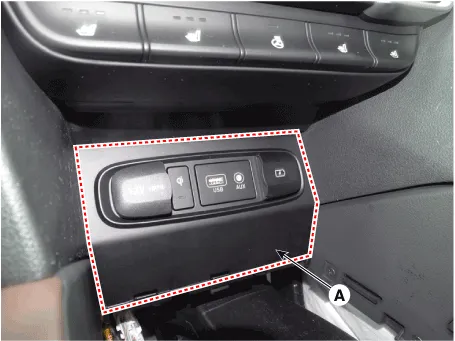
Remove the console tray (A) by using a flat-tip screwdriver.
|
| 4. |
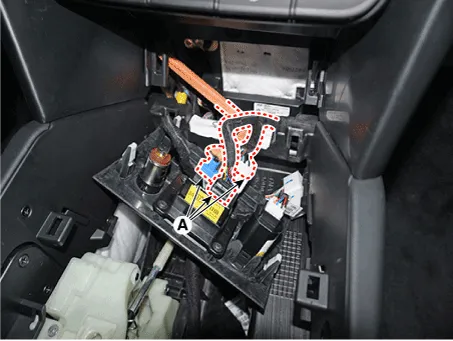
Disconnect the connector (A).
|
| 5. |
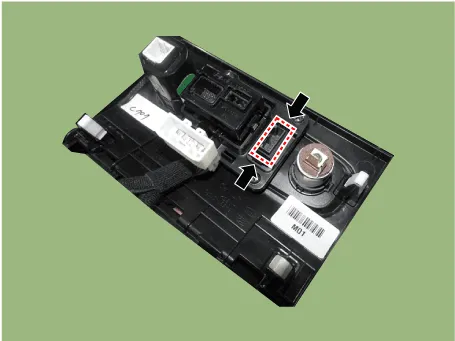
Disengage a fixed hook and then remove the wireless charging lamp.
|
| Installation |
| 1. |
Install the wireless charging lamp.
|
| 2. |
Connect the wireless charging lamp connector.
|
| 3. |
Install the floor console upper cover assembly.
|
| 4. |
Connect the negative (-) battery terminal.
|
Components and positions Components Circuit diagram Circuit Diagram Repair procedures Removal Handling wireless charging system parts by wet hands may cause electric shock.
Other information:
Hyundai Palisade (LX2) 2020-2026 Service Manual: Special service tools
Special Service Tools Tool Name / Number Illustration Description LKA Compensator (09890-3V100) Used for compensating front view camera unit Tolerance Compensation Plate for Surround View Monitoring (09957-CM100)
Hyundai Palisade (LX2) 2020-2026 Service Manual: Troubleshooting
Troubleshooting 1) After replacing H/UNIT, always check that the system operates properly. 2) If the failure persists after replacing the H/UNIT, do not replace the unit.
Categories
- Manuals Home
- Hyundai Palisade Owners Manual
- Hyundai Palisade Service Manual
- Automatic Transaxle System (A8LF1)
- Engine Mechanical System
- Repair procedures
- New on site
- Most important about car
