Hyundai Palisade (LX2): Trunk Trim / Repair procedures
Hyundai Palisade (LX2) 2020-2026 Service Manual / Body (Interior and Exterior) / Trunk Trim / Repair procedures
| Replacement |
|
|
| 1. |
Remove the rear seat.
(Refer to Rear Seat - "Rear Seat Assembly")
|
| 2. |
Remove the rear door scuff trim.
(Refer to Interior Trim - "Door Scuff Trim")
|
| 3. |
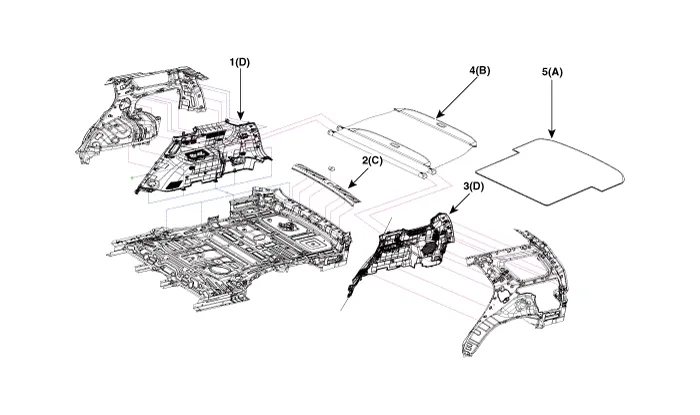
Remove the luggage mat assembly (A).
|
| 4. |
Remove the cargo screen (B).
|
| 5. |
Loosen the mounting clips and remove the rear transverse trim (C).
|
| 6. |
Loosen the mounting screws, remove the luggage side trim (D).
|
| 7. |
To install, reverse removal procedure.
|
| 8. |
Press the lock pin and separate the various connectors.
|
Other information:
Hyundai Palisade (LX2) 2020-2026 Service Manual: Specification
Hyundai Palisade (LX2) 2020-2026 Service Manual: Ambient Temperature Sensor
Description and operation Description The ambient temperature sensor is located at the front of the condenser and detects ambient air temperature. It is a negative type thermistor; resistance will increase with lower temperature, and decrease with higher temperature.
Categories
- Manuals Home
- Hyundai Palisade Owners Manual
- Hyundai Palisade Service Manual
- Engine Mechanical System
- Body (Interior and Exterior)
- Electronic Child Safety Lock System
- New on site
- Most important about car
Copyright © 2026 www.hpalisadelx.com - 0.0128


